You may think of potato pancakes as latkes, but for me, growing
up in a Polish household, they were “placki” (‘plah-tski), something that my
Mom would whip up from scratch if we were home for lunch, or as a snack. She
would grate the potatoes and onions by hand, using a box grater. They were
always topped with a big dollop of sour cream. (Sour cream was part of the
weekly grocery list, we were never without it.) I started making them myself
some years ago, partly out of nostalgia, partly out of the realization that
they can become downright exquisite with the right toppings—how about smoked
sablefish, crème fraiche, and caviar, paired with a little glass of ice-cold
vodka!
I don’t recall ever having zucchini pancakes growing up, but I’ve noticed that they seem to be another Polish staple. We got a couple of really nice zucchini in our farm box last week, and we have been very into savory fried pancakes lately, so we thought we would give them a try for lunch today. They turned out beautifully, and our method for making potato pancakes translated quite well. Bon appétit, or as they say in Polish, smacznego!
Ingredients
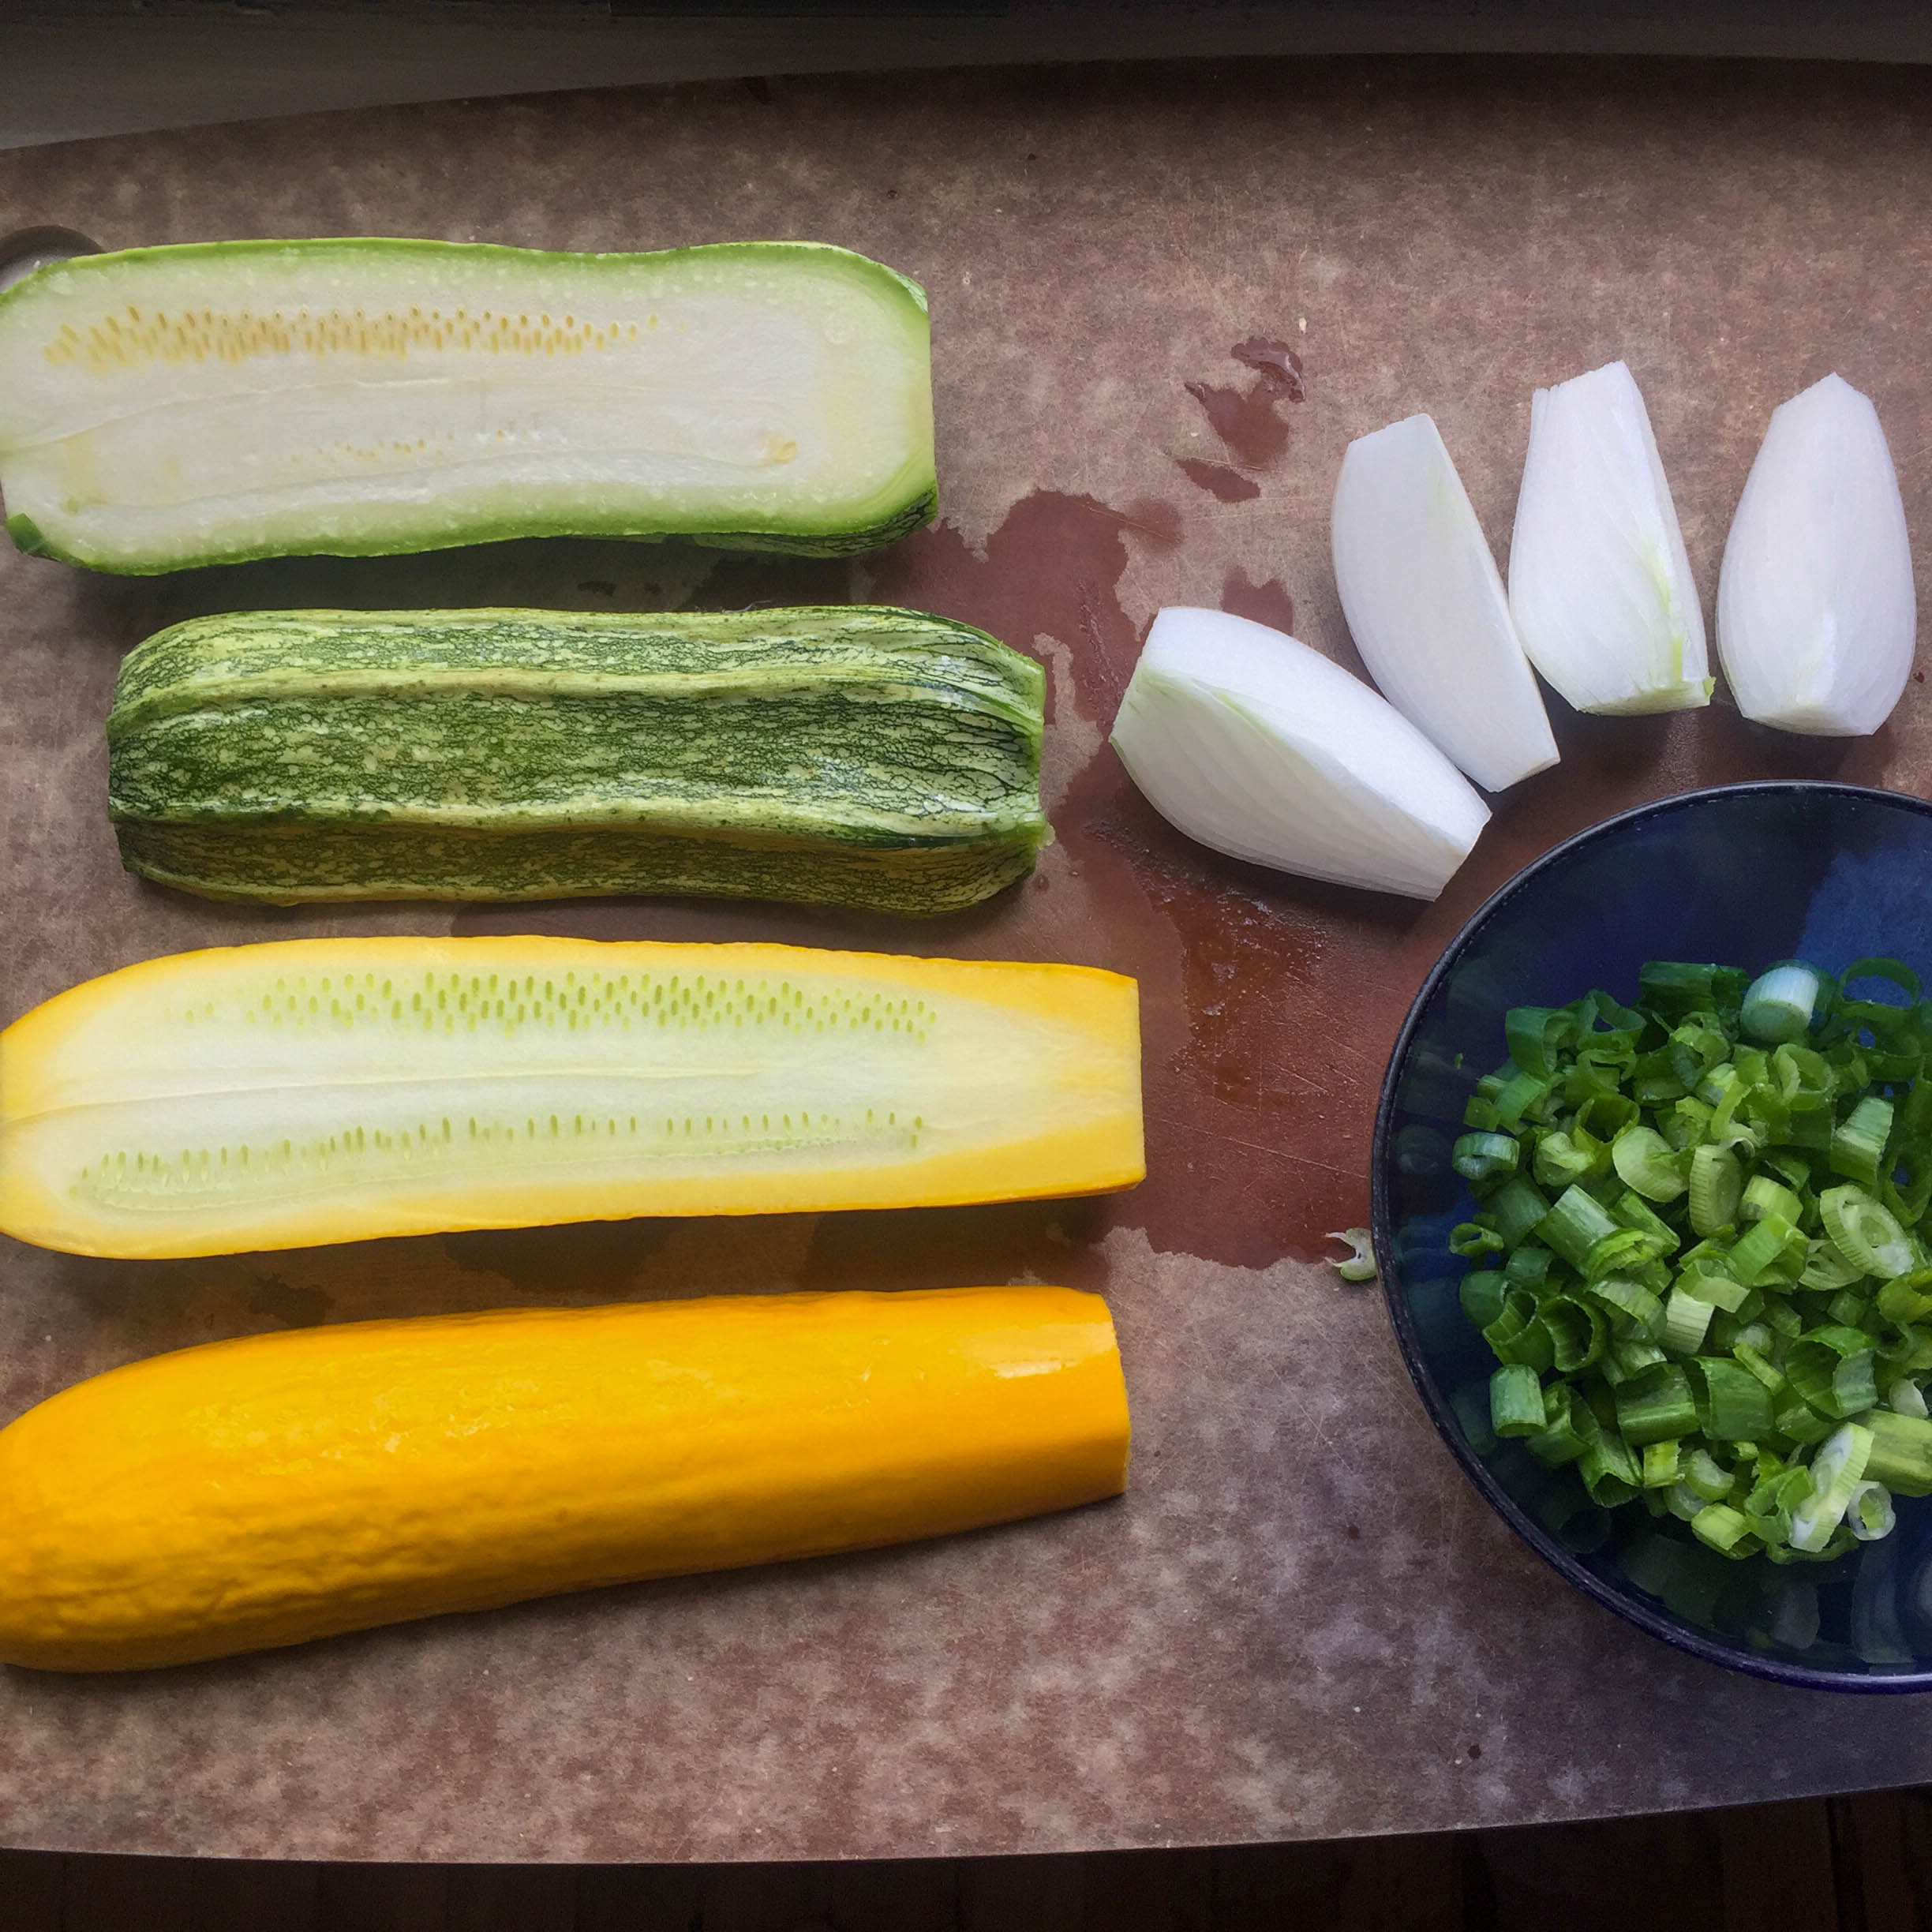
2 zucchinis
1 spring onion
1 egg
1 tbsp whole wheat flour
1 tsp salt
1 tsp pepper
1 tsp smoked paprika
4 tbsp olive oil
Yogurt or sour cream to top
Method
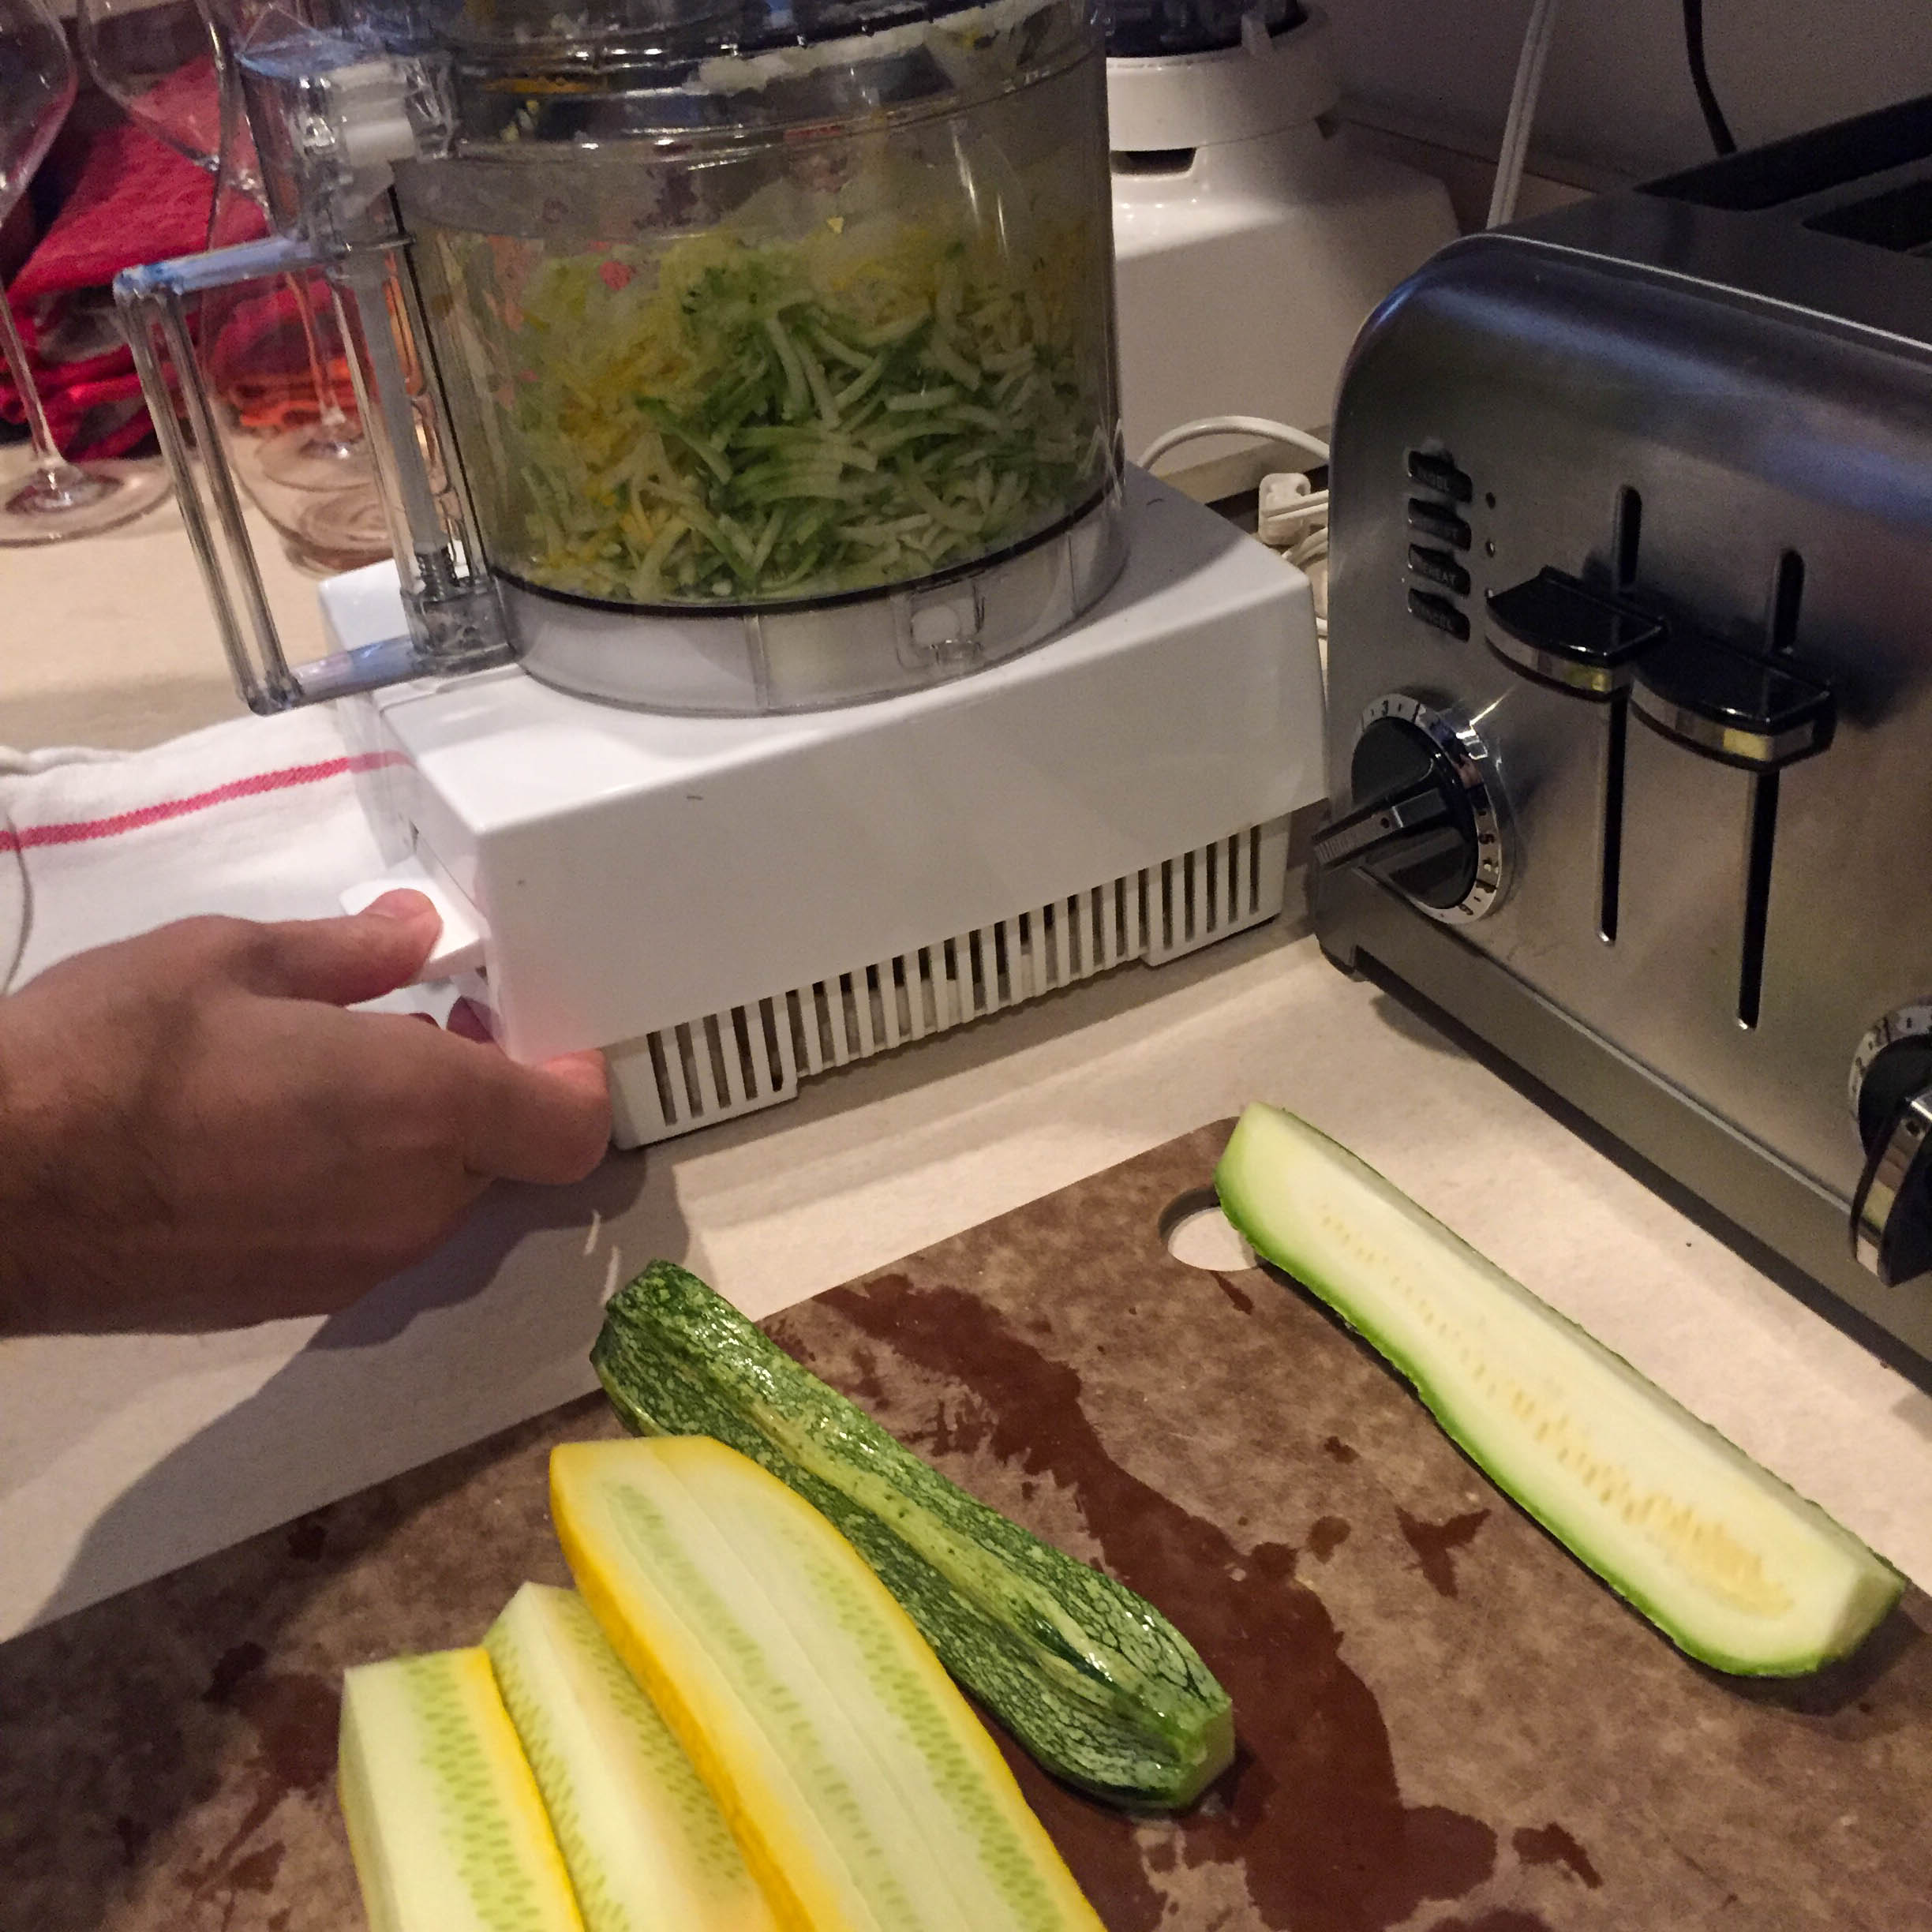
Prepare the zucchinis for grating, just top and tail them if
using a box grater, chop into manageable pieces if using the food processor. Prep
the bulb of the onion for grating. Chop the green parts of the onion and set
aside for topping the pancakes. Grate the zucchinis and onions together and set
into a large mixing bowl. Cover the mixing bowl with a tea towel. Invert the bowl
so that its contents go into the tea towel, gathering the towel together like a
giant teabag. Over the sink, squeeze as much liquid out of the grated
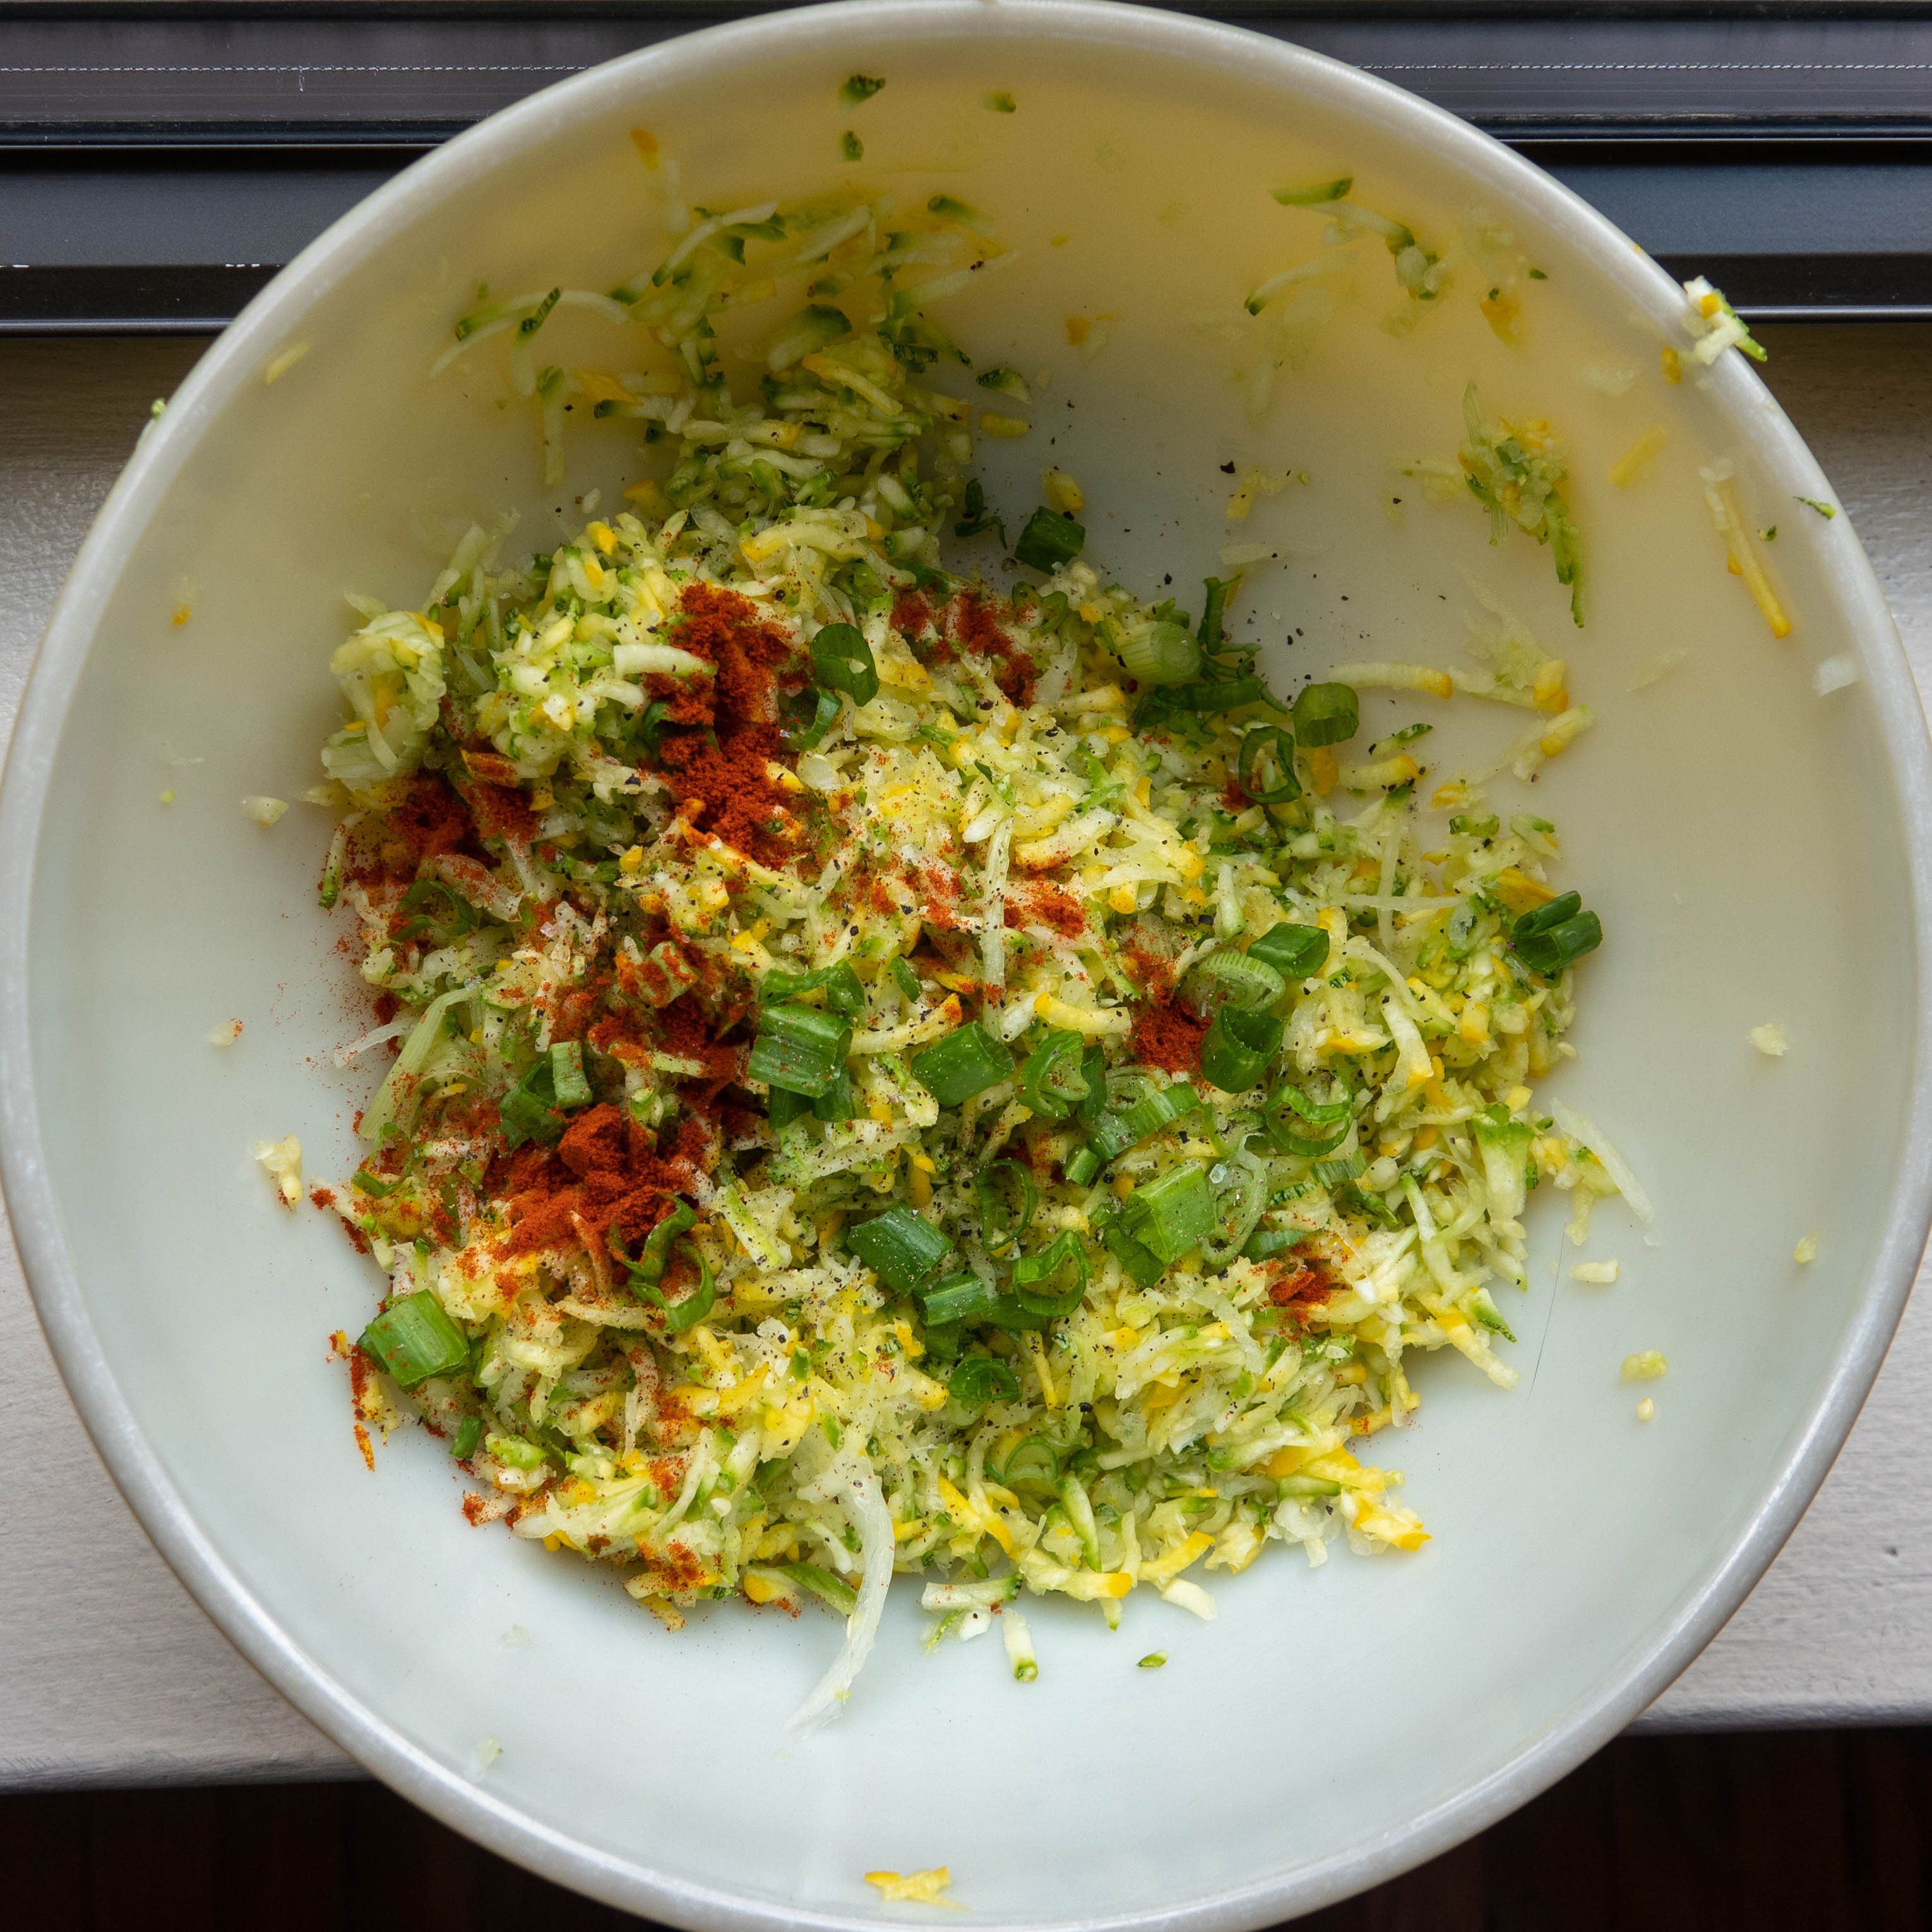
vegetables as possible. Return the vegetables back to the mixing bowl. Add the
flour, salt, pepper, paprika, egg, and mix together.
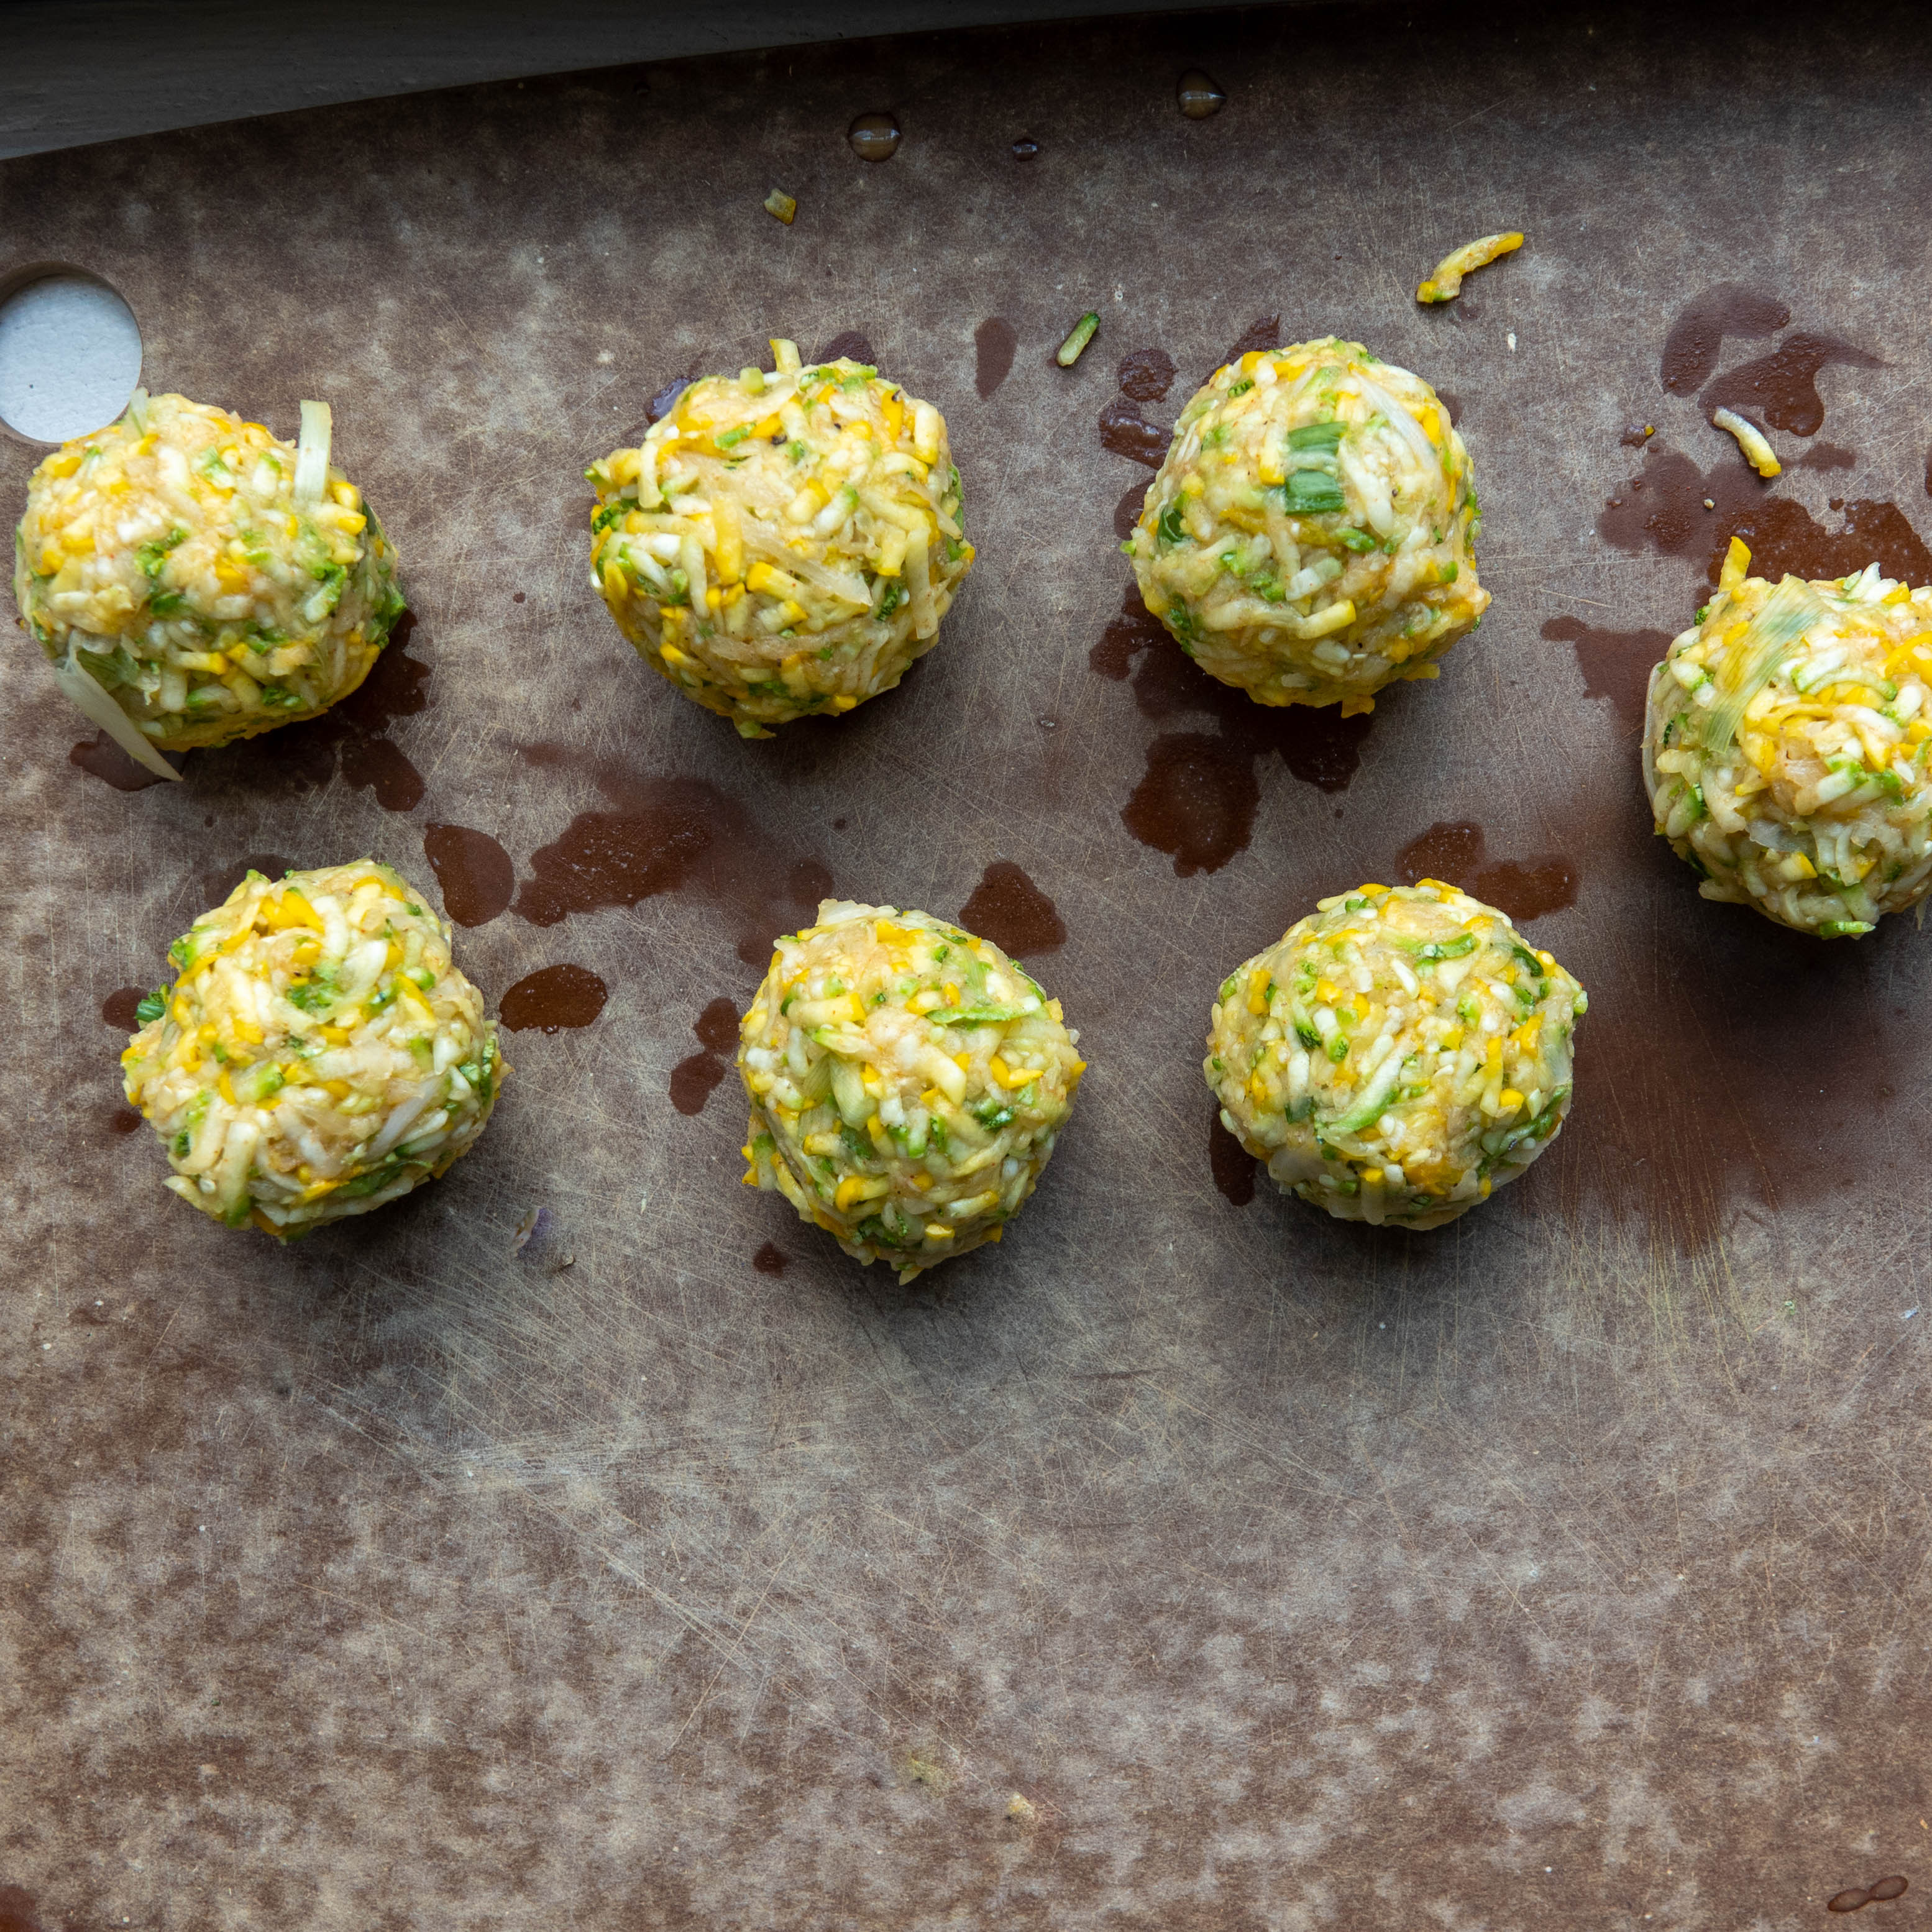
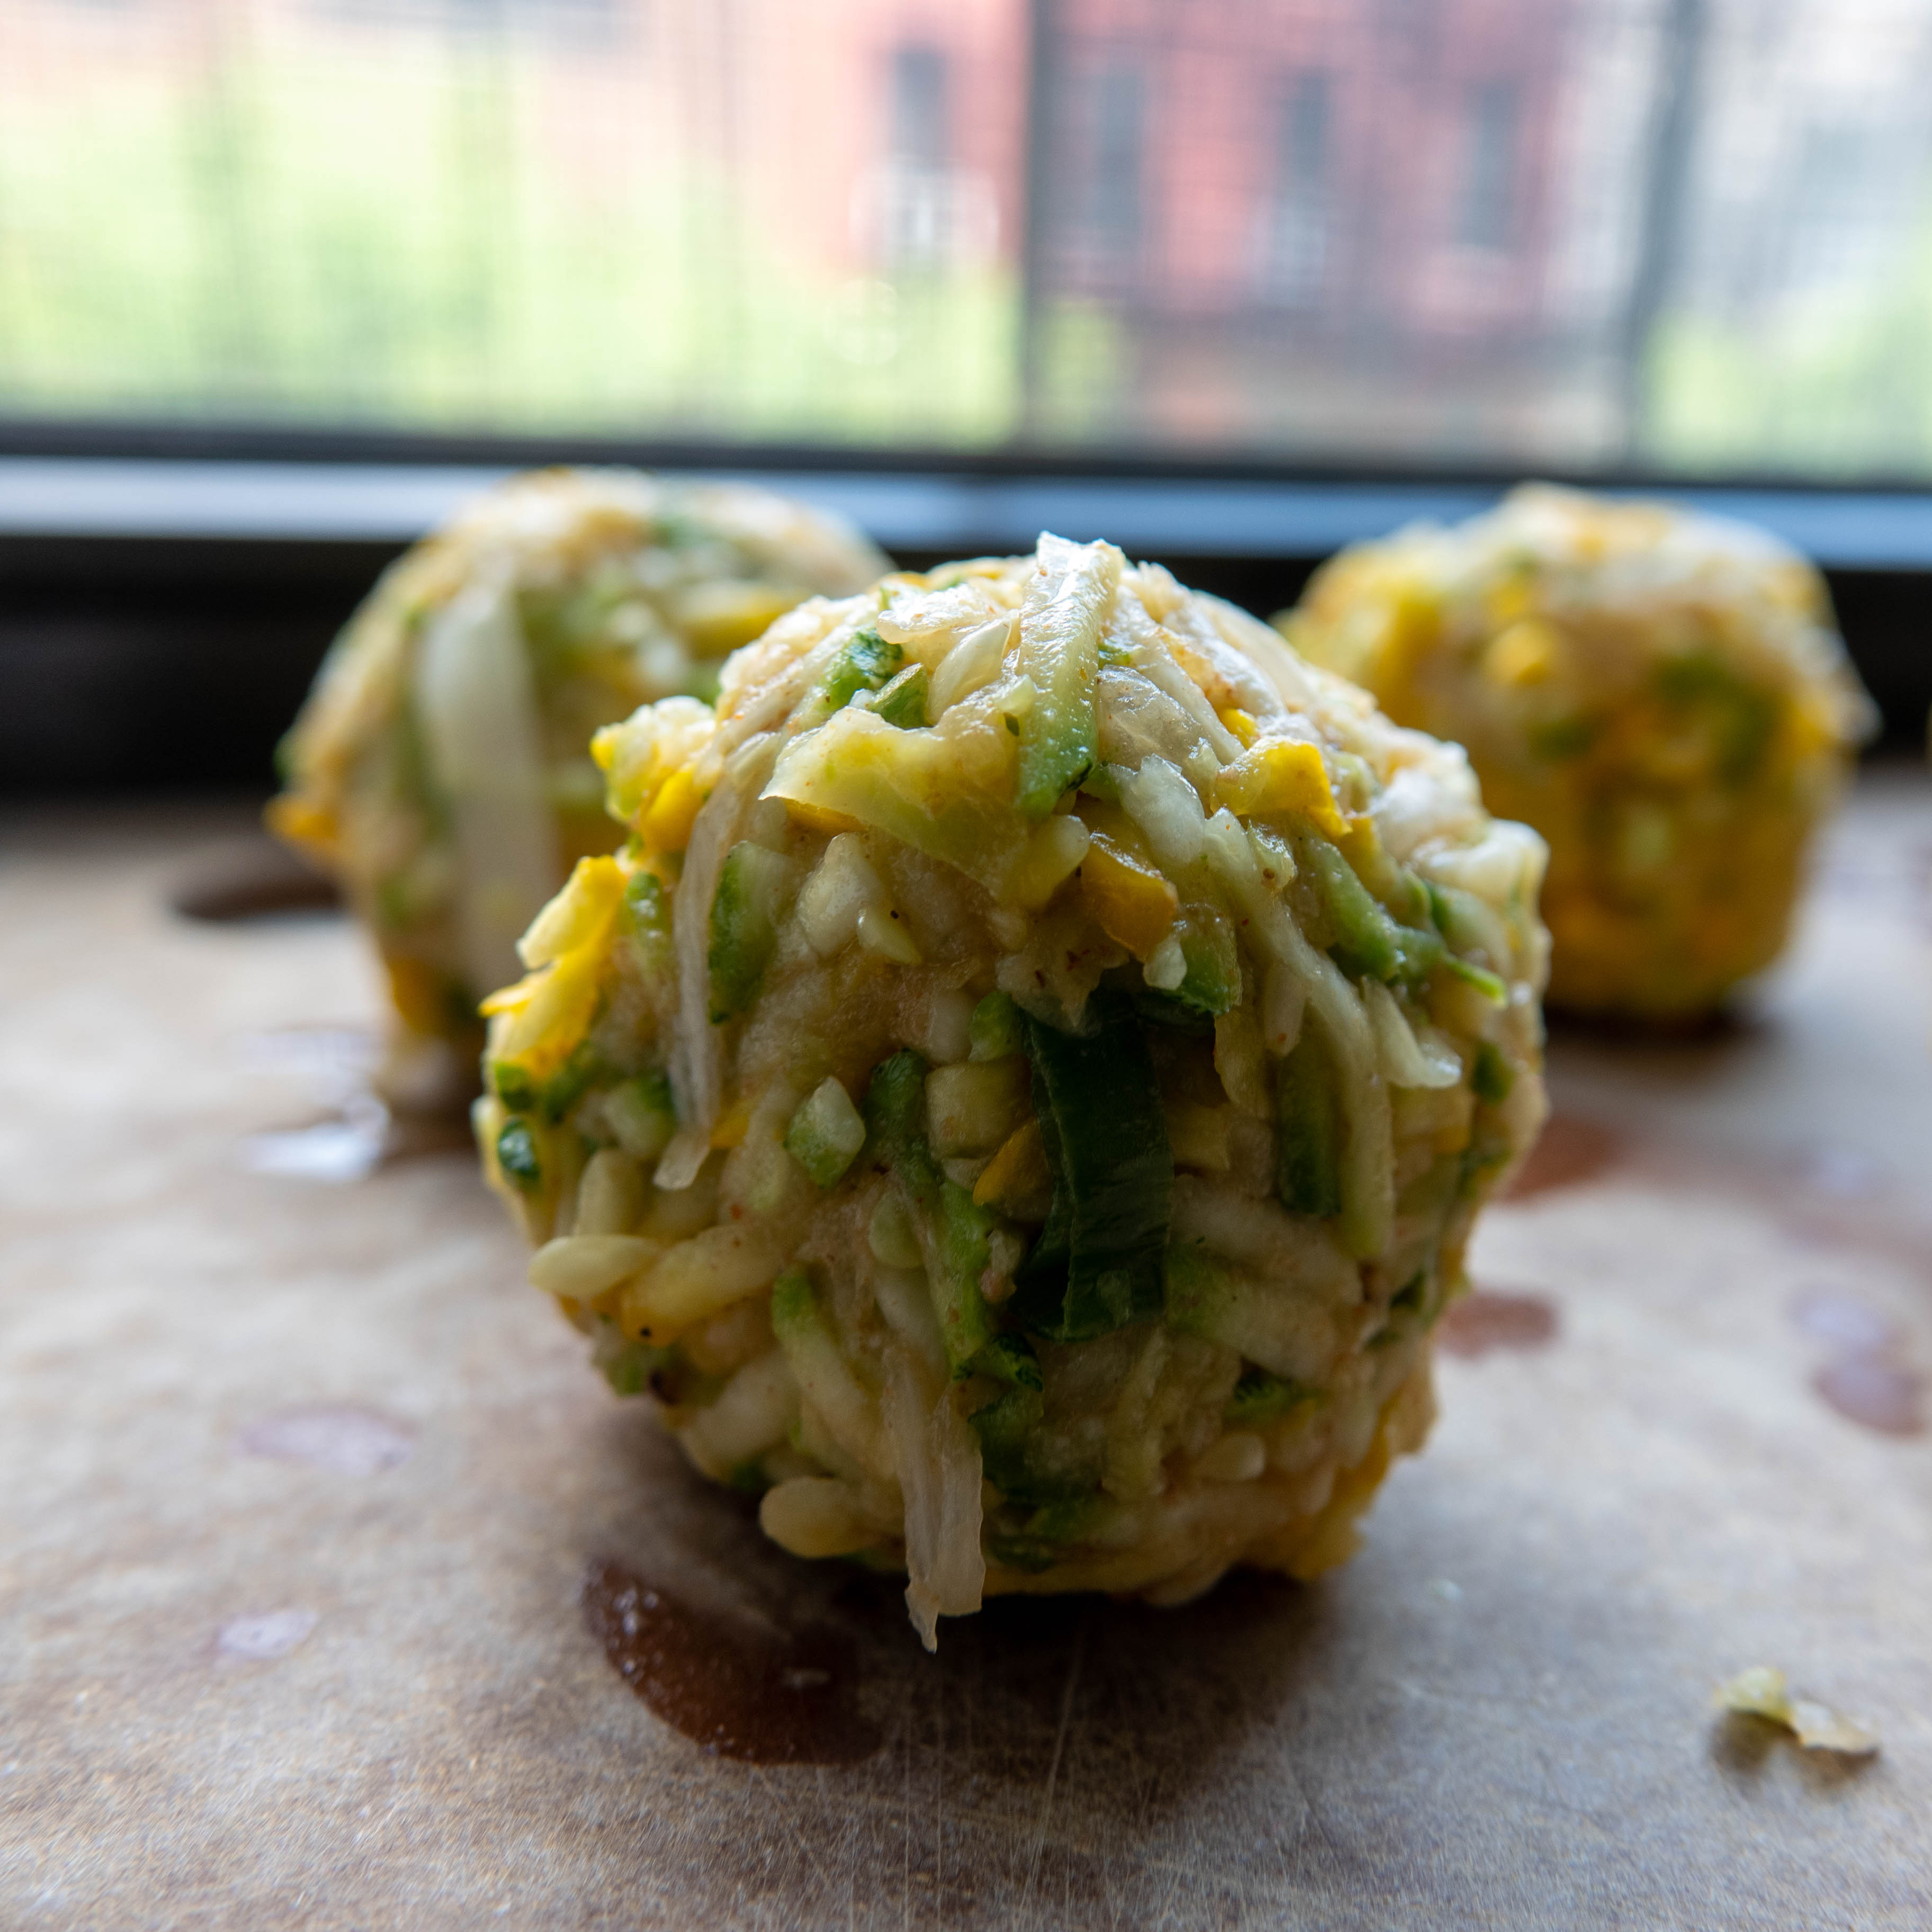
To form the pancakes, I use a 1/3 cup measuring cup. Grab a
heaping 1/3 cup of the mixture and form it into a ball with the palms of both
hands. Over the sink, again squeeze out liquid as you form the balls. Let them
rest on a cutting board as you portion out all of the mixture. I made seven
balls out of these two large zucchini and one smallish onion.
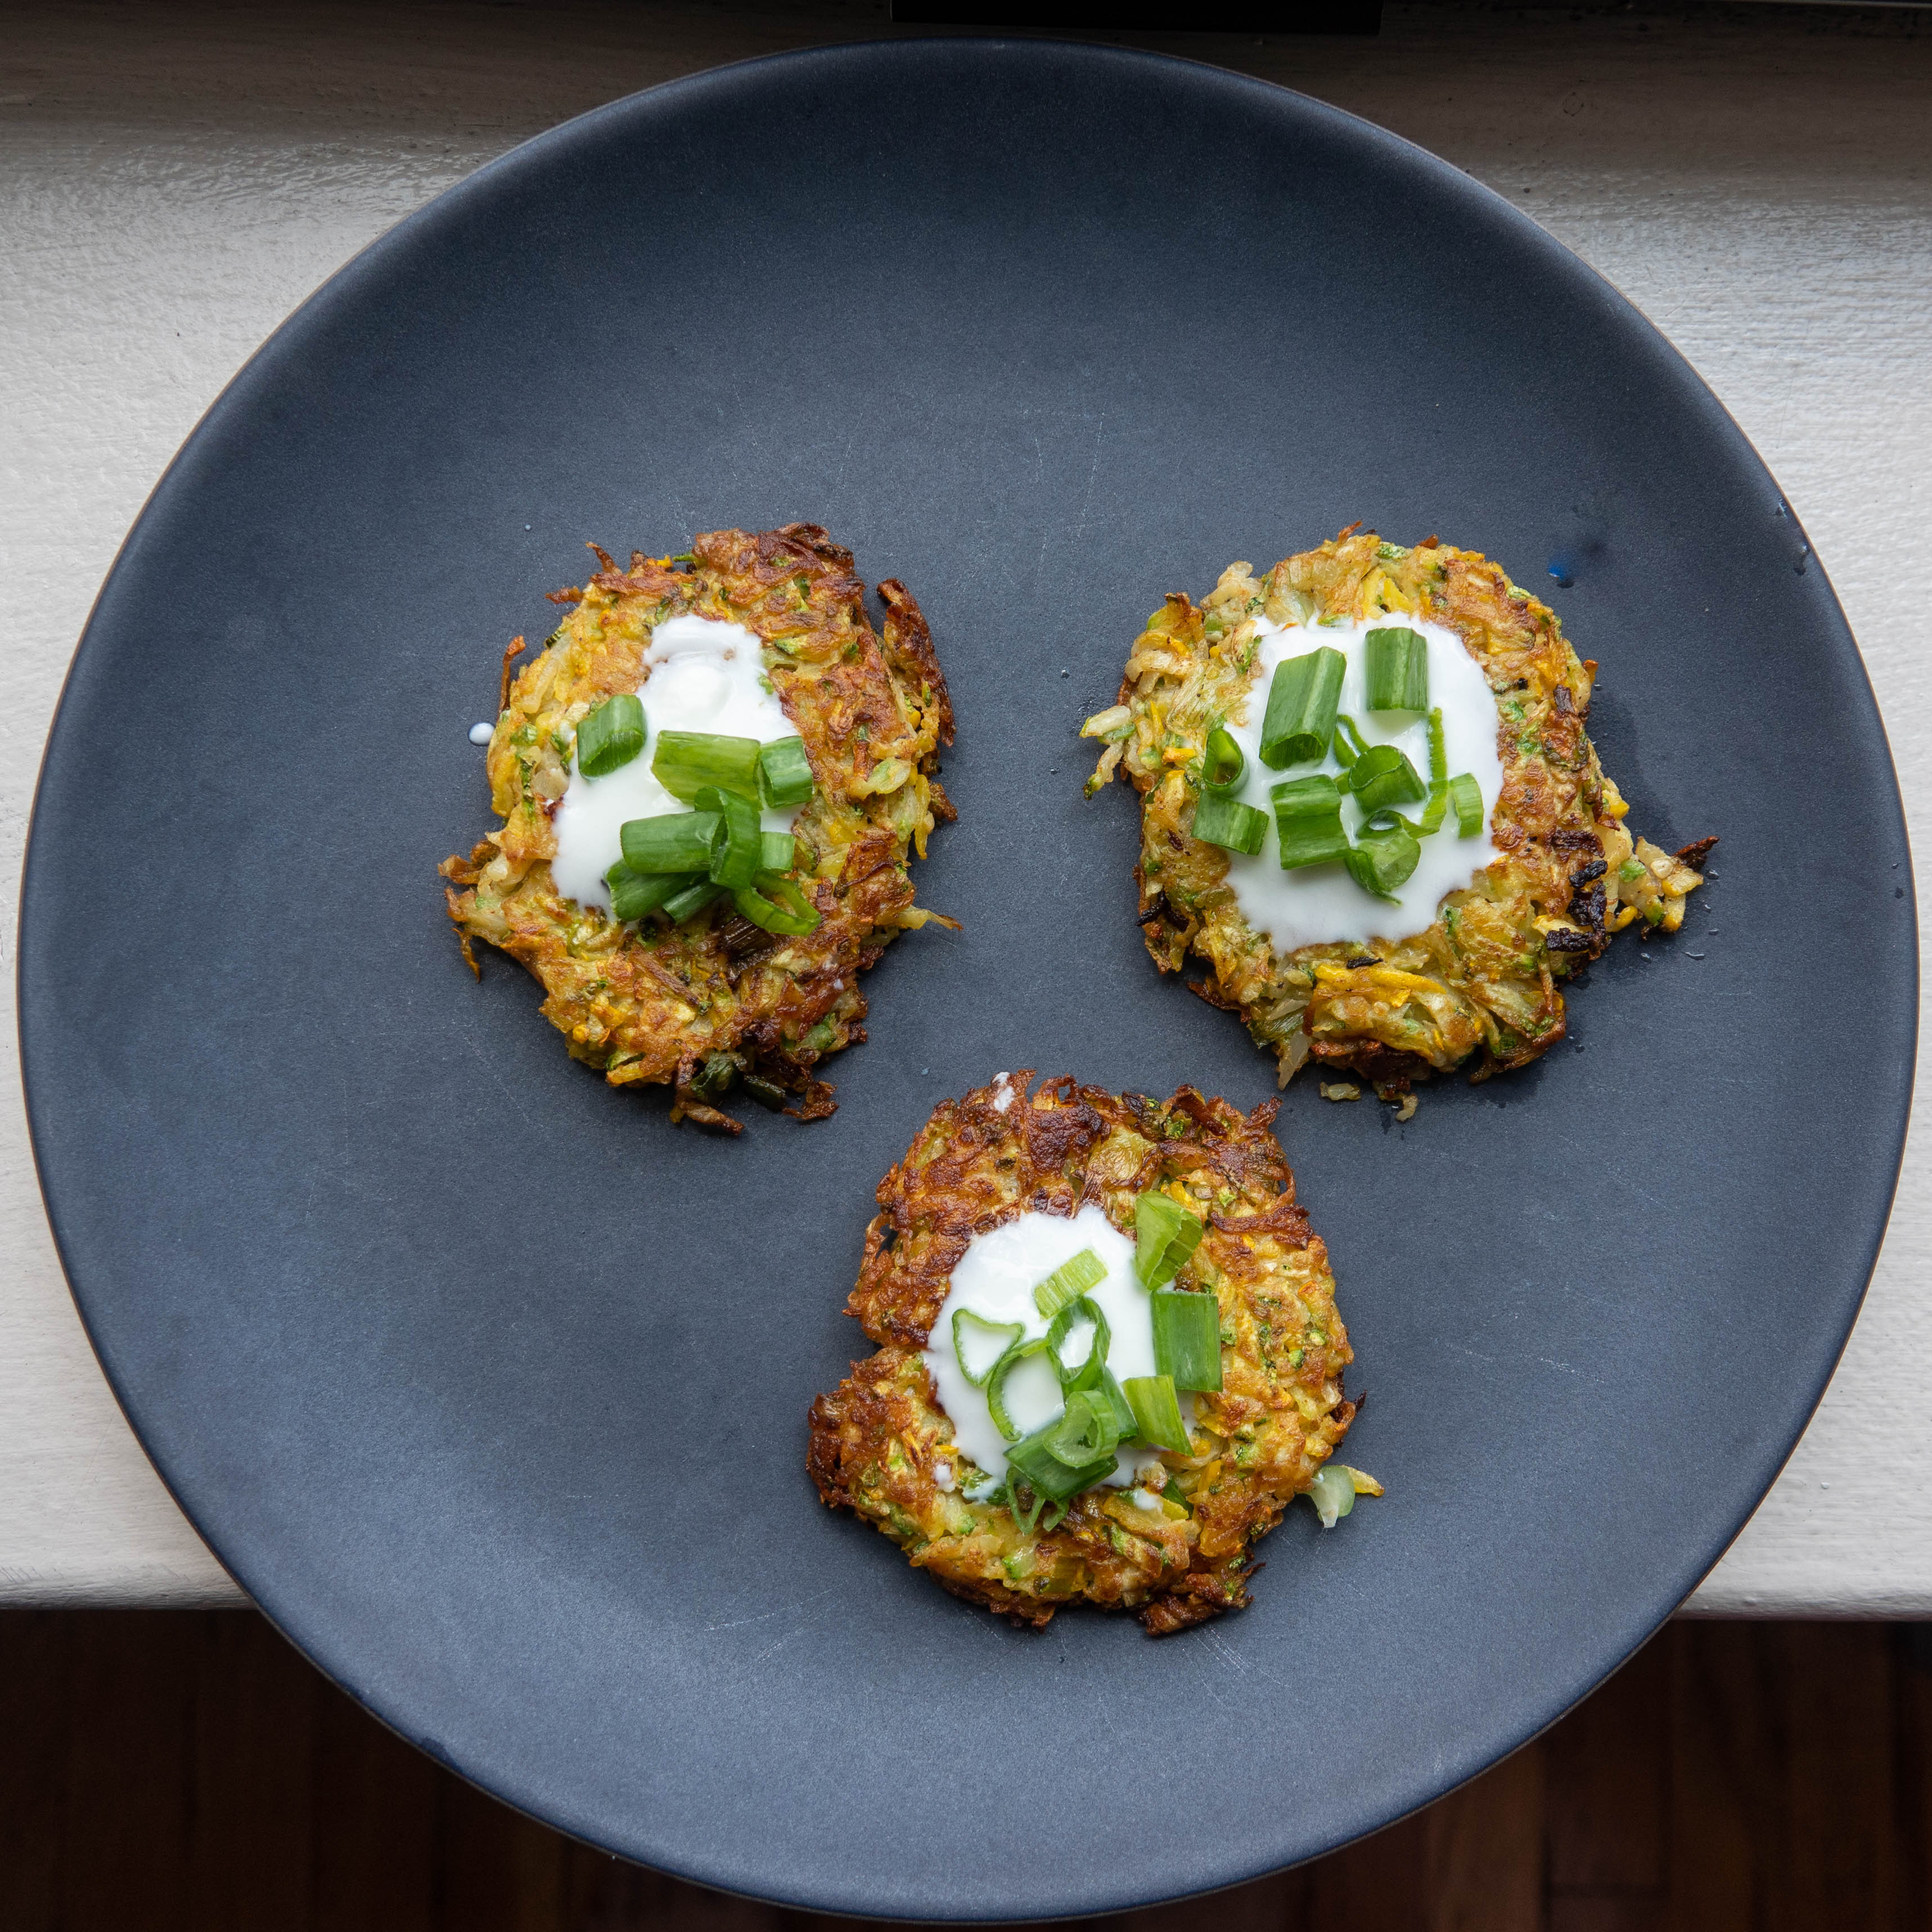
To fry, I use either a cast iron or stainless
steel pan. I do these with a generous shallow fry of olive oil. Today the pan
was at about 360F. When the oil is hot, add a ball to the pan, and flatten it
into a disk with a spatula. Add as many as your pan will hold without crowding.
Watch for doneness on the bottom and then flip them. When done, let them rest
on paper towels. To serve, top with a dollop of yogurt or sour cream, and add
the chopped onion greens.
Thanks to COVID-19 era food shopping, we are finding ourselves with huge amounts of certain ingredients. Right now we have about five bunches of celery! We saw a great idea for Sichuan celery on Ruth Reichl’s Instagram. That made me think of one of our current favorite recipes, which is Diana Kuan’s Vegetarian Mapo Tofu. I improvised a bit with Kuan’s recipe and came up with this recipe for the celery stir fry. It was amazing!
Ingredients
12 dried shiitake mushrooms
1 cup warm water
2 tbsp fermented black beans
2 tbsp olive oil
3 scallions, sliced, white and green parts separated
2 tsp minced ginger
6 stalks celery, trimmed and chopped
For the sauce
2 tbsp gochujang
1 tbsp aji mirin
2 tsp soy sauce
2 tsp sesame oil
1 tsp ground Sichuan pepper
Method
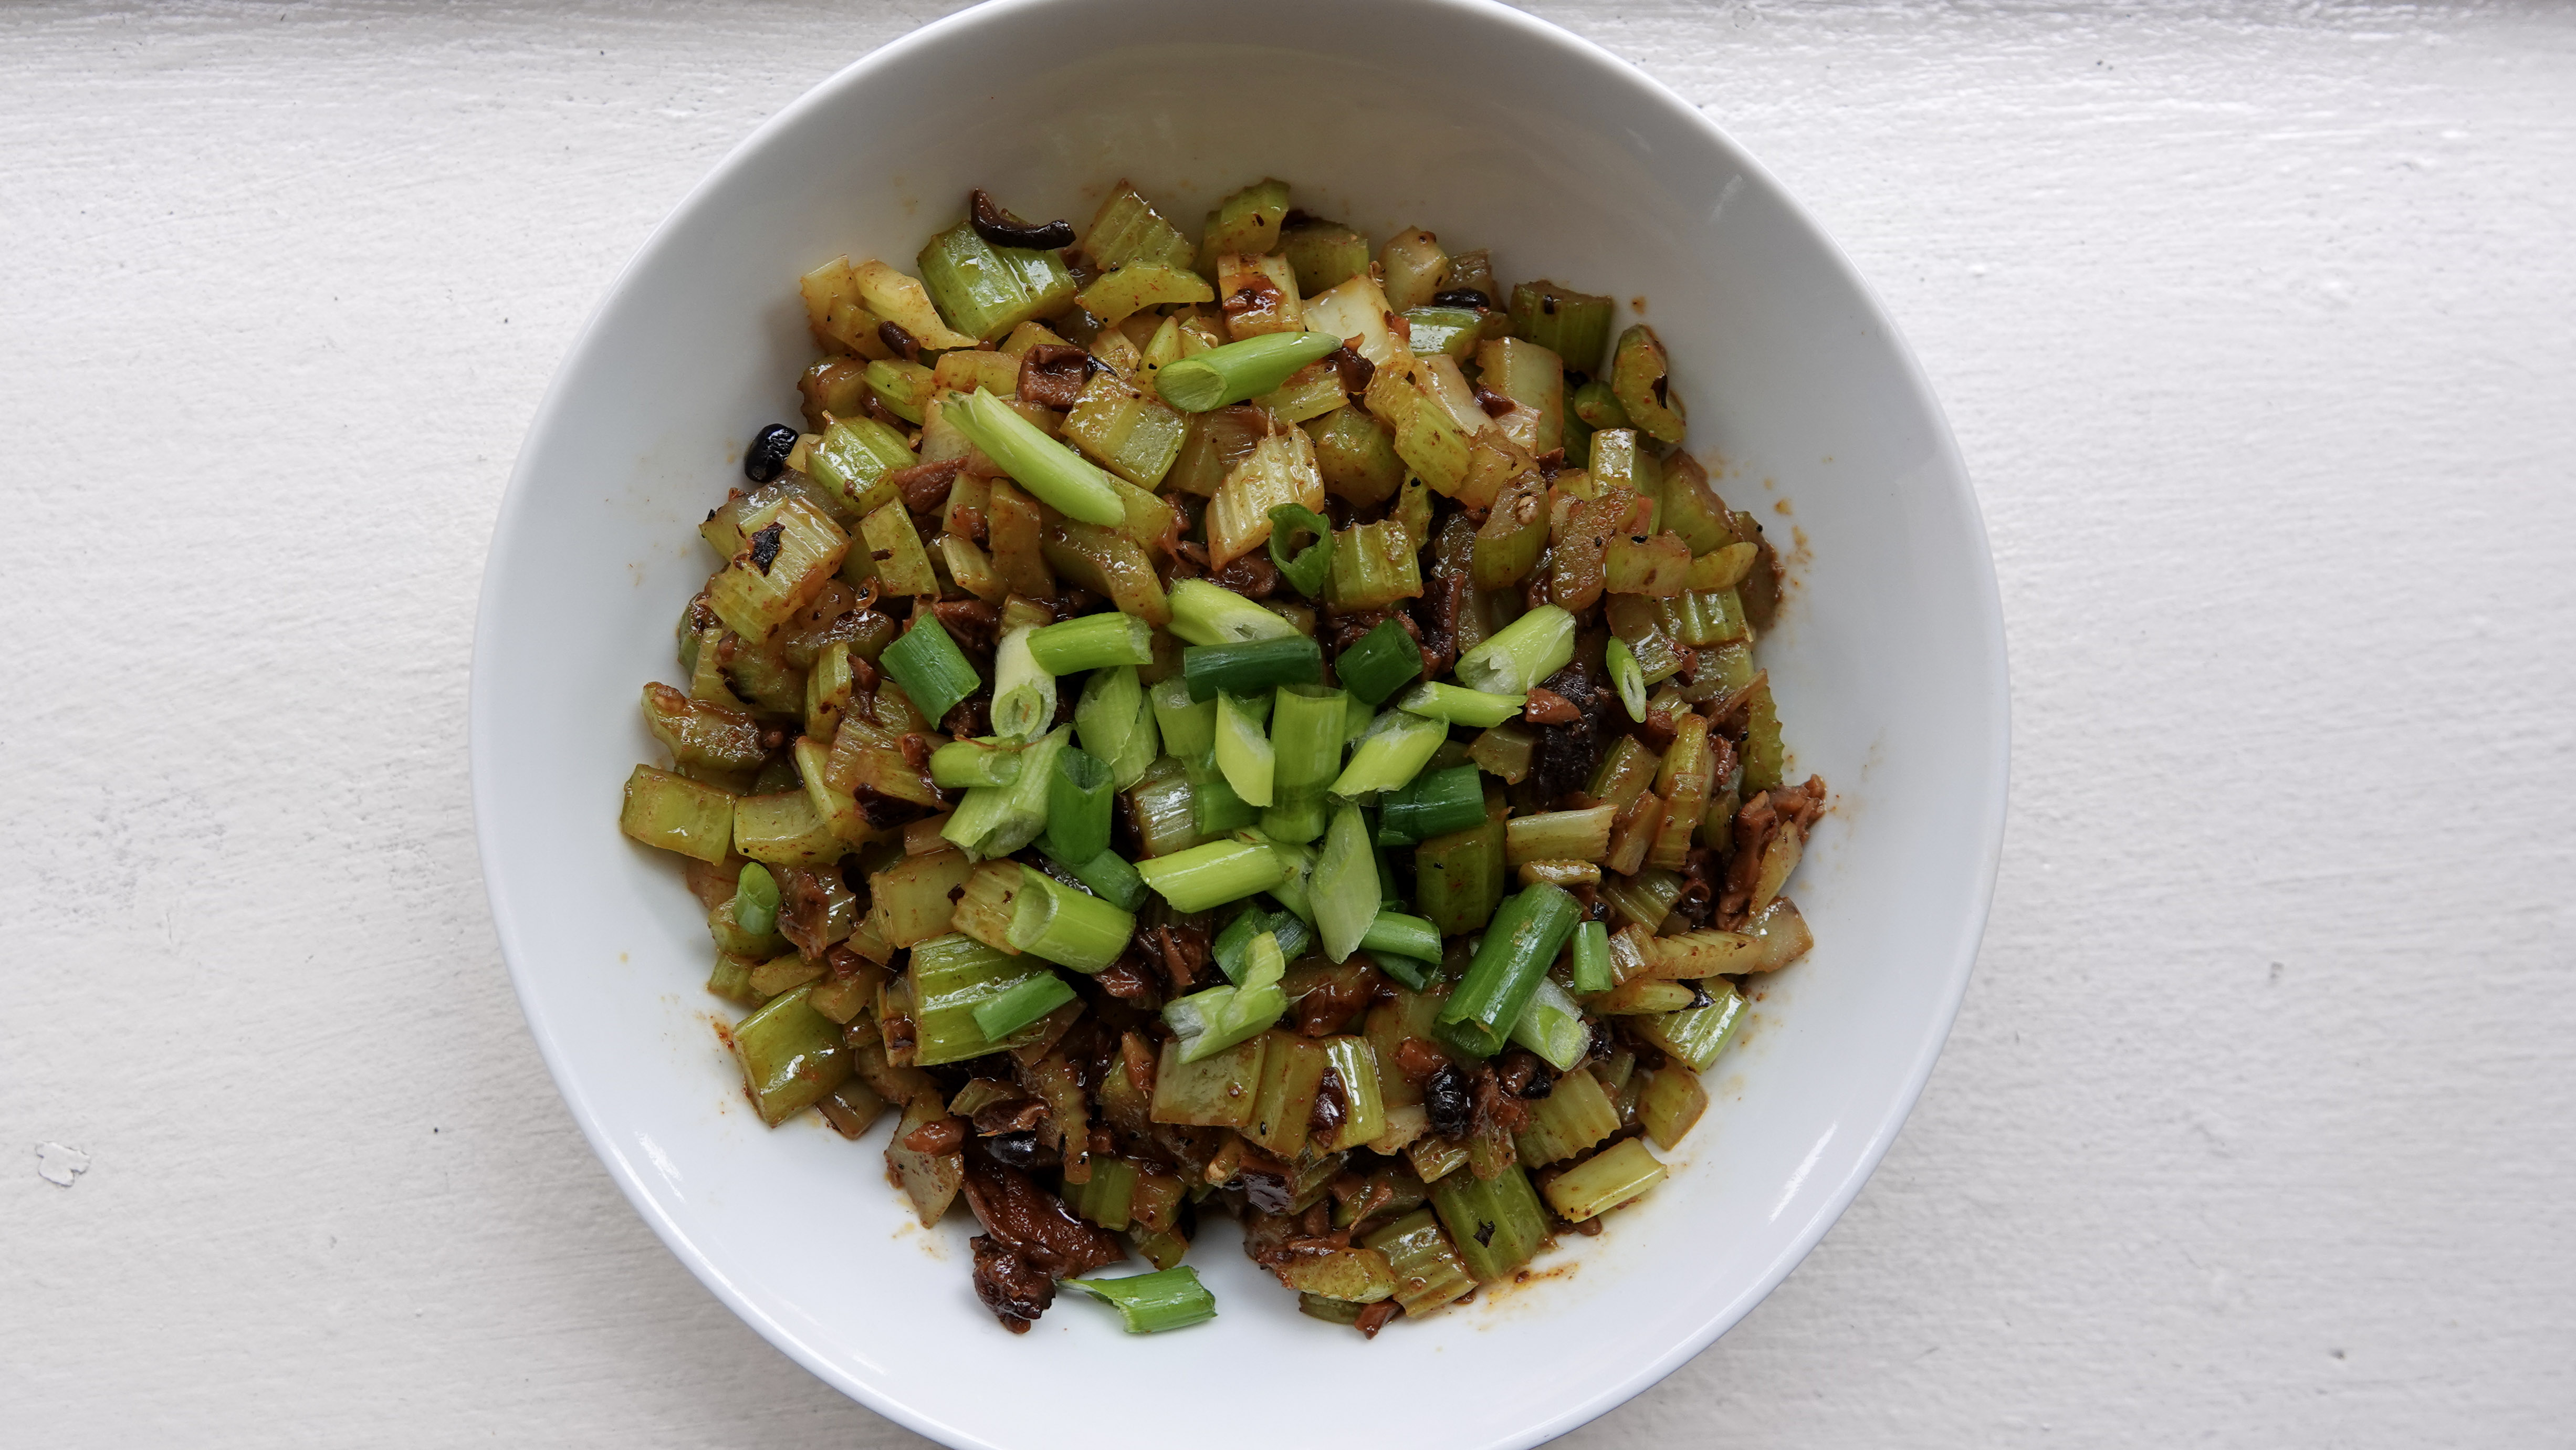
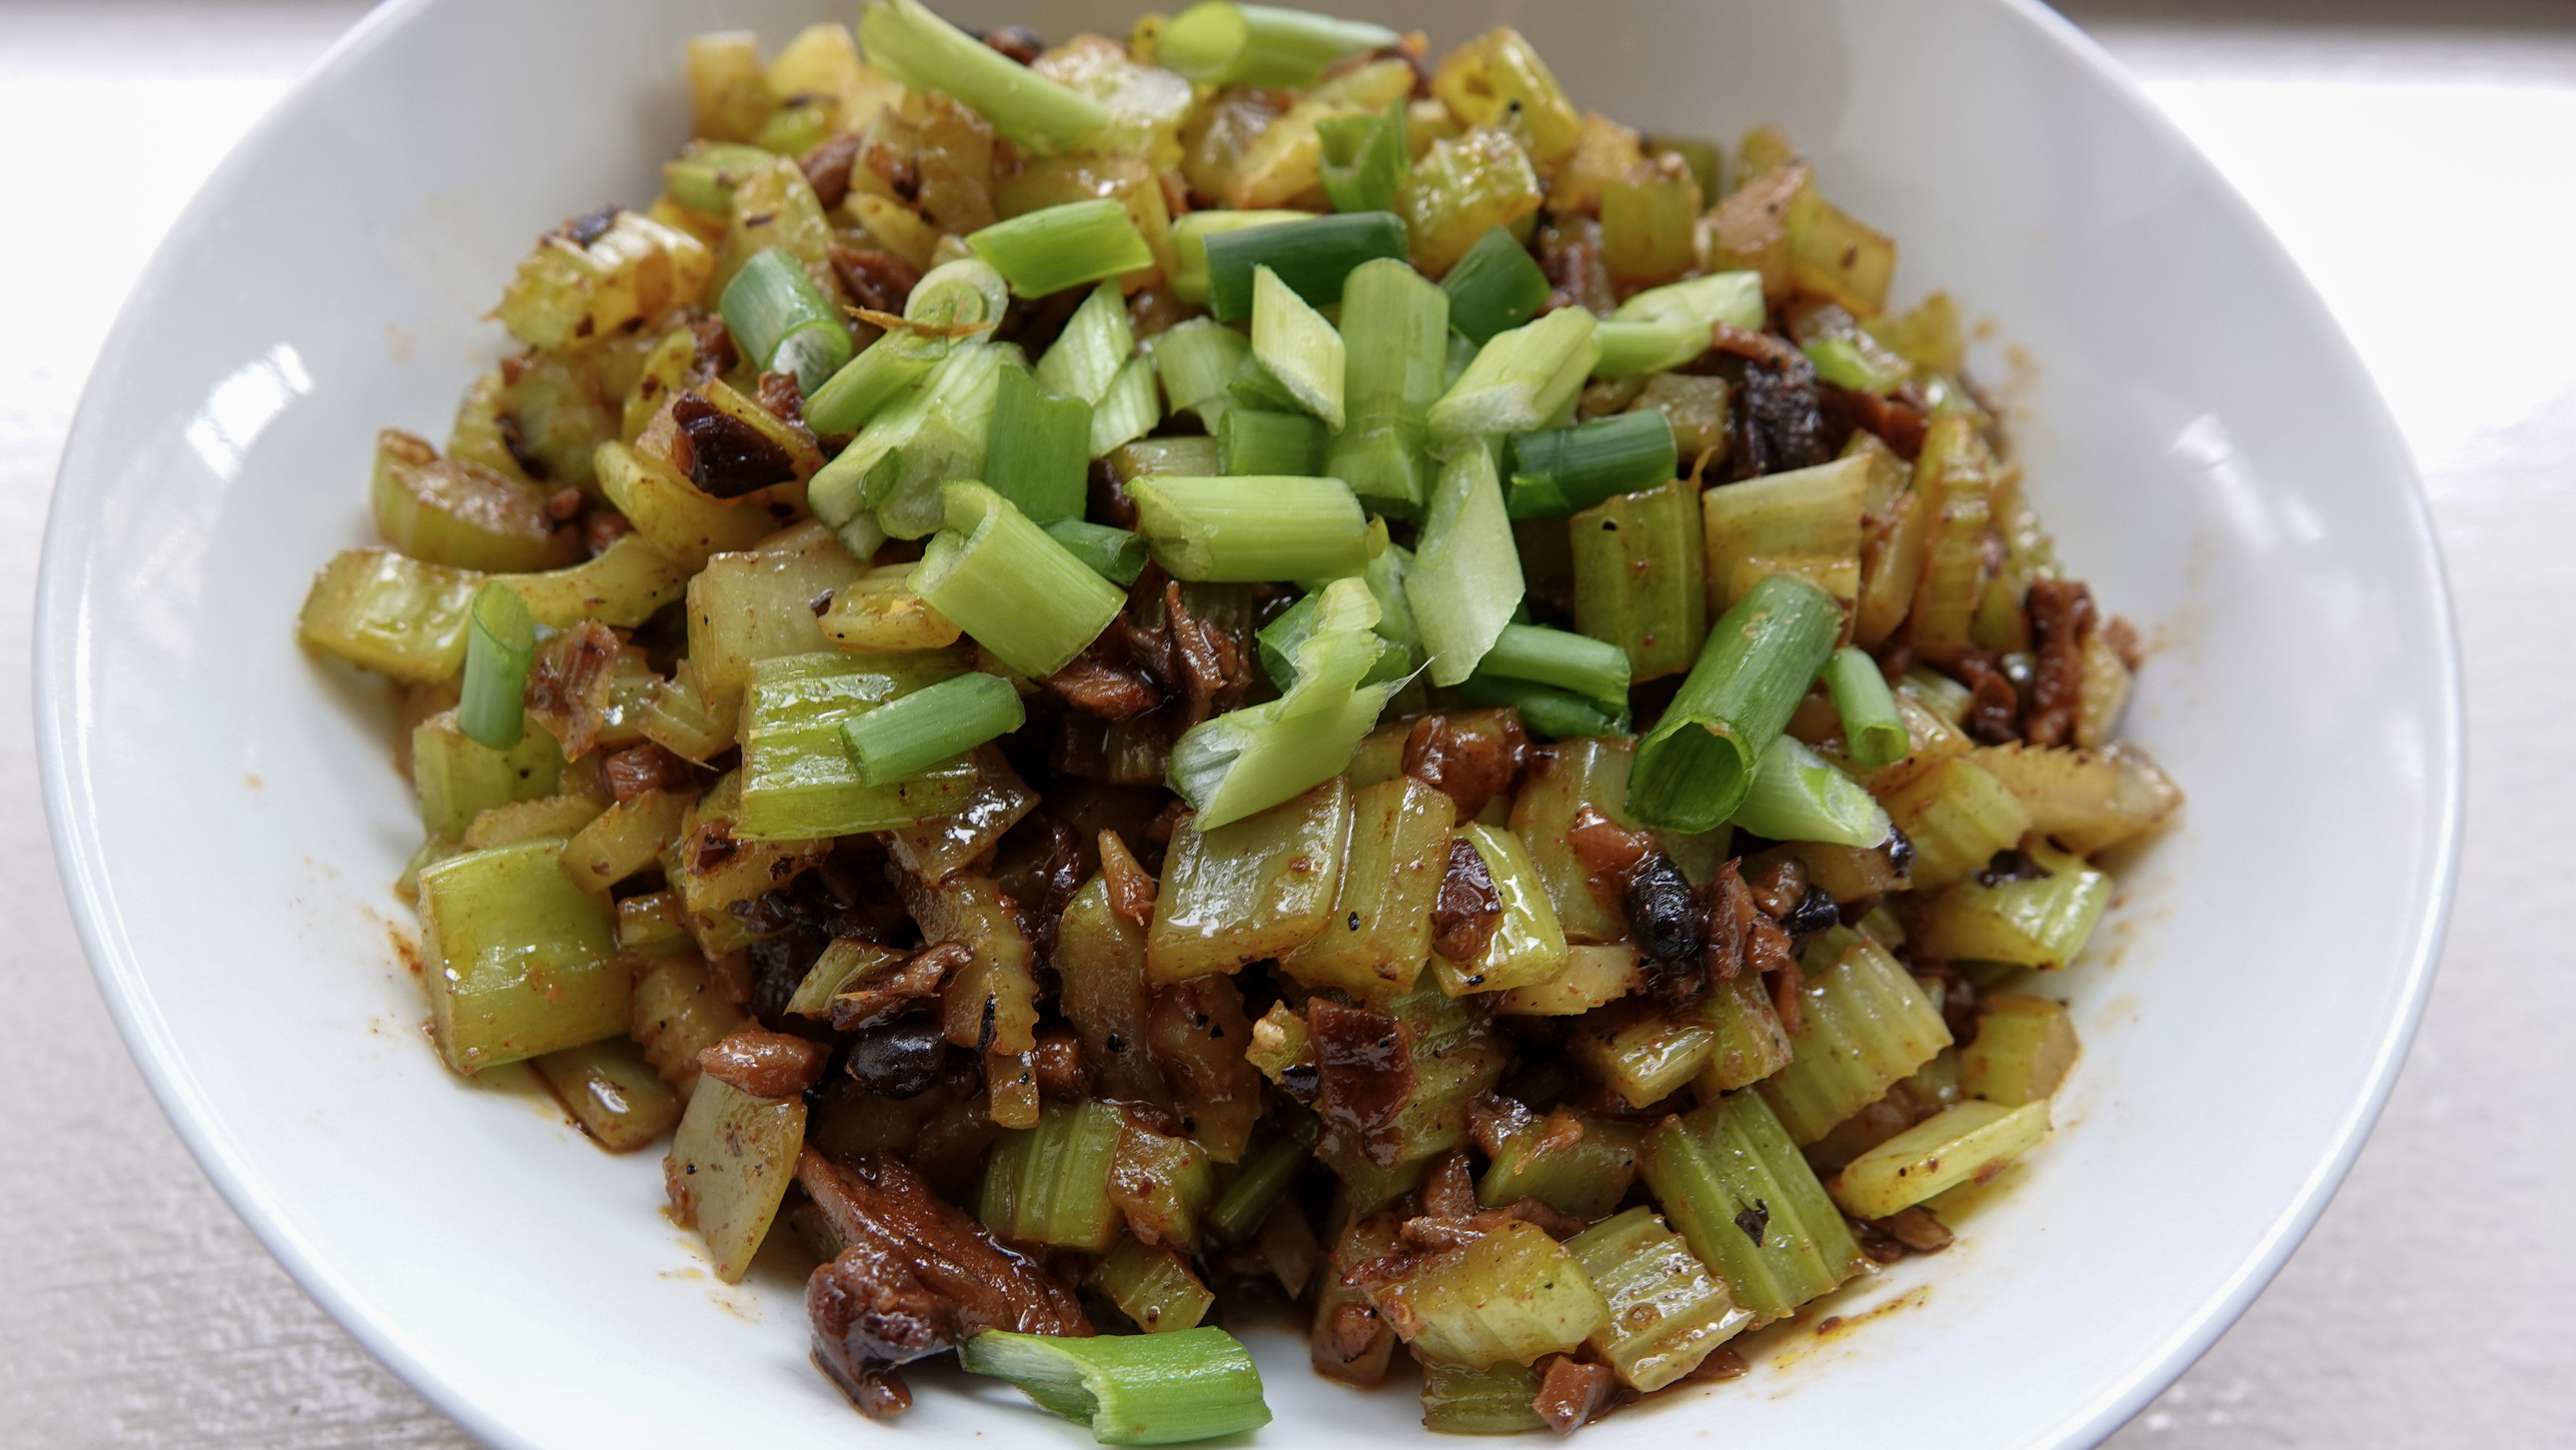
Soak the shiitakes in the warm water for 15 minutes. Retain the soaking liquid for the sauce. Stem and mince the shiitakes (retain the stems for stock). Rinse the fermented black beans, and mash them with the back of a spoon. In a small bowl, mix together the sauce ingredients, adding a few tbsp of the shiitake soaking liquid, set aside. Heat the oil to medium high. Add in the white parts of the scallions and the ginger. Stir fry for one minute. Add in the minced mushrooms and fermented black beans. Stir fry for two minutes. Add in the celery and stir fry for a few minutes. When the celery is close to done, stir in the sauce. Set heat to high until the sauce begins to boil. Lower heat and reduce sauce. Serve in a bowl covered with the green parts of the scallions.
Here’s another favorite recipe–and a real crowd-pleaser–that I’ve been riffing on for the past few years. If you’re just getting into sourdough baking, this one is much more approachable than the full-on sourdough bread recipe I posted earlier. In fact, this one is so straightforward that I always make the dough as a side-project while I’m making sourdough bread.
What makes this recipe so simple? A few things. There’s no stretching and folding during bulk fermentation. The shaping is minimal, so even though the dough is very slack, there’s less risk of disaster. And since you’re baking on well-oiled parchment-paper-lined sheet pans, it’s even easier than making pizza.
Ingredients
630 g water at 87 F
20 g salt
200 g levain (sourdough starter) 50/50 whole wheat/unbleached all-purpose at 100% hydration
100 g rye flour
100 g whole wheat flour
700 g unbleached all-purpose flour
Olive oil
Essential Tools
Vessel for mixing, bulk fermentation. We use a Cambro 6 qt round polypropylene food storage container.
Digital food scale, large format for weighing flour, dough, etc.
Small digital scale for weighing precise amounts of small ingredients, e.g., salt
Pen thermometer
Bench scraper
2 Half sheet pans for baking, parchment paper
Cooling rack
Method Overview
Preparing the levain
Autolyse – 30 minutes
Bulk fermentation – 3-4 hours
Shaping and proofing – 48-hour proof
Topping
Baking – 20 minutes at 475 F
Cooling
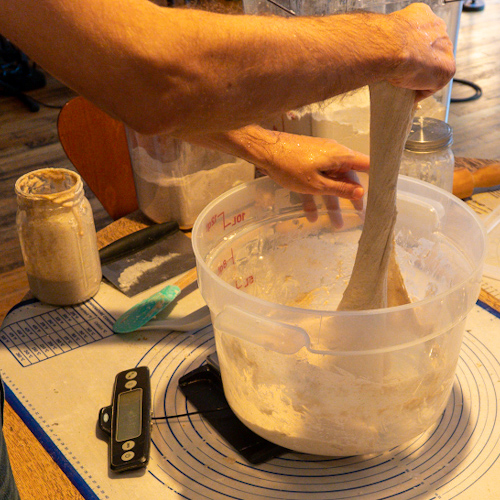
Method
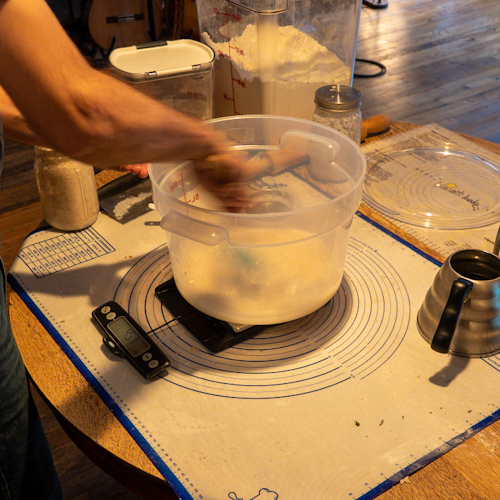
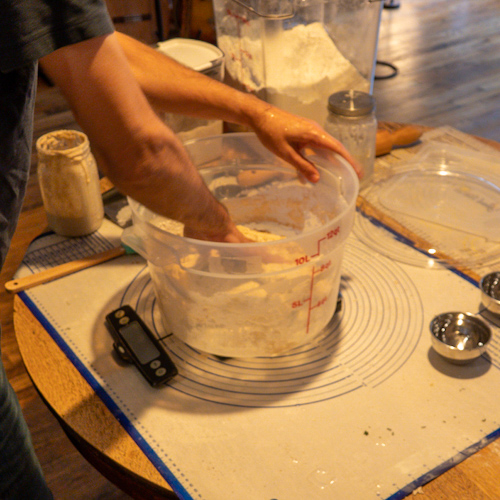
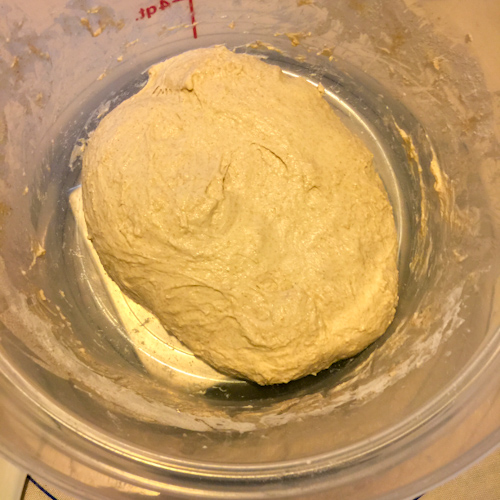
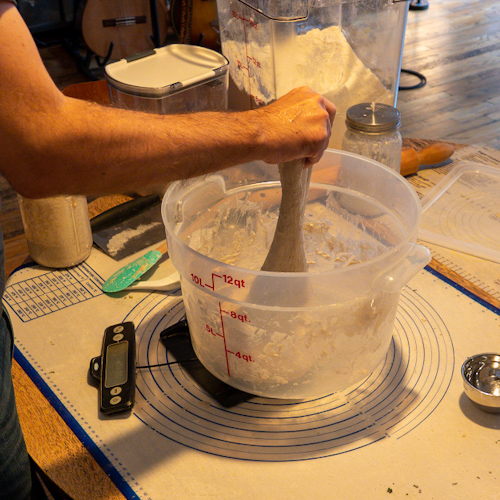
Start with your mixing vessel and add the 630 g water. Add the salt and mix. Add the levain and mix. Add the flour and mix to combine. Leave for a 30-minute autolyse. After the autolyse, it’s time to mix the dough. You can turn it out onto a floured work surface, but I do this step inside the Cambro. Mix the dough well, using a combination of kneading, stretching, folding. This will take about five minutes. Make sure all the flour is well incorporated and there are no dry spots. Top with a brushing of olive oil, covering the entire dough mass. Cover the mixing vessel and leave it for 3-4 hours of bulk fermentation. I keep the dough at 80-81 F.
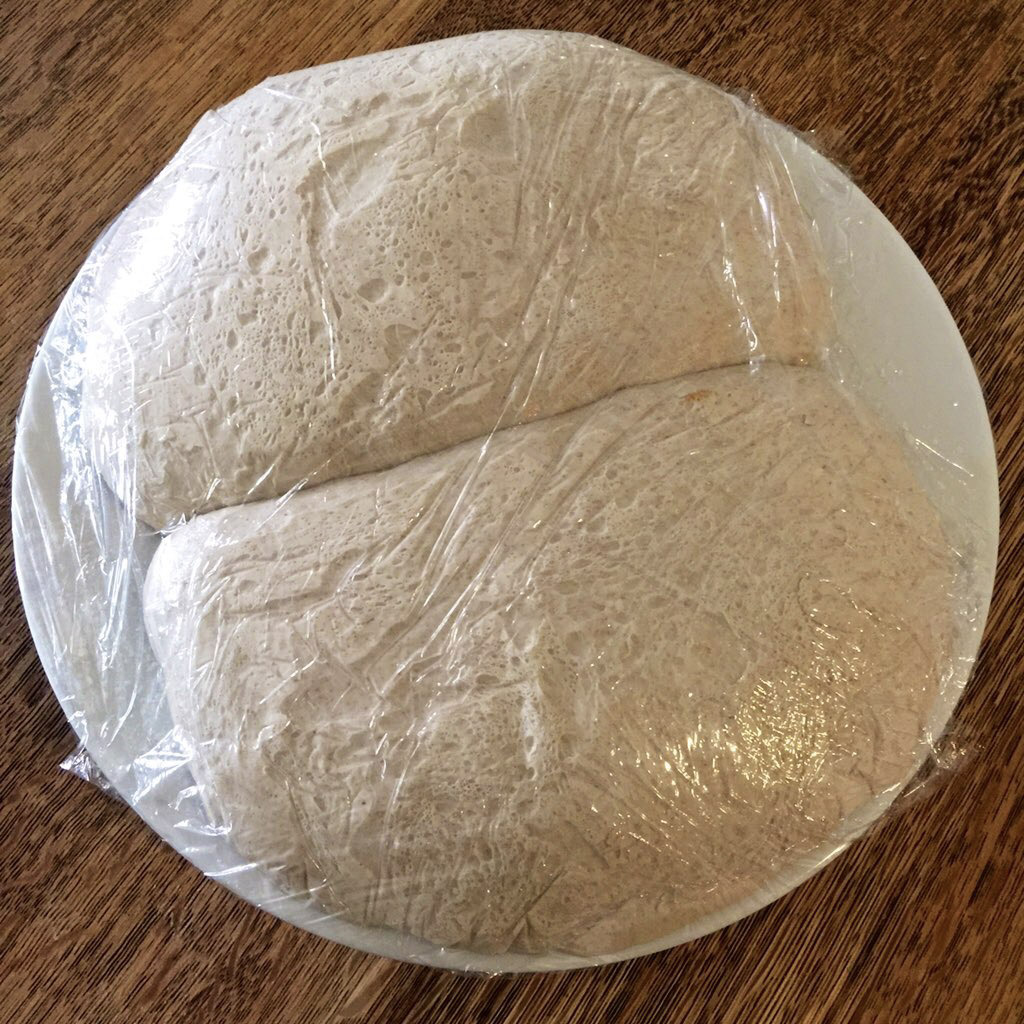
Once bulk fermentation is done, dust a work surface with flour. Turn out the dough and divide in half. Using four ¼ turns, shape each half into a boule. Lightly flour a platter, place the boules, and cover with cling wrap. Place in the fridge for a 48-hour proof.
To bake, cover your sheet pans with parchment paper. King Arthur Flour makes pre-cut parchment paper that I love to use. Lightly coach the parchment paper with olive oil. Turn out the dough onto each sheet pan. Some tips: let gravity do some of the work to get your dough into rectangles. The dough will be very cold and will want to snap back into its previous shape. Give it some time. Start with a rough rectangle and let it sit for 10 minutes. Then it will be easy to shape it the rest of the way. For the classic focaccia texture, dimple the dough with your fingers.
Top each focaccia as you like. See below for some ideas. Bake at 475 F for 10 minutes, turn and swap the pans, and bake for another 10 minutes until done. Depending on your toppings, you may want a quick 3 minutes under the broiler. Check to make sure the bottom is done, if you have a pizza stone, 3 minutes directly on the stone may be helpful.
Place on a cooling rack for 10 minutes. Unlike the sourdough bread, if you really, really want to eat this before cooling, that’s OK. I like it better after it has cooled a bit.
After the 48-hour proof
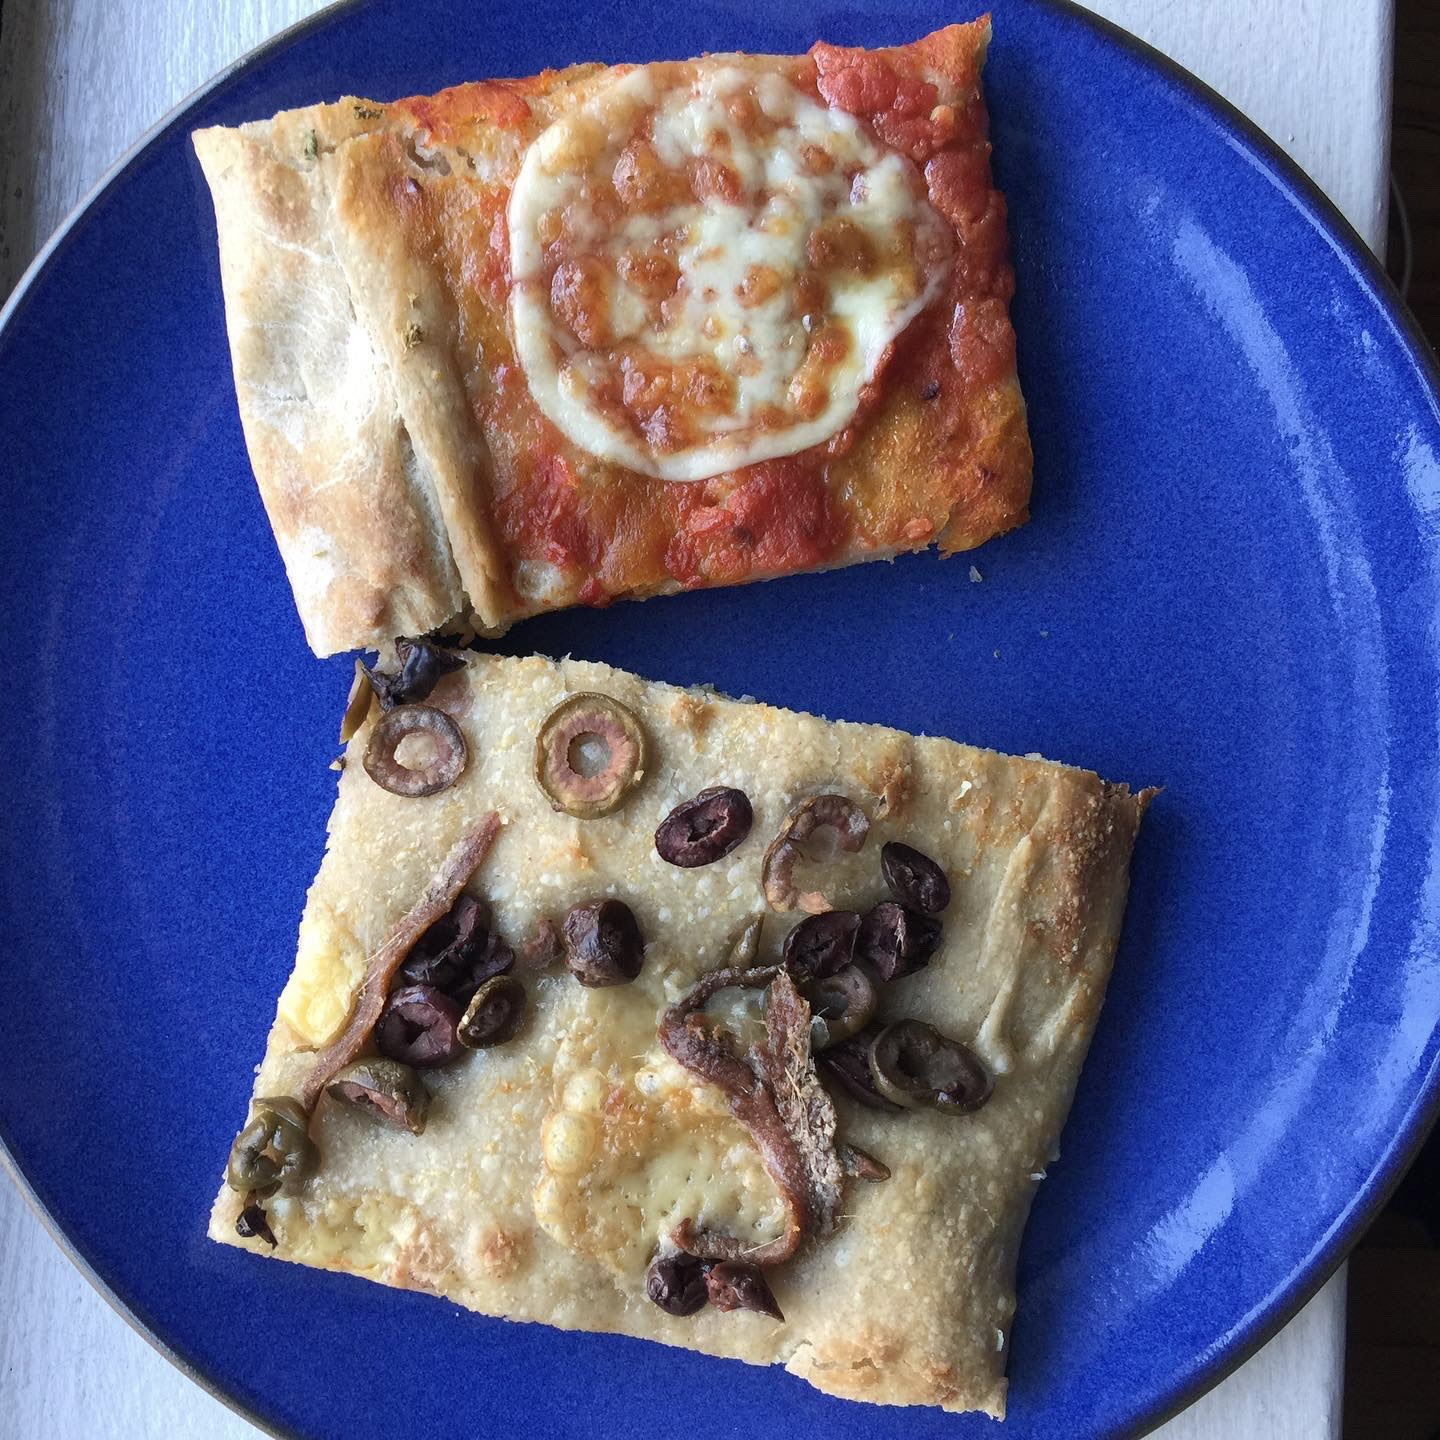
Margherita, olives-anchovies-cheese
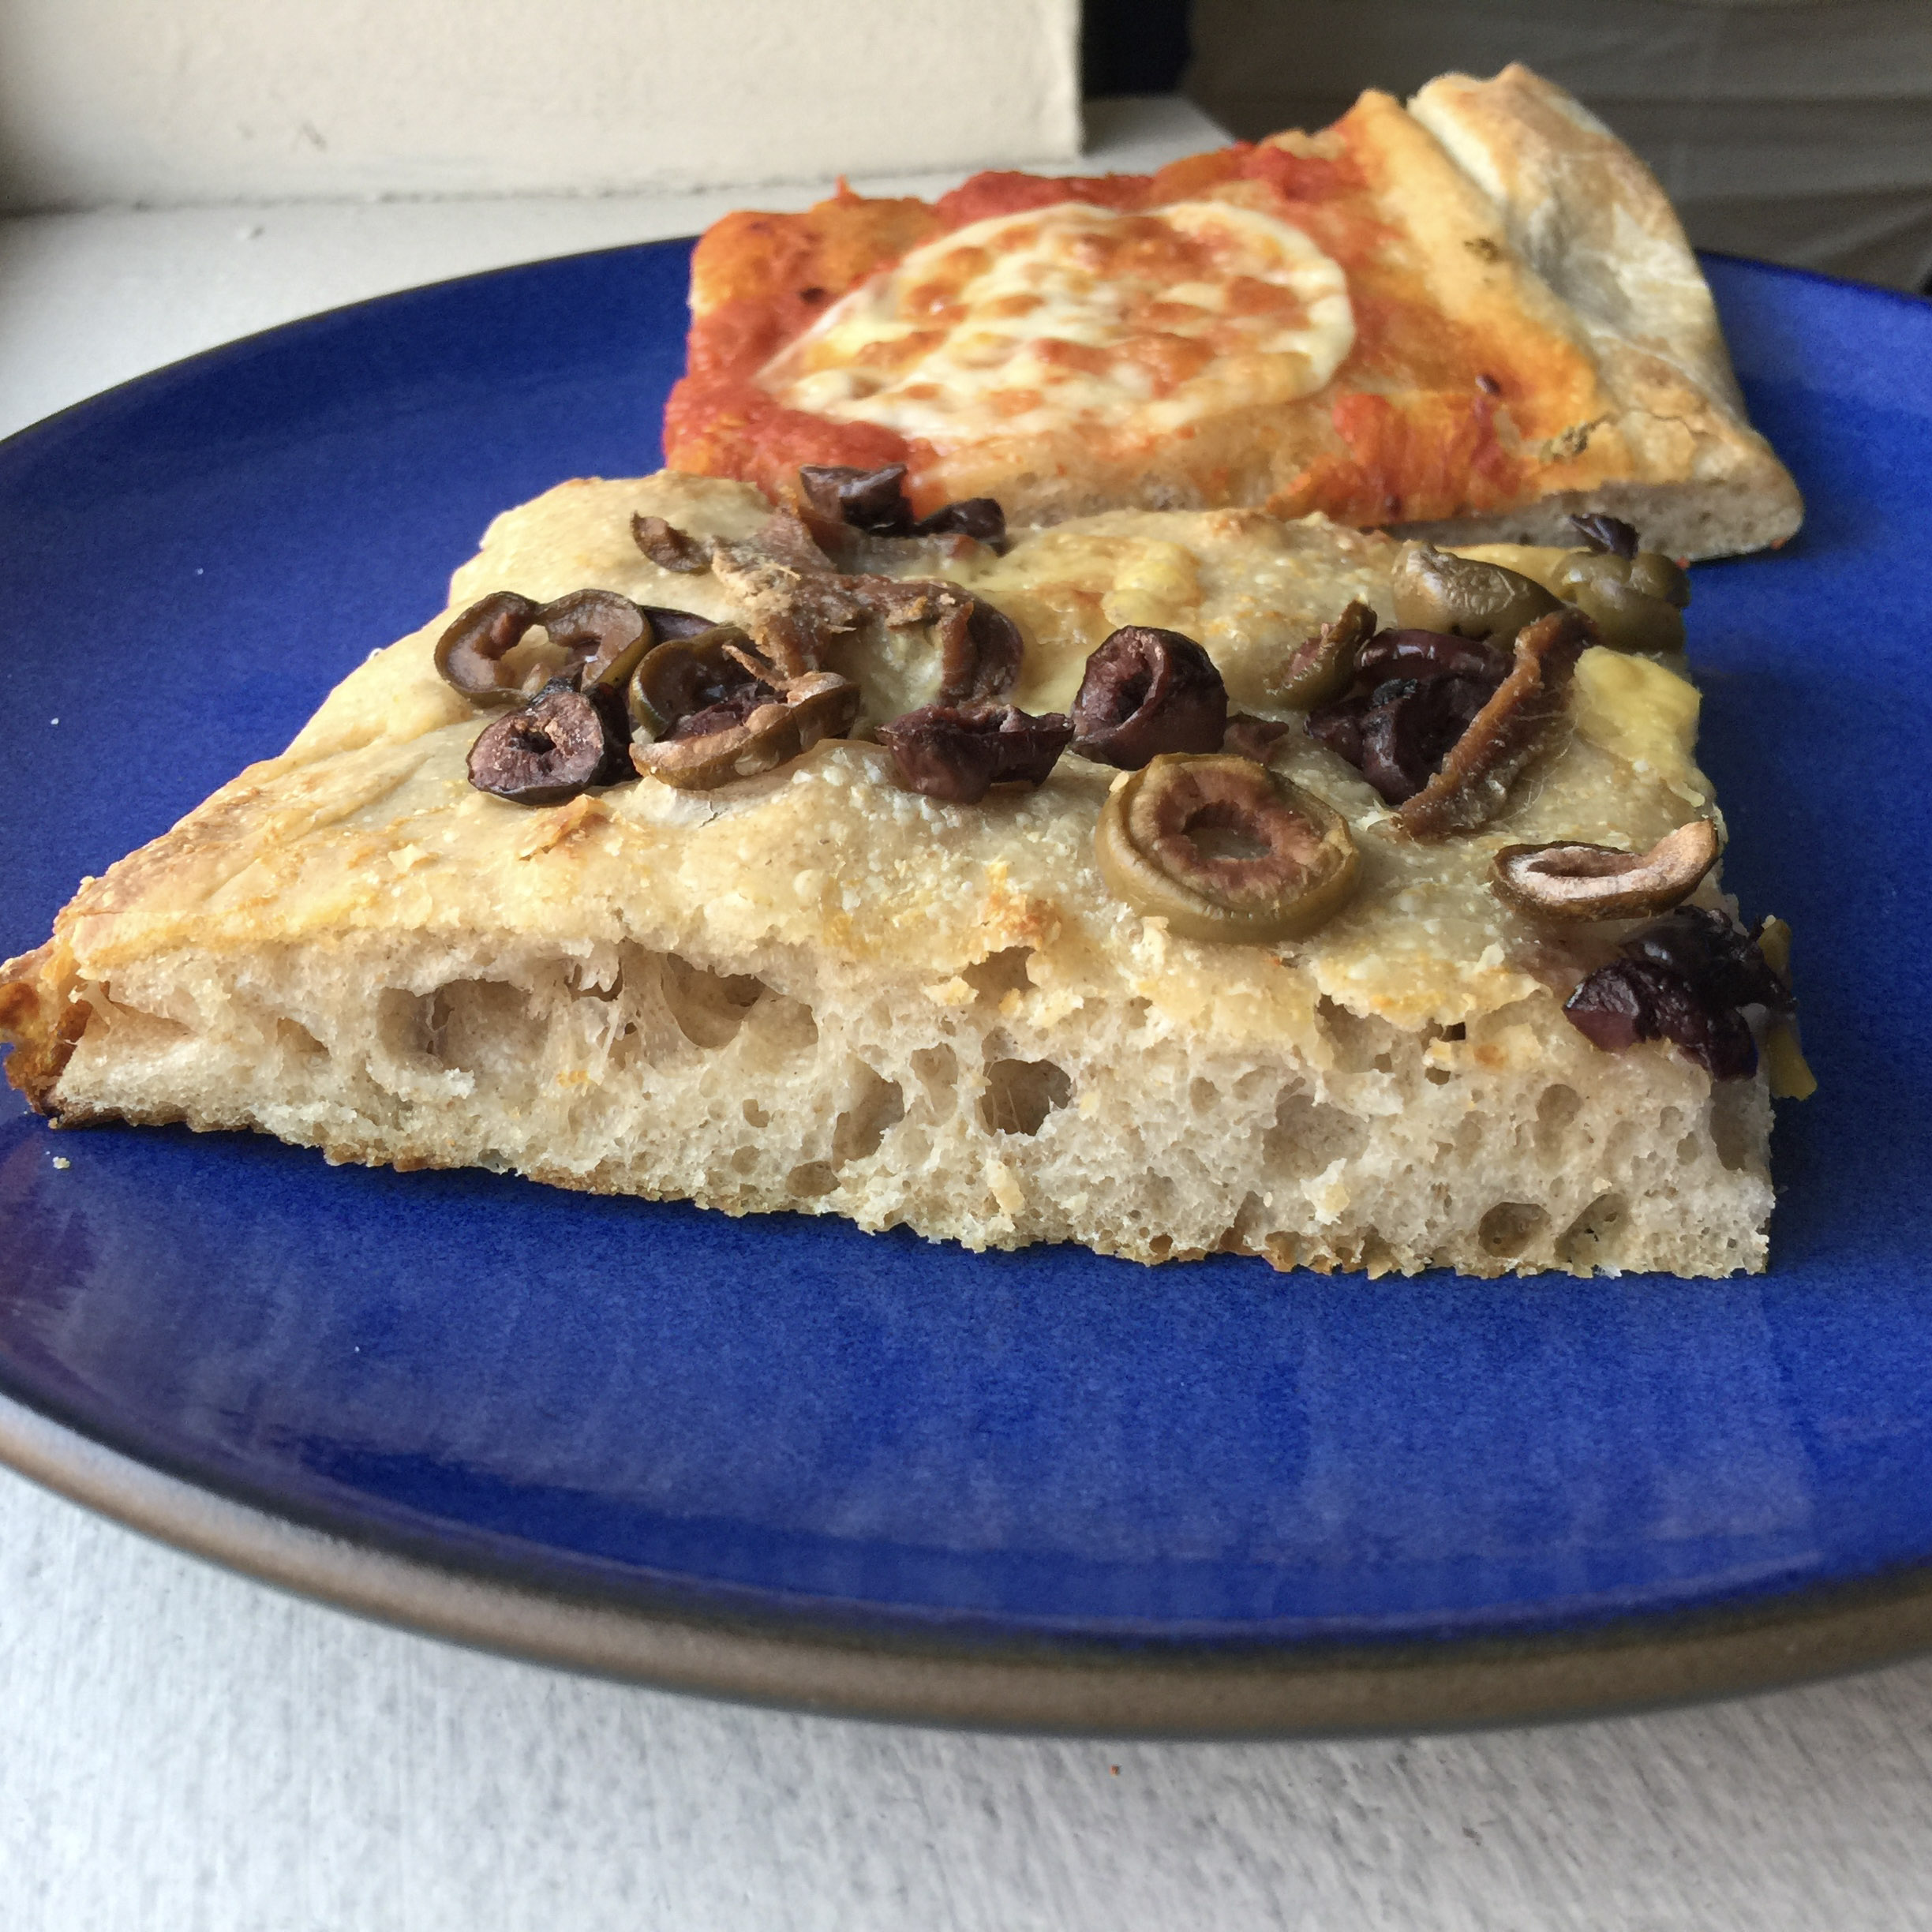
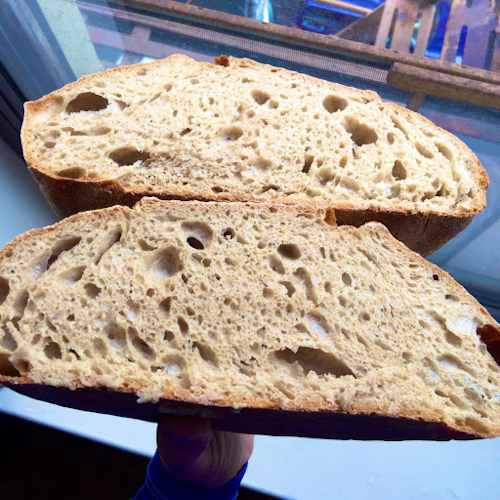
Crumb!
Topping Ideas
Dried herbs, olive oil, salt
Anchovies, olives, cheese
Cheese, cheese, cheese, & cheese
Pizza style
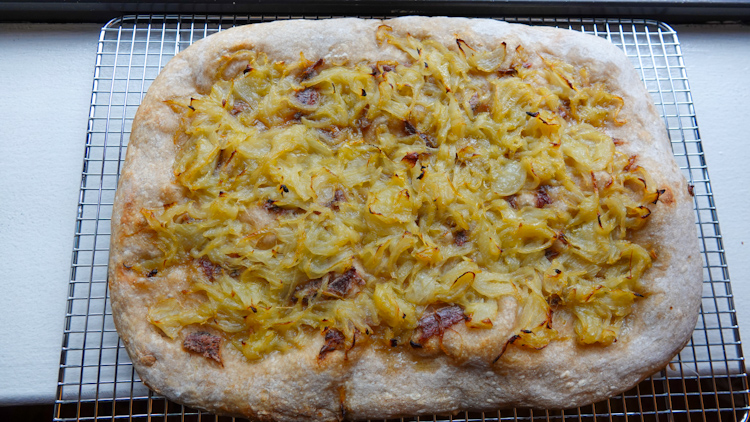
One of our favorites: Pissaladière-style, with caramelized onions and anchovies
I got into bread baking about four years ago. Before venturing into sourdough, I baked many of the loaves in Ken Forkish’s great bread book, Flour, Water, Salt, Yeast. Once I got into sourdough I spent the next couple of years essentially making the same loaf over and over again. This was the country bread from Chad Robertson’s Tartine Bread. Eventually, I was practiced enough to feel comfortable riffing on the method. This recipe is for my current favorite, which is a blend of rye, whole wheat, and white flour.
Ingredients
750 g water at 87 F
200 g levain (sourdough starter) 50/50 whole wheat/unbleached all-purpose at 100% hydration
200 g rye flour
300 g whole wheat flour
500 g unbleached all-purpose flour
20 g salt
50 g water at 87 F
Rice flour for dusting
Essential Tools
Vessel for mixing, bulk fermentation. We use a Cambro 12 qt round polypropylene food storage container.
Digital food scale, large format for weighing flour, dough, etc.
Small digital scale for weighing precise amounts of small ingredients, e.g., salt
Pen thermometer
Bench scraper
Lame, or razor blade, or other sharp knife for scoring
2 banneton proofing baskets
2 cast iron dutch ovens. We use Lodge black cast iron 4 qt.
Cooling rack
Method Overview
Preparing the levain
Autolyse
Bulk fermentation
First shaping and bench rest
Shaping and proofing
Scoring
Baking
Cooling
The Method in Detail
Preparing the Levain
This is one of the most crucial elements in the entire process, since the levain is the heart and soul of this bread. Ideally, you will be feeding your levain every day, so it’s always in great shape. For us, this is not the case. I don’t bake every week, so doing a daily feed is wasteful. If I know it will be more than a week before I bake, I will keep my levain in the fridge. You then really do need to plan ahead.
For me, it takes several days of regular feeding to get the levain where it needs to be. My regular daily feed is to take 50 g from the previous day and add 100 g of 50/50 flour and 100 g of water. I always keep my levain at 100% hydration. For the final feeding before a bake, I up the amounts to 150 g of flour and 150 g of water.
With practice, you will get a feel for when your levain is ready for a bake. For me, it is a combination of the activity level and the aroma. The target aroma is a little hard to describe–yeasty, sweet, a touch of funk.
Autolyse – 30 Minutes
The purpose of the autolyse is to allow the water to integrate with the flour and begin to form the gluten structure of the dough. My typical autolyse time is 30-40 minutes. I have experimented with longer times, but for this recipe, 30 minutes is fine. The general guidance for an autolyse greater than 60 minutes is to leave out the levain. For a 30-minute autolyse, you can leave the levain in.
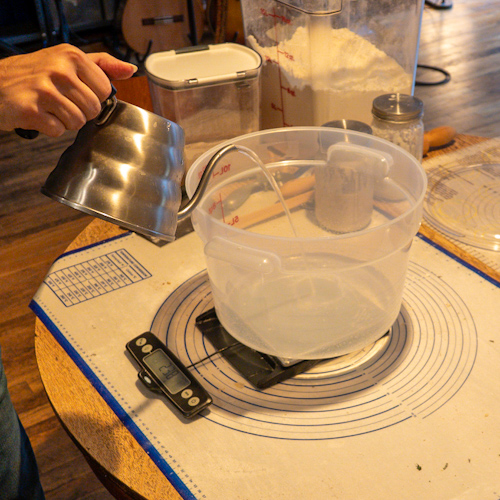
In your mixing vessel, begin by adding 750 g of water at 87 F
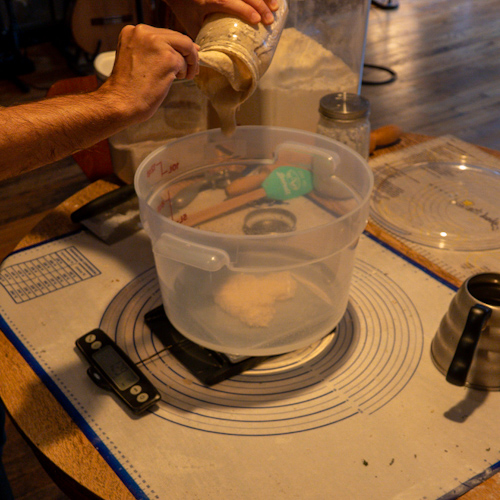
Add 200 g of levain
Stir with a flour whisk to disperse the levain into the water
Add the rye, whole wheat, and unbleached all-purpose flour
Whisk the flour, levain, and water together
Cover and let sit for 30 minutes
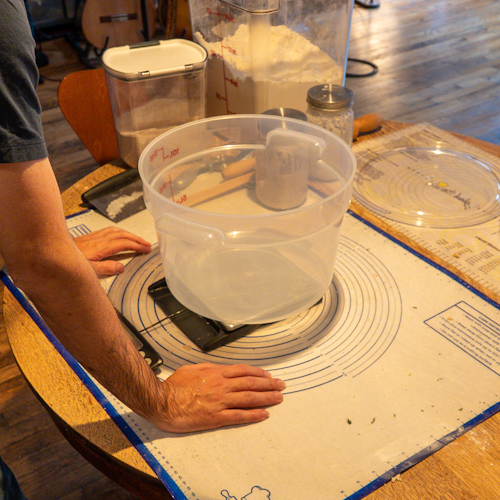
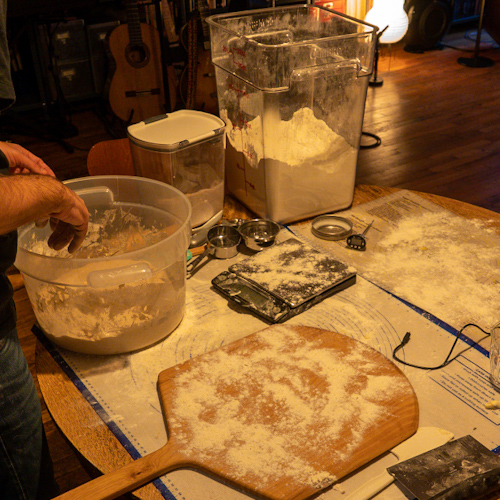
The workspace
Weigh out the water
Weigh out the levain
Mix the water and levain
Bulk Fermentation – 3 Hours
As the name implies, the dough will do much of its rise during this period. In this method, the dough is not kneaded in the traditional way. Instead, the dough develops structure through a series of stretches and folds. I aim for a constant dough temperature of around 80 F. If the dough gets too cold, between folds I will leave it in an oven that has been warmed to 100 F then turned off.
Add 20 g of salt
Add remaining 50 g of water at 87 F
Use your hands to thoroughly mix the dough, incorporating the salt and added water
Perform the first stretch and fold: grab a piece of dough, pull it up as far as it will stretch without breaking, then fold it back on itself, turn the vessel and continue until you have gone all the way around
For the next three hours, perform a stretch and fold every 30 minutes, for a total of six
At the end of three hours, the dough will has risen by around 30%, and will be very smooth and slack, and will pass the ‘window pane test’
Second mix
Ready for stretch and fold
Stretch
Stretch
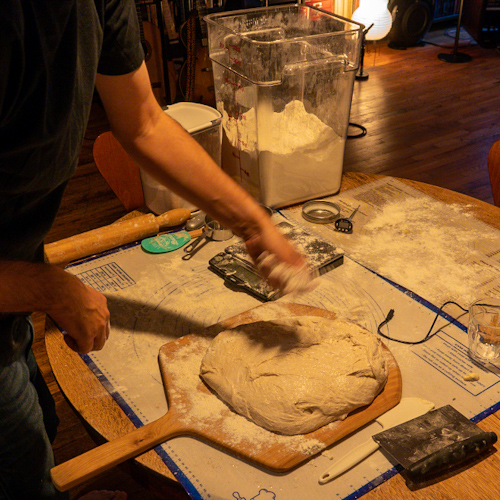
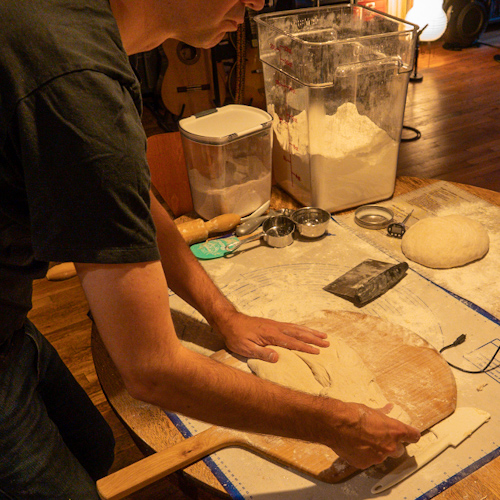
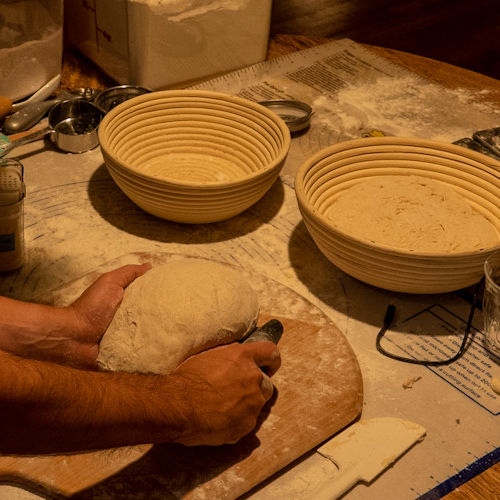
First Shaping and Bench Rest – 20 Minutes
This is where things can get a little tricky, especially if you are not experienced with handling a very slack dough. All I can say is, you need to use the “Carnegie Hall” method: practice, practice, practice. We are making two boules, so the first step is to divide the dough. Then we will shape the two halves into boules and let them rest before the next step.
Lightly flour your workspace
Lightly flour the top and edges of the dough
Turn the dough out onto the workspace
Using your bench scraper, shape the dough mass into a circle, this will allow you to eyeball where to divide the dough into two equal halves
Use your bench scraper to divide the dough
Add some flour to the dough where you divided it
Weigh each piece to see how close you came to equal, if necessary, add dough from one piece to another
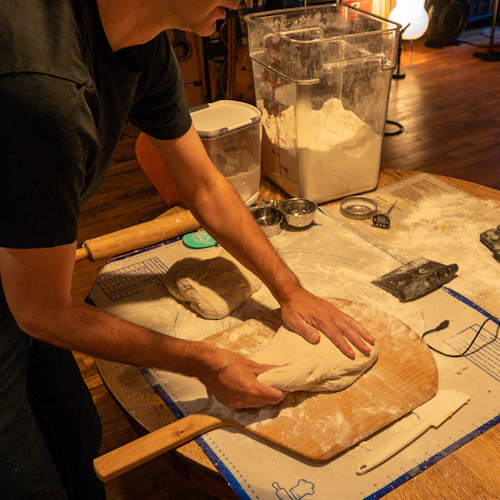
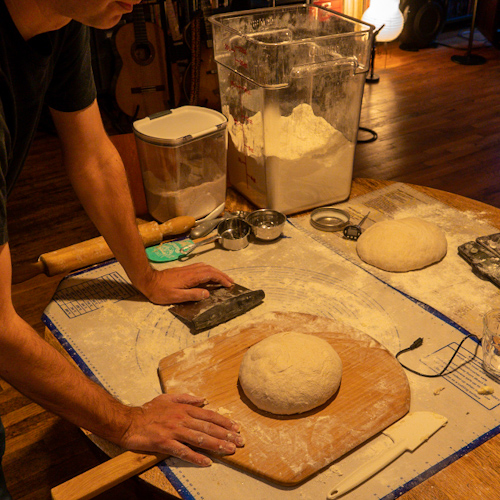
Shape the first boule: grab a piece of dough, stretch and fold, turn 90 degrees and repeat for a total of four folds
Slide your bench scraper beneath the boule and flip it over
Shape the boule by dragging it across the workspace; this will develop a smooth ‘skin’ on the top of the boule
When the boule is shaped, let it rest and repeat with the second dough mass
Let both boules rest for 20 minutes
Turn out the dough
Divide
First shaping
Shaping the second boule
Bench rest
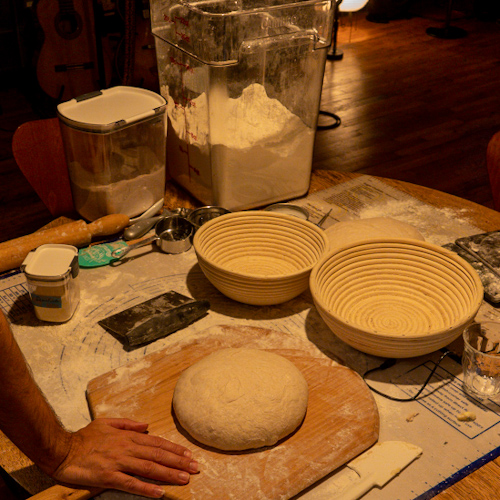
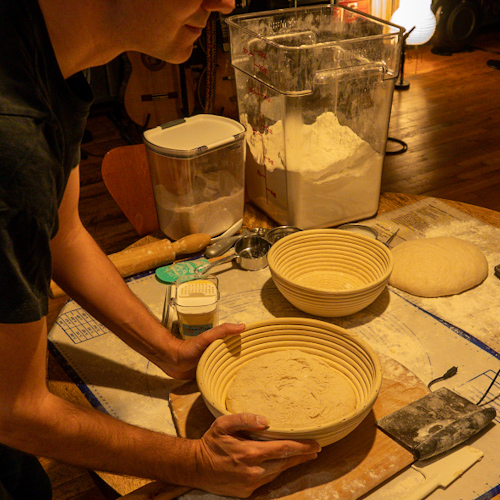
Shaping and Proofing – 6-12 Hours
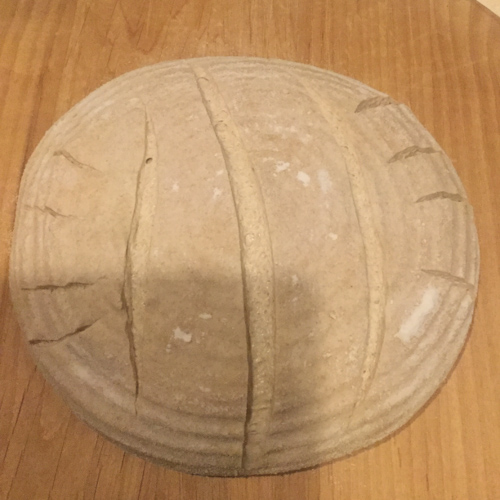
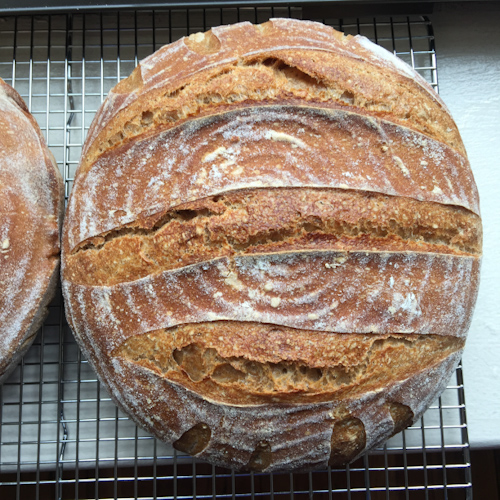
This is where the dough takes on its characteristic shape and finished fermenting. I use unlined banneton proofing baskets, this is where that swirly pattern comes from on the final bread. I now always do my proofing in the fridge. This allows for a longer fermentation, and I also find makes the process of scoring and transferring the bread much easier.
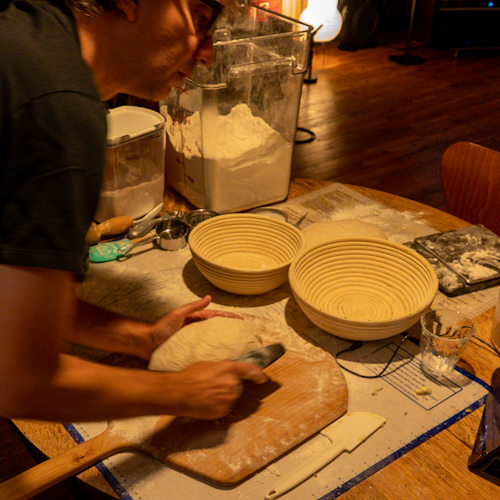
For each boule, repeat the shaping process from the previous step
Prepare the banneton baskets by dusting them liberally with flour; use rice flour to get the characteristic white swirl pattern
Use your bench scraper to flip each boule into a banneton basket, what was the top of the boule is now on the bottom of the basket
Cover each basket, we found specialty covers that are made for this, prior to that, we used cling wrap
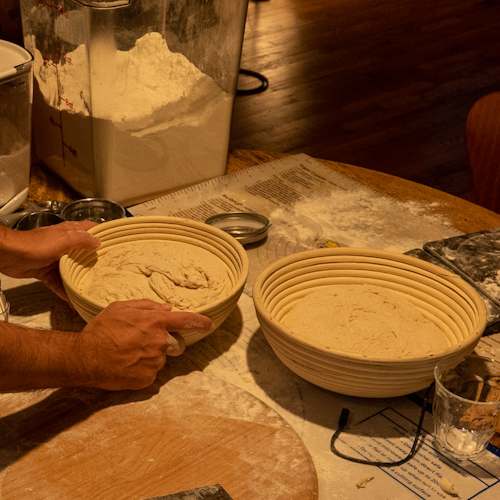
Let the boules proof in the fridge
Readying the bannetons
Flip the first boule
Shaggy side up
Flip the second boule
Ready for proofing
Scoring
The purpose of scoring is to split the top of the boule to enable a strong rise in the oven. Some people take this to an artistic extreme, but I tend to be a little more utilitarian. It is worth investing in a lame. Before I had one, I tried to score the boules with a knife, and the results were disappointing.
PLEASE NOTE: for the next two steps, you are going to be dealing with an extremely hot oven, and two extremely hot dutch ovens. You need to have proper hand protection. I use silicone gloves.
Place the two dutch ovens, lids on, near the bottom of your oven
Pre-heat to 500 F for at least 30 minutes
Take the first dutch oven out and remove the lid
Quickly invert the first boule onto a lightly floured cutting board or pizza peel
Use your lame to score the boule
Carefully lift the boule and place it into the dutch oven (remember, it is 500 F, you will burn yourself badly if you touch it with bare hands or fingers)
Place the lid on the dutch oven and return it to the oven
Repeat with the second boule
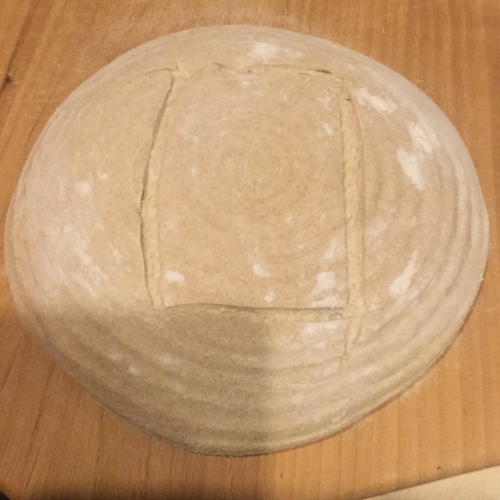
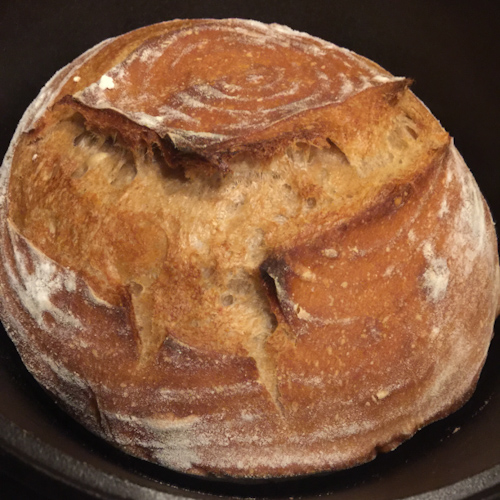
Scoring with a square pattern
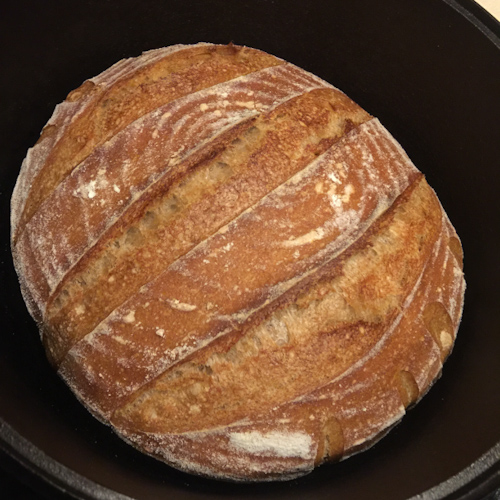
Scoring with a stripe pattern
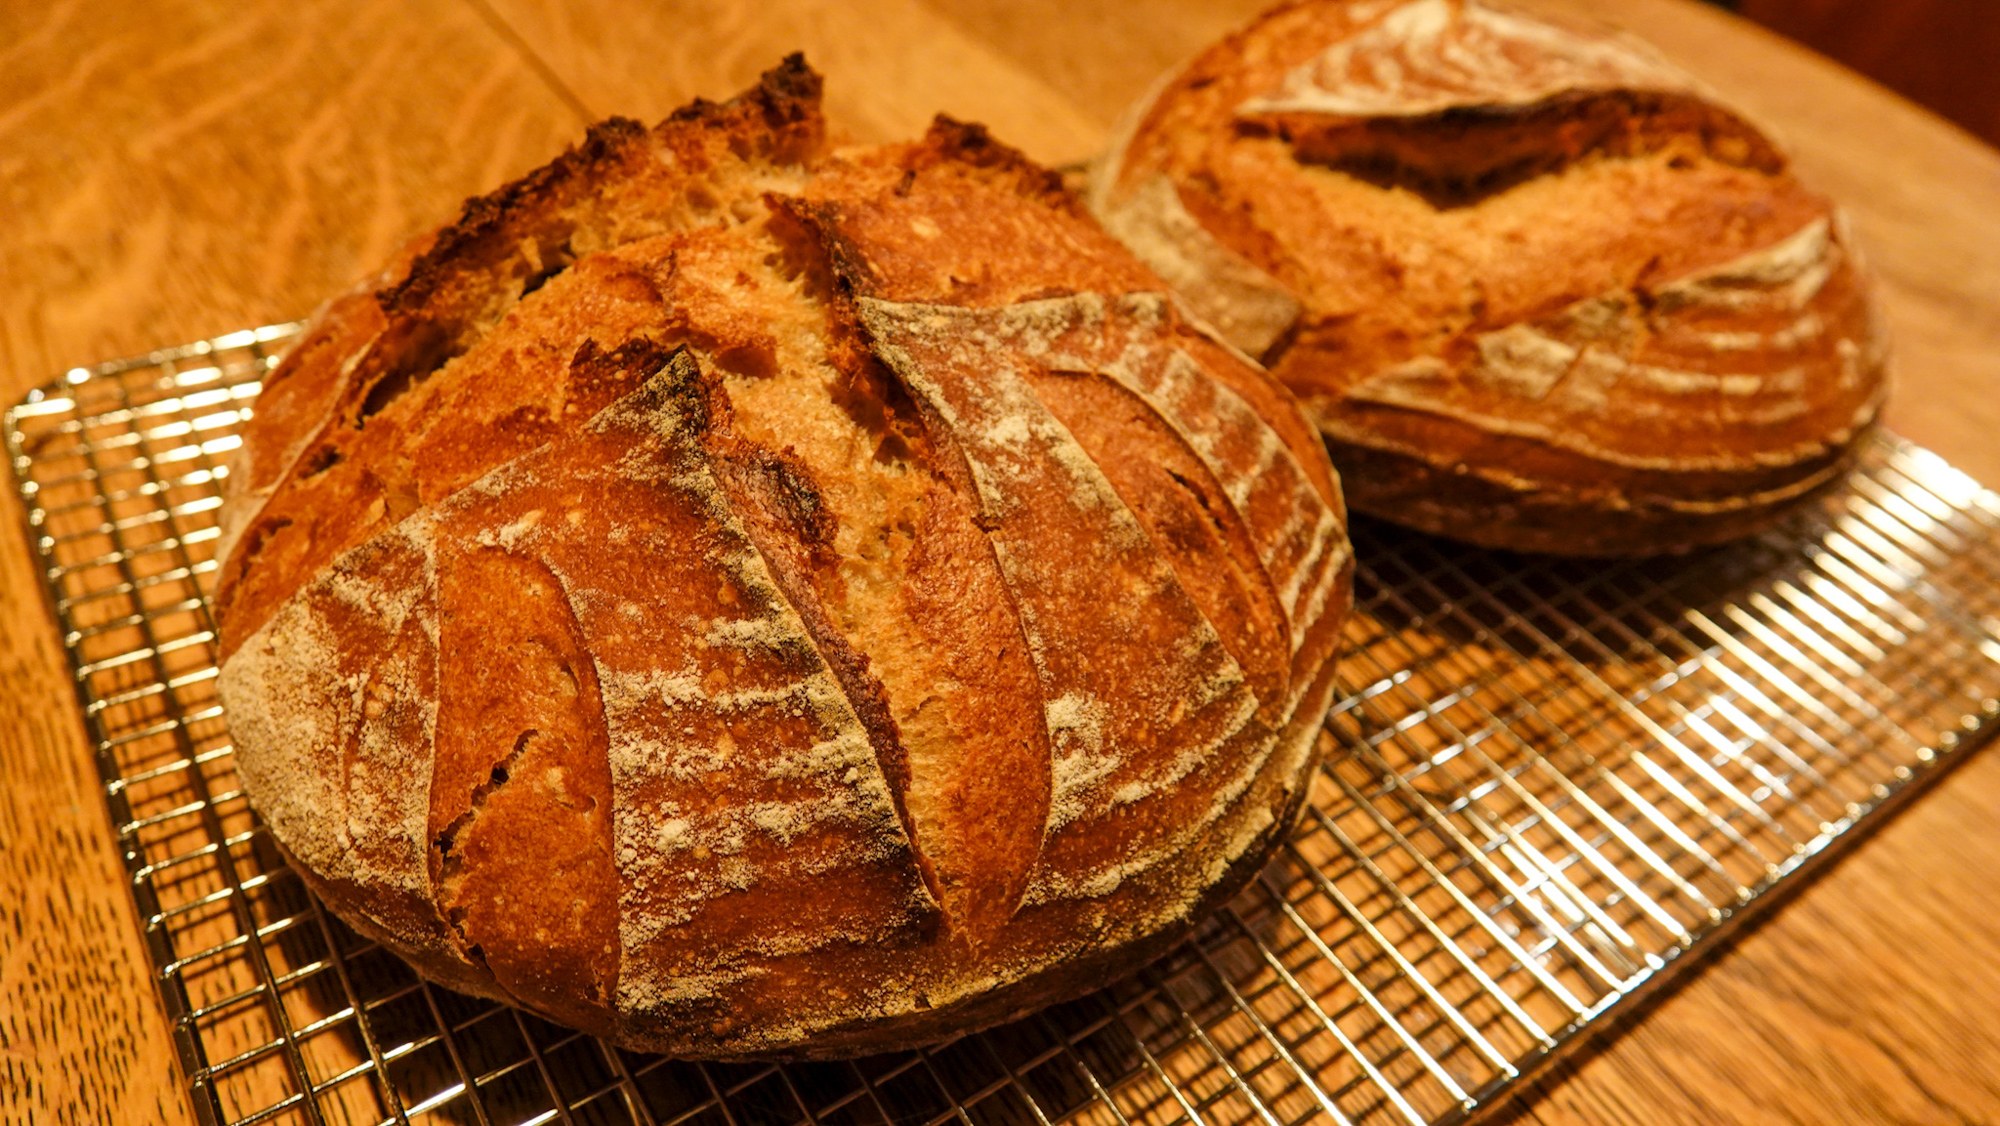
Baking
The purpose of baking in the dutch ovens with the lids on for the first part of the bake is to replicate the dose of steam that the boules would get in a commercial oven. The second part of the bake is with the lids off, to finish and caramelize the crust. Part of the fun of this method is the element of surprise when you take the lids off. That’s the moment you see how much oven spring you got, what kind of ‘ears’ you have developed and so on.
Bake at 500 F for 20 minutes with the lids on
Reduce temperature to 450 F and bake for a further 10 minutes
Remove the lids, and bake for a further 20 minutes, until crust is deeply caramelized
The square pattern baked
The striped pattern baked
Cooling
This is also an essential part of the process. Of course, you will be tempted to tear into the bread as soon as it is cool enough to handle. And you should try that at least once. Grab a big piece and just slather some butter on it. It’s amazing! But it’s not really done yet. The crust hasn’t finished hardening. And the crumb is soft and custardy. In fact, it will be a bit difficult to cut the bread into a well-formed slice at this point. Wait at least an hour. Better yet, if you are doing a night bake—which is my current preference—let it cool overnight. It will be perfect in the morning.
Carefully turn each boule out onto a wire cooling rack and let cool at least an hour
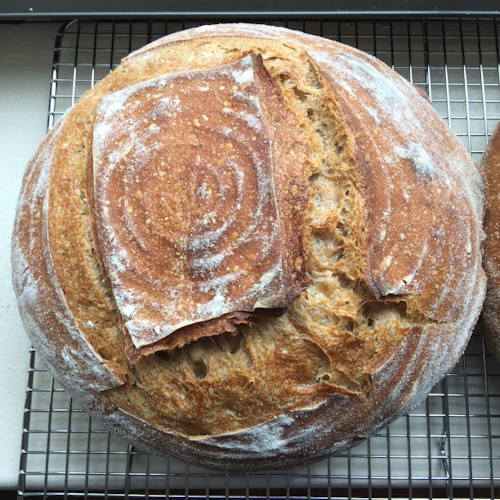
Square pattern cooling
Stripe pattern cooling
Some thoughts on this bread
If you are not familiar with this style of bread, it may cause you to rethink some of your bread assumptions. First off, the notion of ‘freshness’ and avoiding ‘day old’ bread. This bread actually keeps getting better and better. The flavor continues to develop and starts to peak after about the third day. We were at a book event with Appolonia Poilâne from the famous French bakery, and she told a story of a vacation with friends. She had brought one of Poilâne’s famous miche breads, and she and her friends ate that one bread for over 12 days, using it in ways best suited to its characteristics on each subsequent day.
There’s just two of us, and this is a substantial amount of bread. We will usually eat the first boule over about three days. At that point, we will slice up the second boule and pop it into a one gallon freezer bag and freeze it. That will usually keep us going for another few days.
Because of COVID-19, people around the world are sheltering in place. Here in NYC, most people are hunkered down, and that includes us. We are only venturing outside for essentials, and to go for an occasional run or cautious birding trip to Central Park. Otherwise, we are at home cooking up a storm!
We’re thrilled to see so many people take up breadmaking during this time, and sourdough bread making in particular. As we mentioned last week in our post on easy sourdough kimchi pancakes, the sourdough starter process can generate a good deal of discarded starter (read, discarded flour) and now that feels more wasteful than ever.
But there are things that you can make with starter that you would otherwise be tossing. The pancakes are one favorite of ours, and these sourdough crackers are another. The pancakes are dead simple to make, these are maybe a little trickier, but by no means as difficult as making a good quality sourdough boule.
We started out with the King Arthur Flour sourdough cracker recipe and have been riffing on it ever since. It’s a simple recipe at heart. Make a dough with equal parts spent sourdough starter (100% hydration, which means 50/50 flour and water) and unbleached all purpose flour, plus ¼ part butter. Season it however you like it. Roll it out thin. Top it how you like it. Cut into cracker shapes, bake it, and there you go!
Ingredients
For the dough
1 cup sourdough starter (100% hydration)
1 cup unbleached all-purpose flour
¼ cup melted butter, cooled
½ tsp salt
2 tbsp grated parmesan (or dried herbs, or combination)
For the topping
Kosher salt
Paprika
Grated parmesan
Get creative!
Directions
The sourdough starter should be unfed, let’s say 24 hours or maybe a bit longer. Not what you would use to make bread, we want it to have a pronounced tang. (A 100% white flour starter, combined with white flour will make the most addictive, quasi-junkfood version of these crackers. I usually do one batch with our 100% white, and one batch with our 50/50.) Combine the dough ingredients in a bowl until it comes together. You don’t need to overwork it, you’re not making bread. Split in half. Wrap each half in cling wrap, and store in the fridge for at least 30 minutes. This step is crucial, just like you are making pasta dough. If you try to skip it, you will be very unhappy!
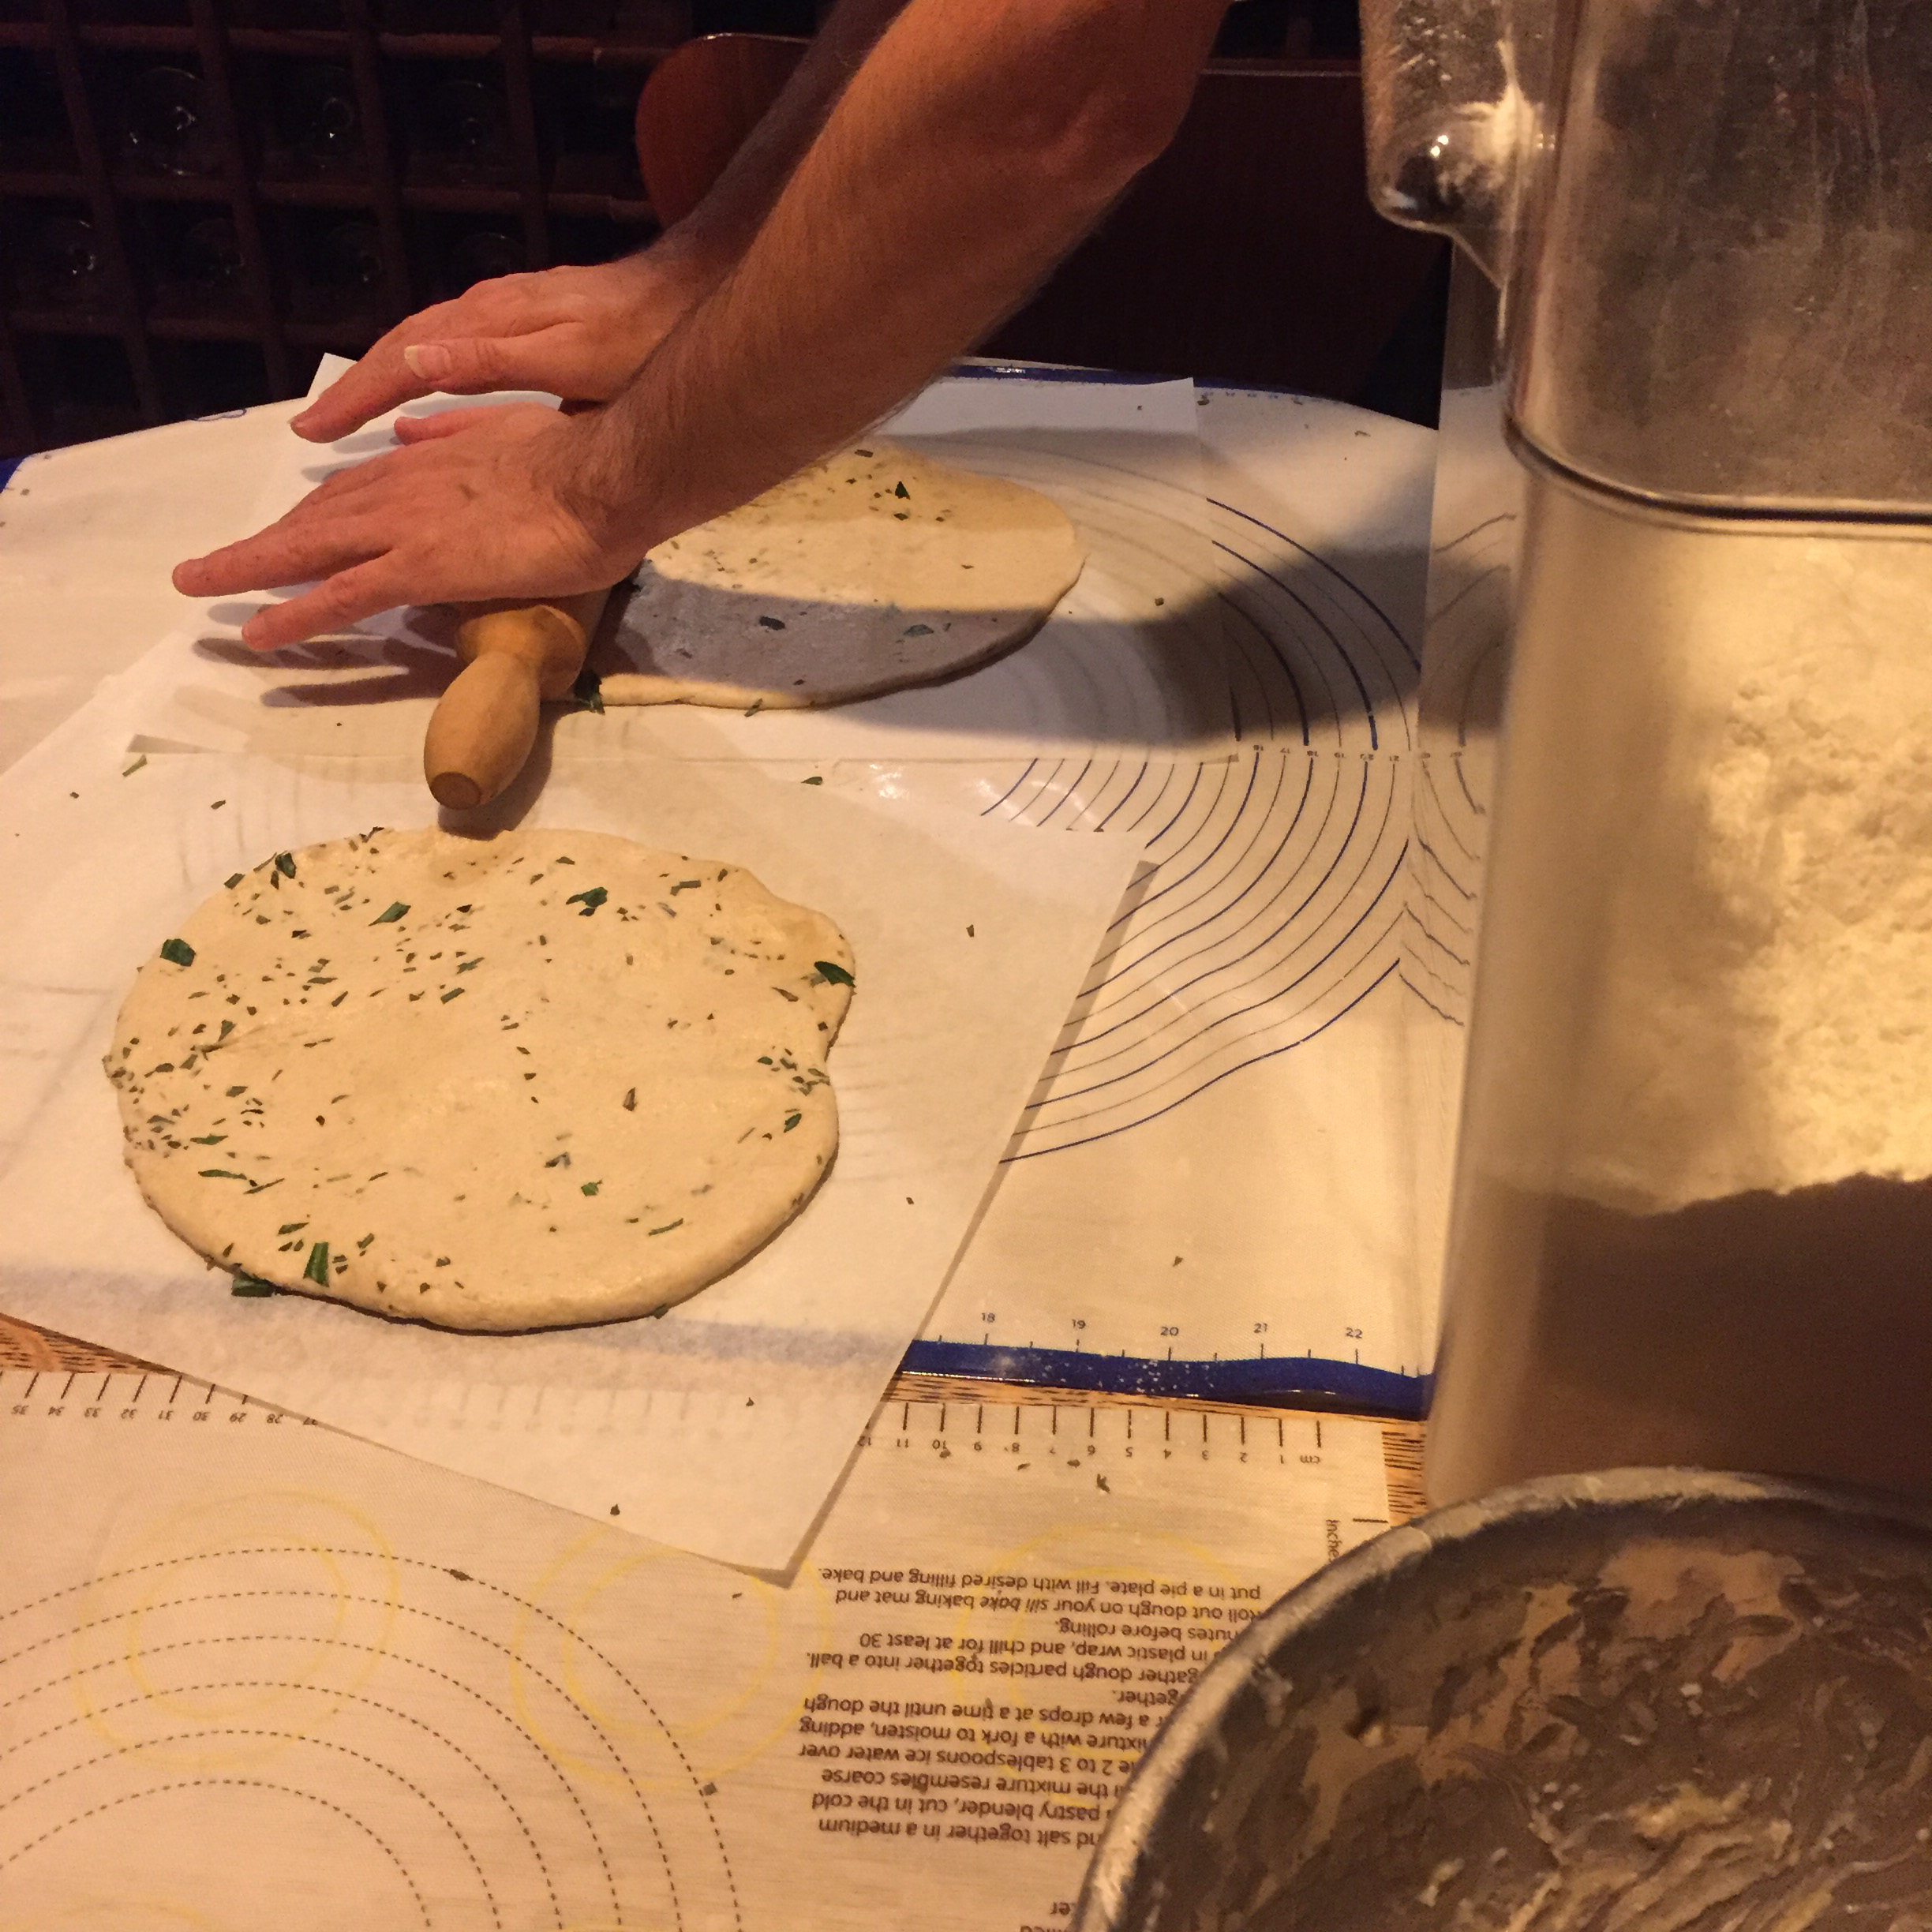
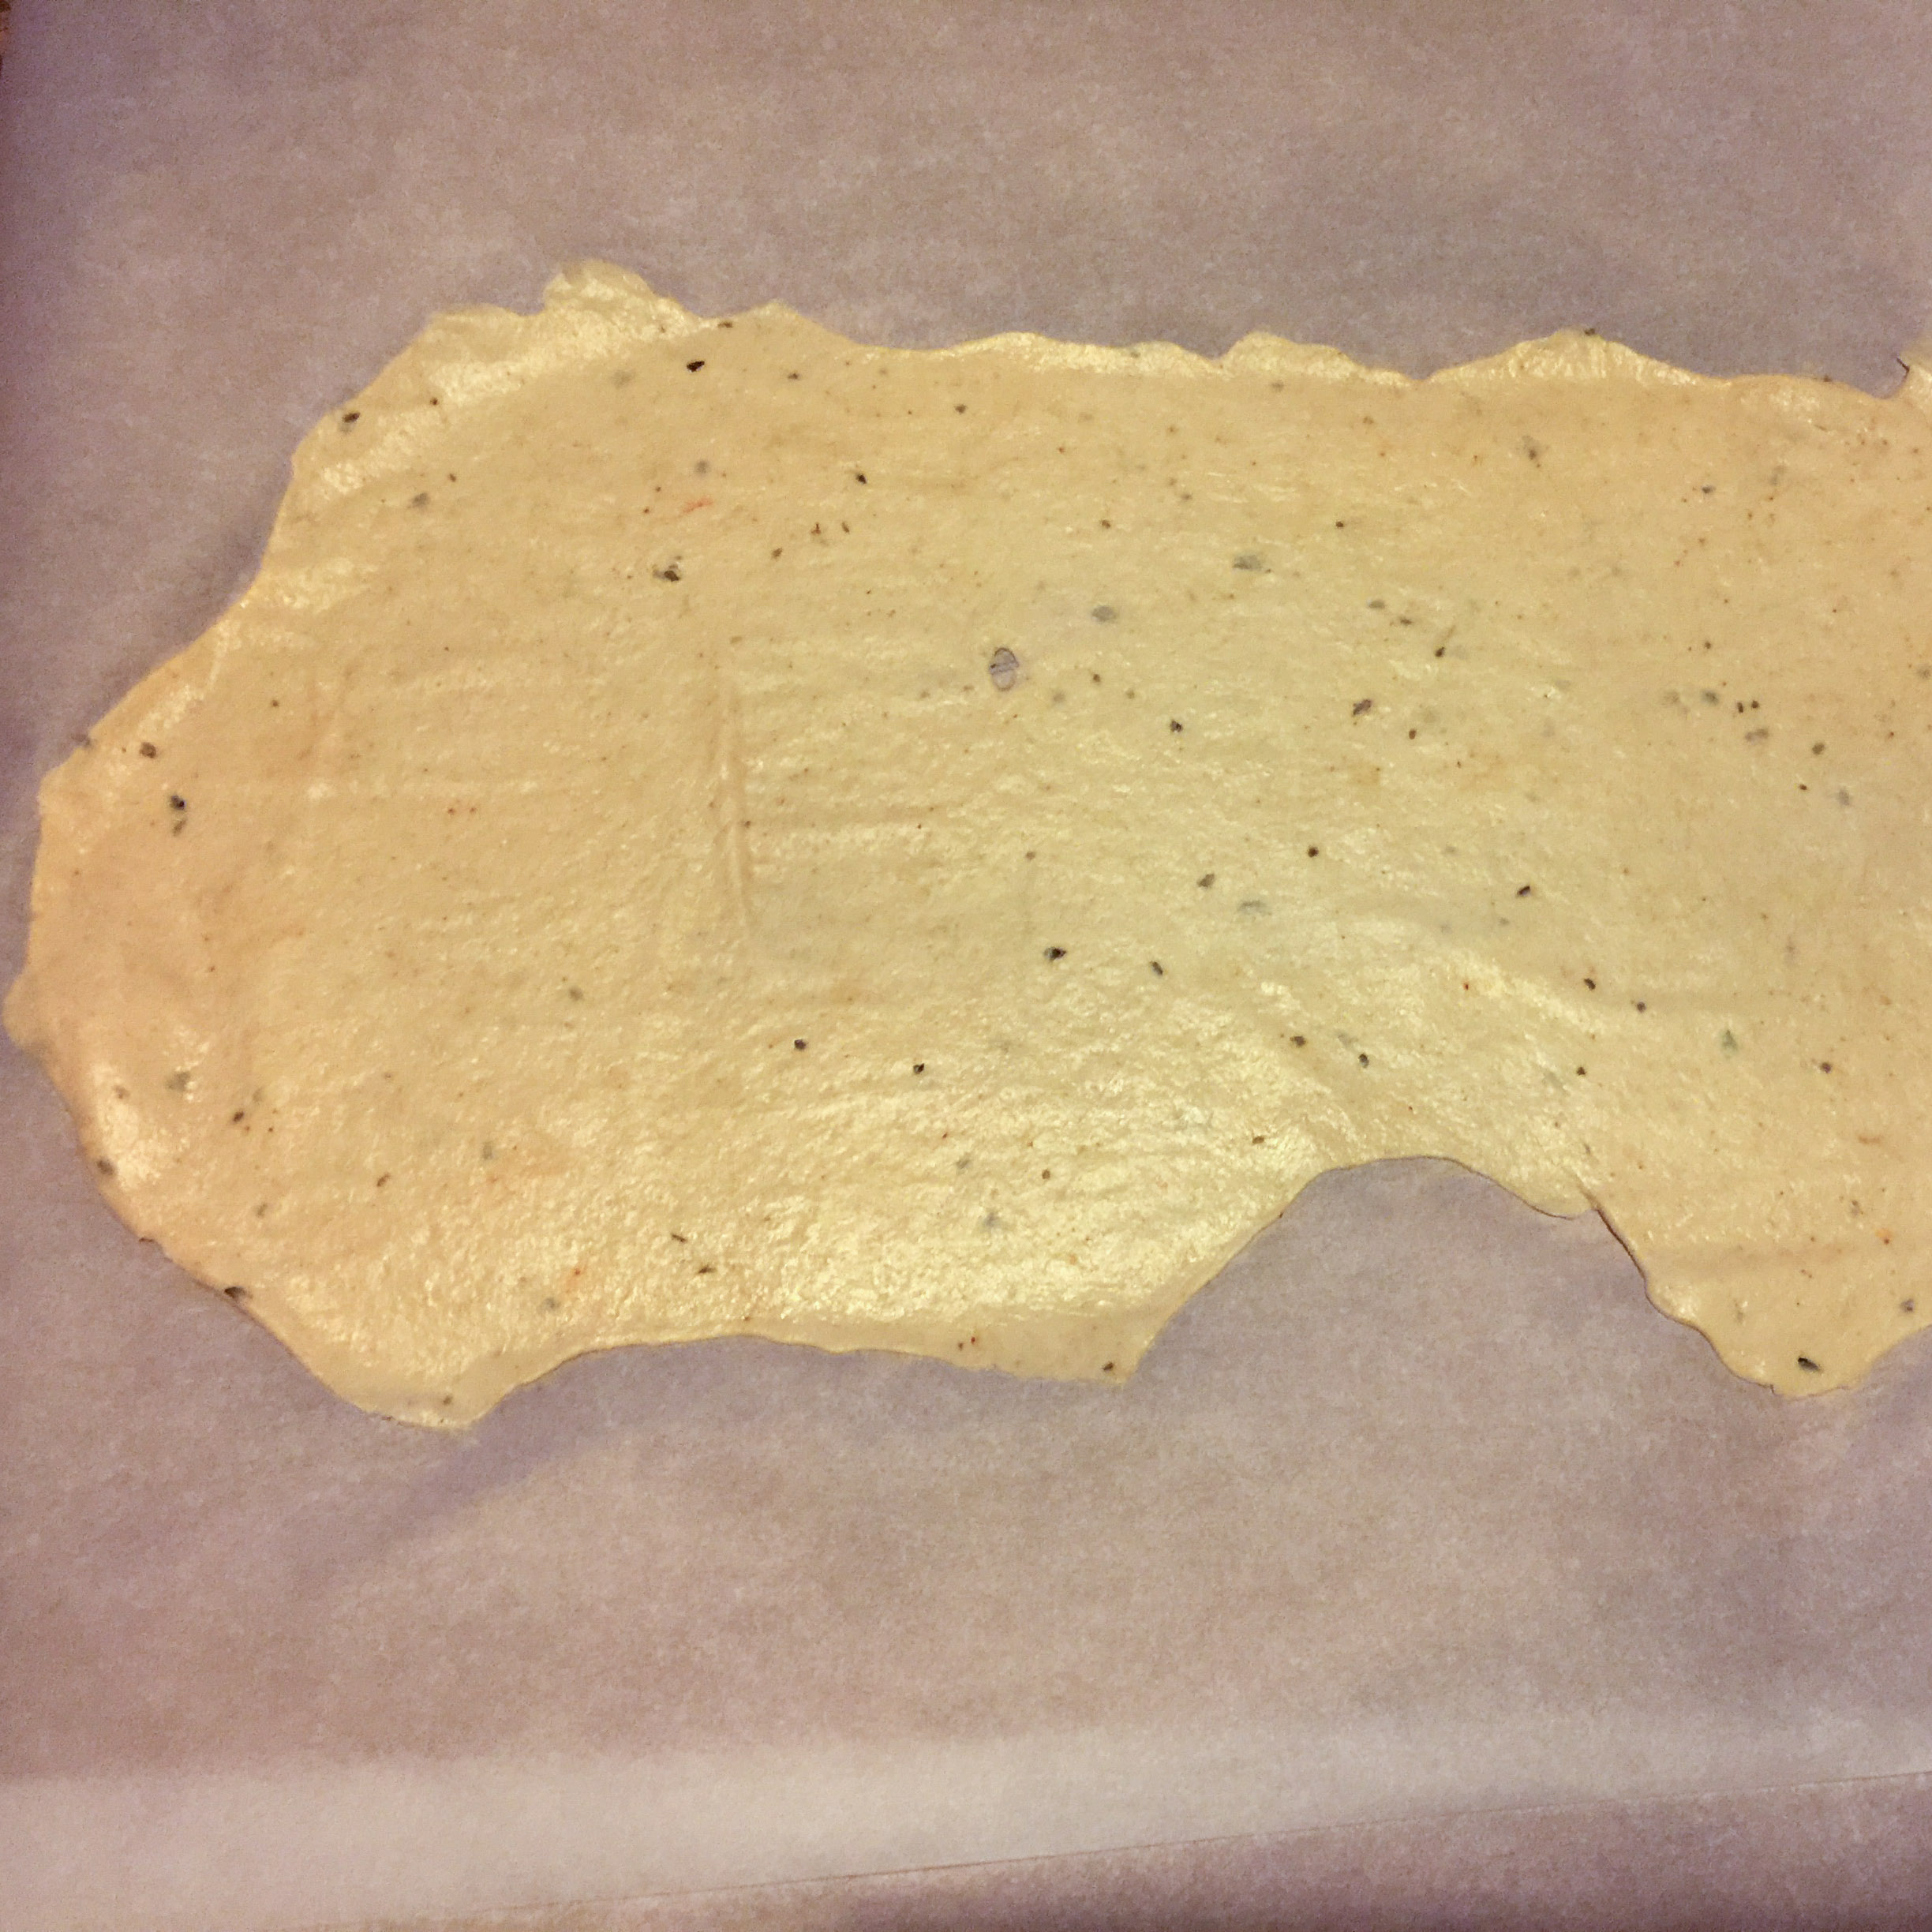
Rolling out the dough
Roll it out nice and thin
Prepare two parchment papers to fit two ½ sheet pans. Take one of the doughs and roll it out onto the parchment paper. You have some leeway with the thickness. If you make it really thin, you will get a nice crisp cracker. The most important thing is to make the thickness consistent, or else you will have an uneven bake.
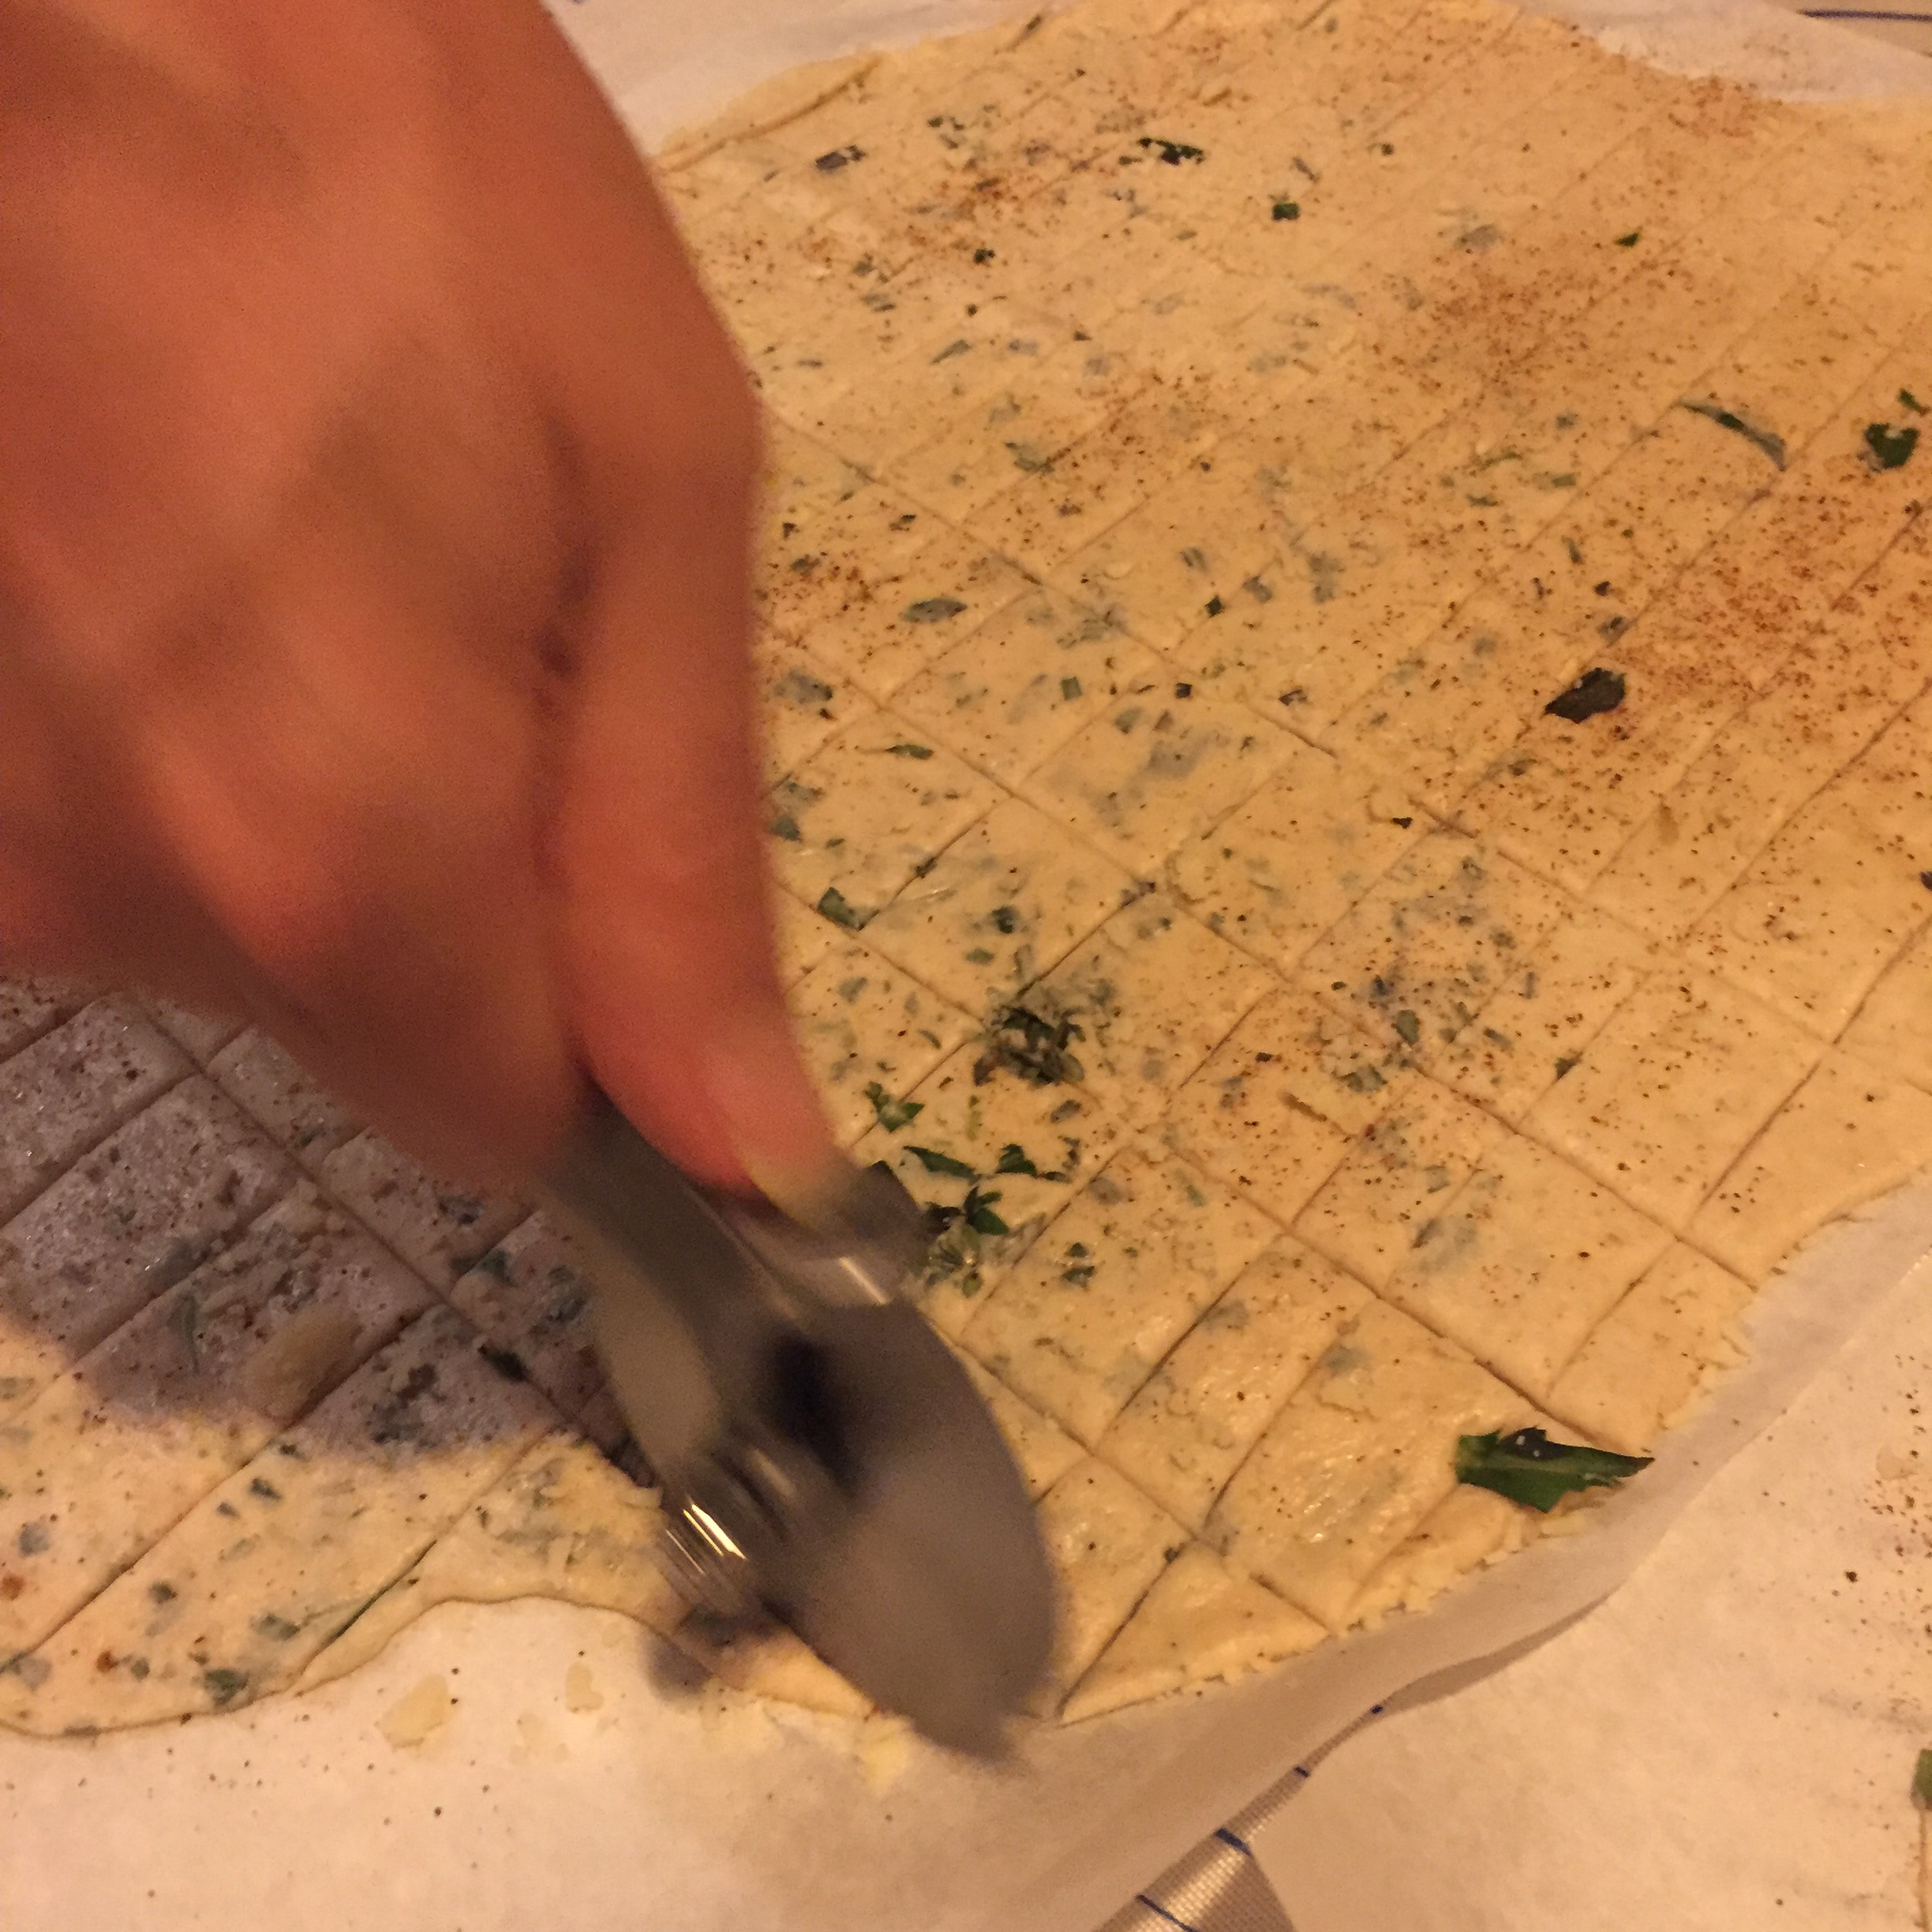
Before you cut the dough, go over it lightly with the tines of a fork to create dimples. Add your toppings. Salt, paprika (I use smoked hot) and parmesan. Now, you can use a pizza cutter to make into cracker shapes. I usually go the long way first, then across the width. They do not need to completely separate now, they will do that during and after the bake. Once that’s done, lift the parchment paper into the sheet pan. Now you can repeat the process with the second dough and a second sheet pan.
Cutting the crackers
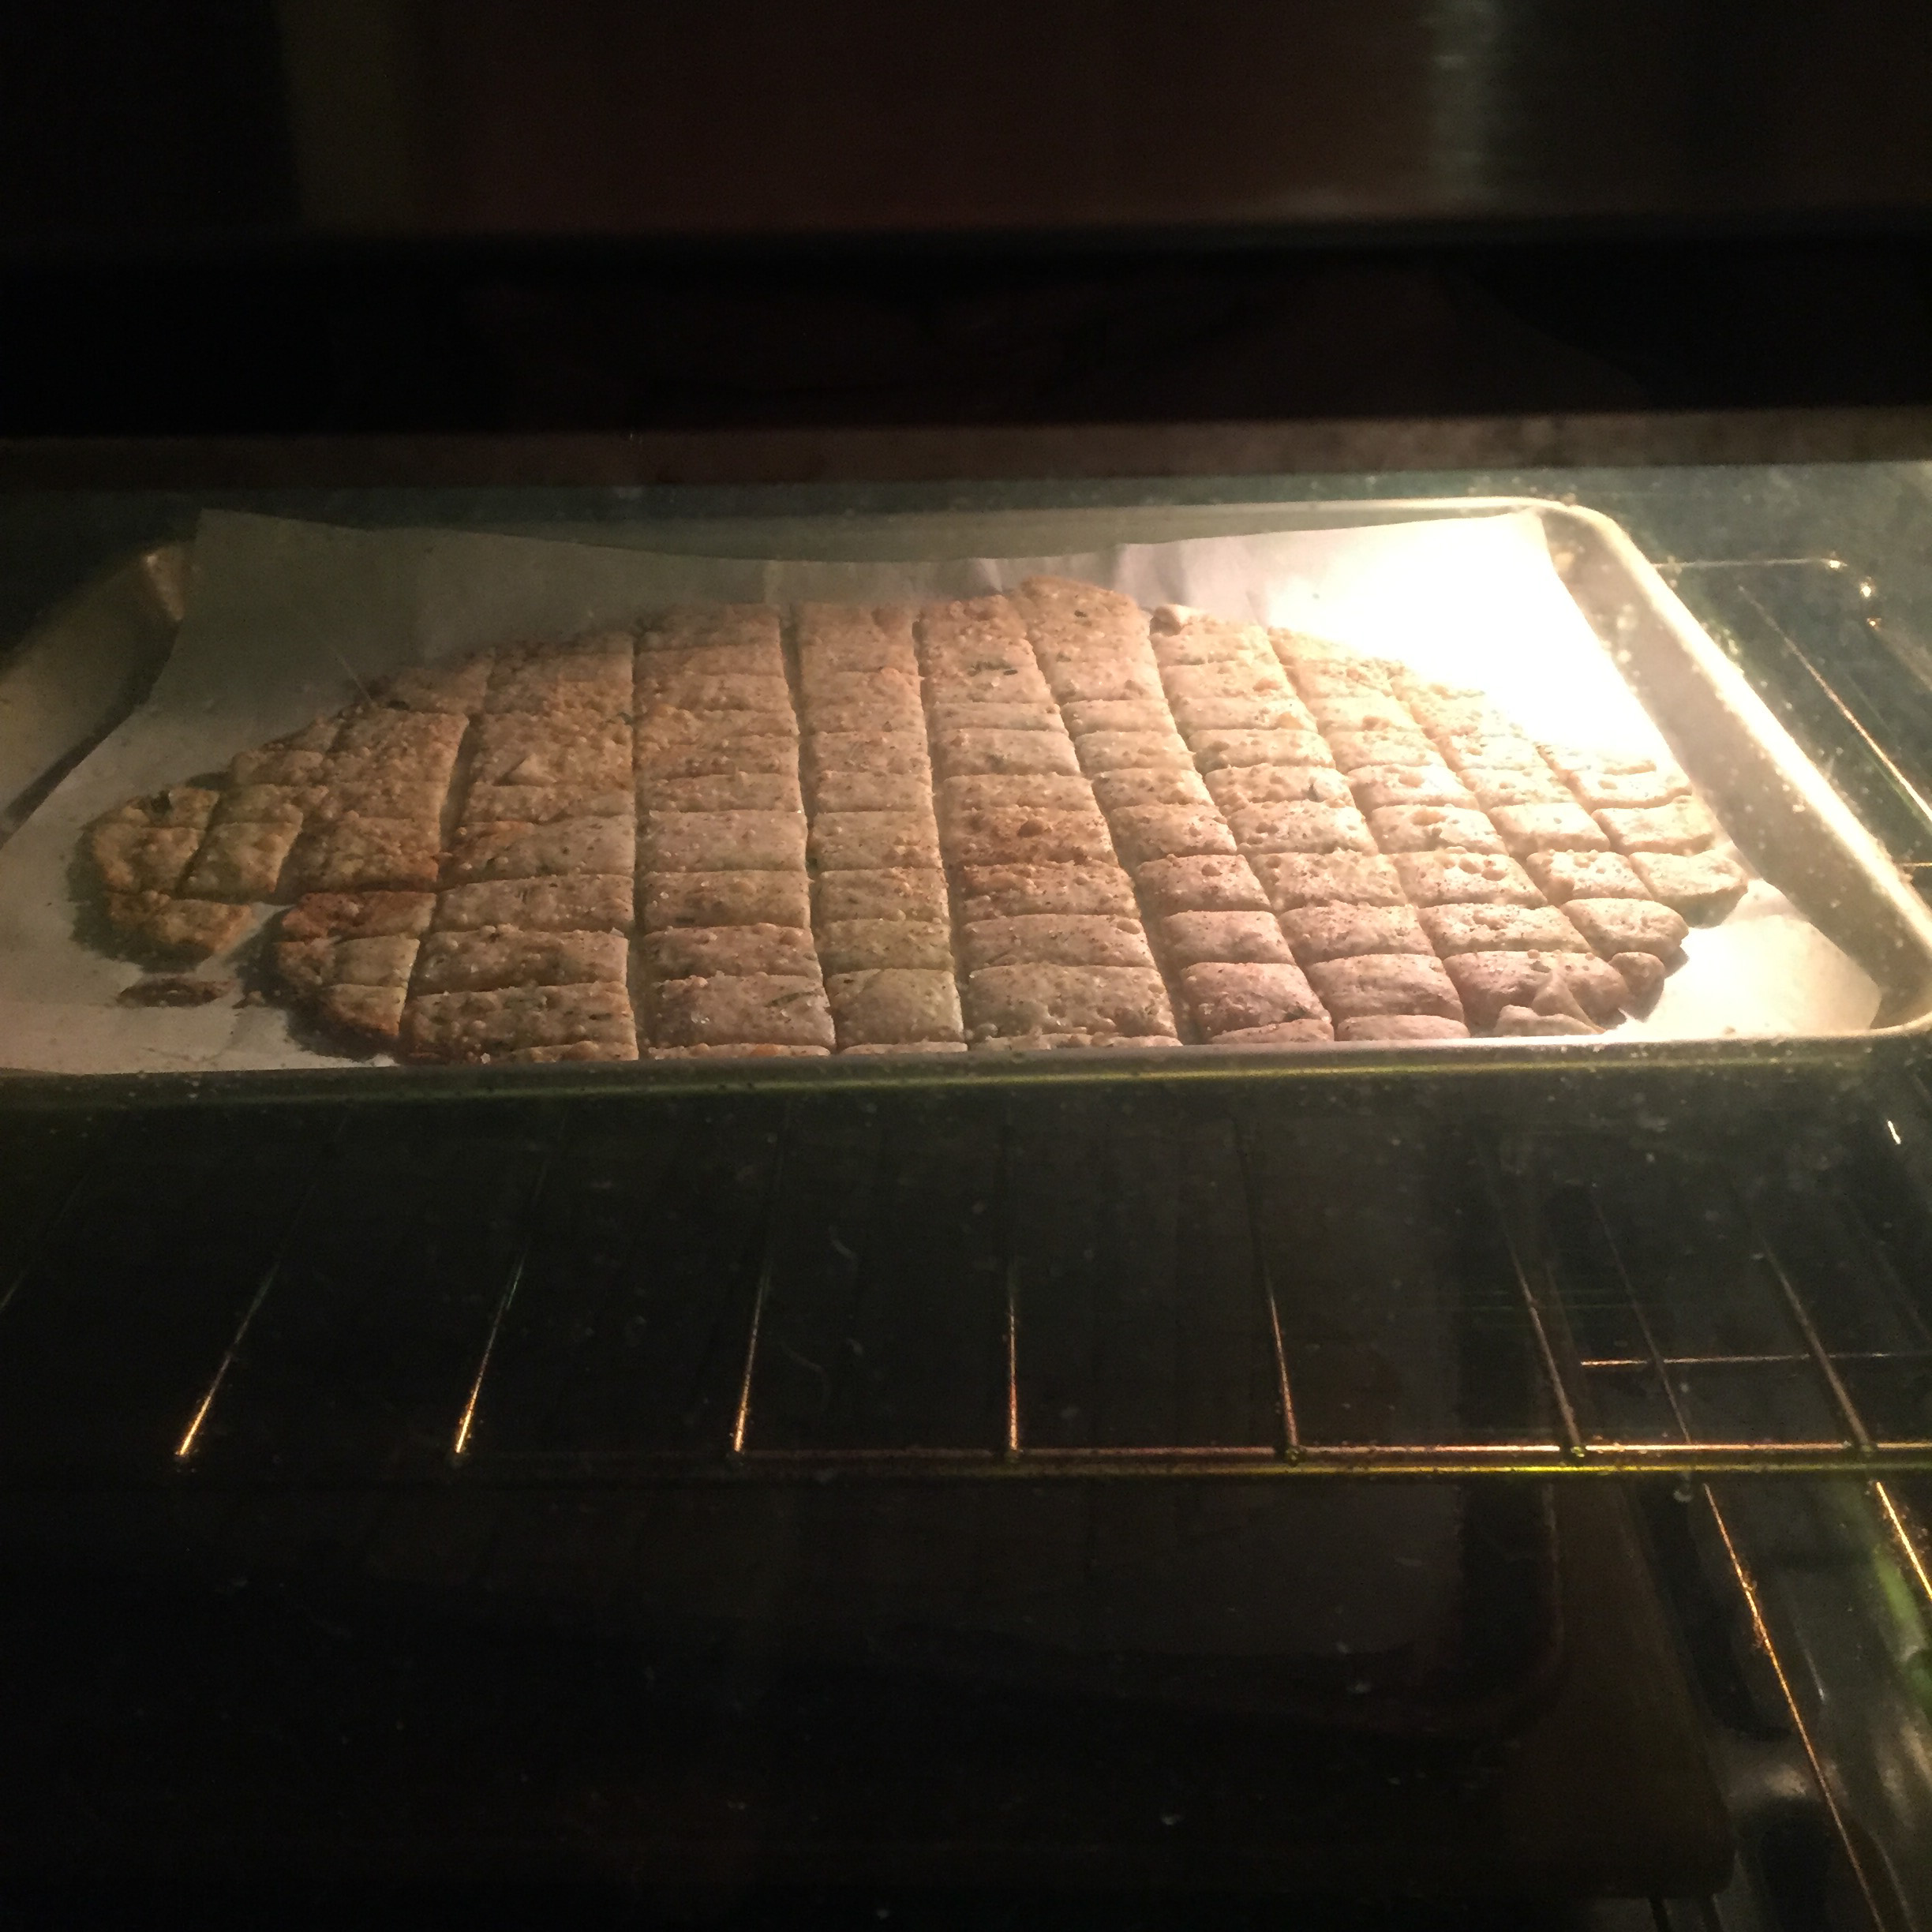
The bake
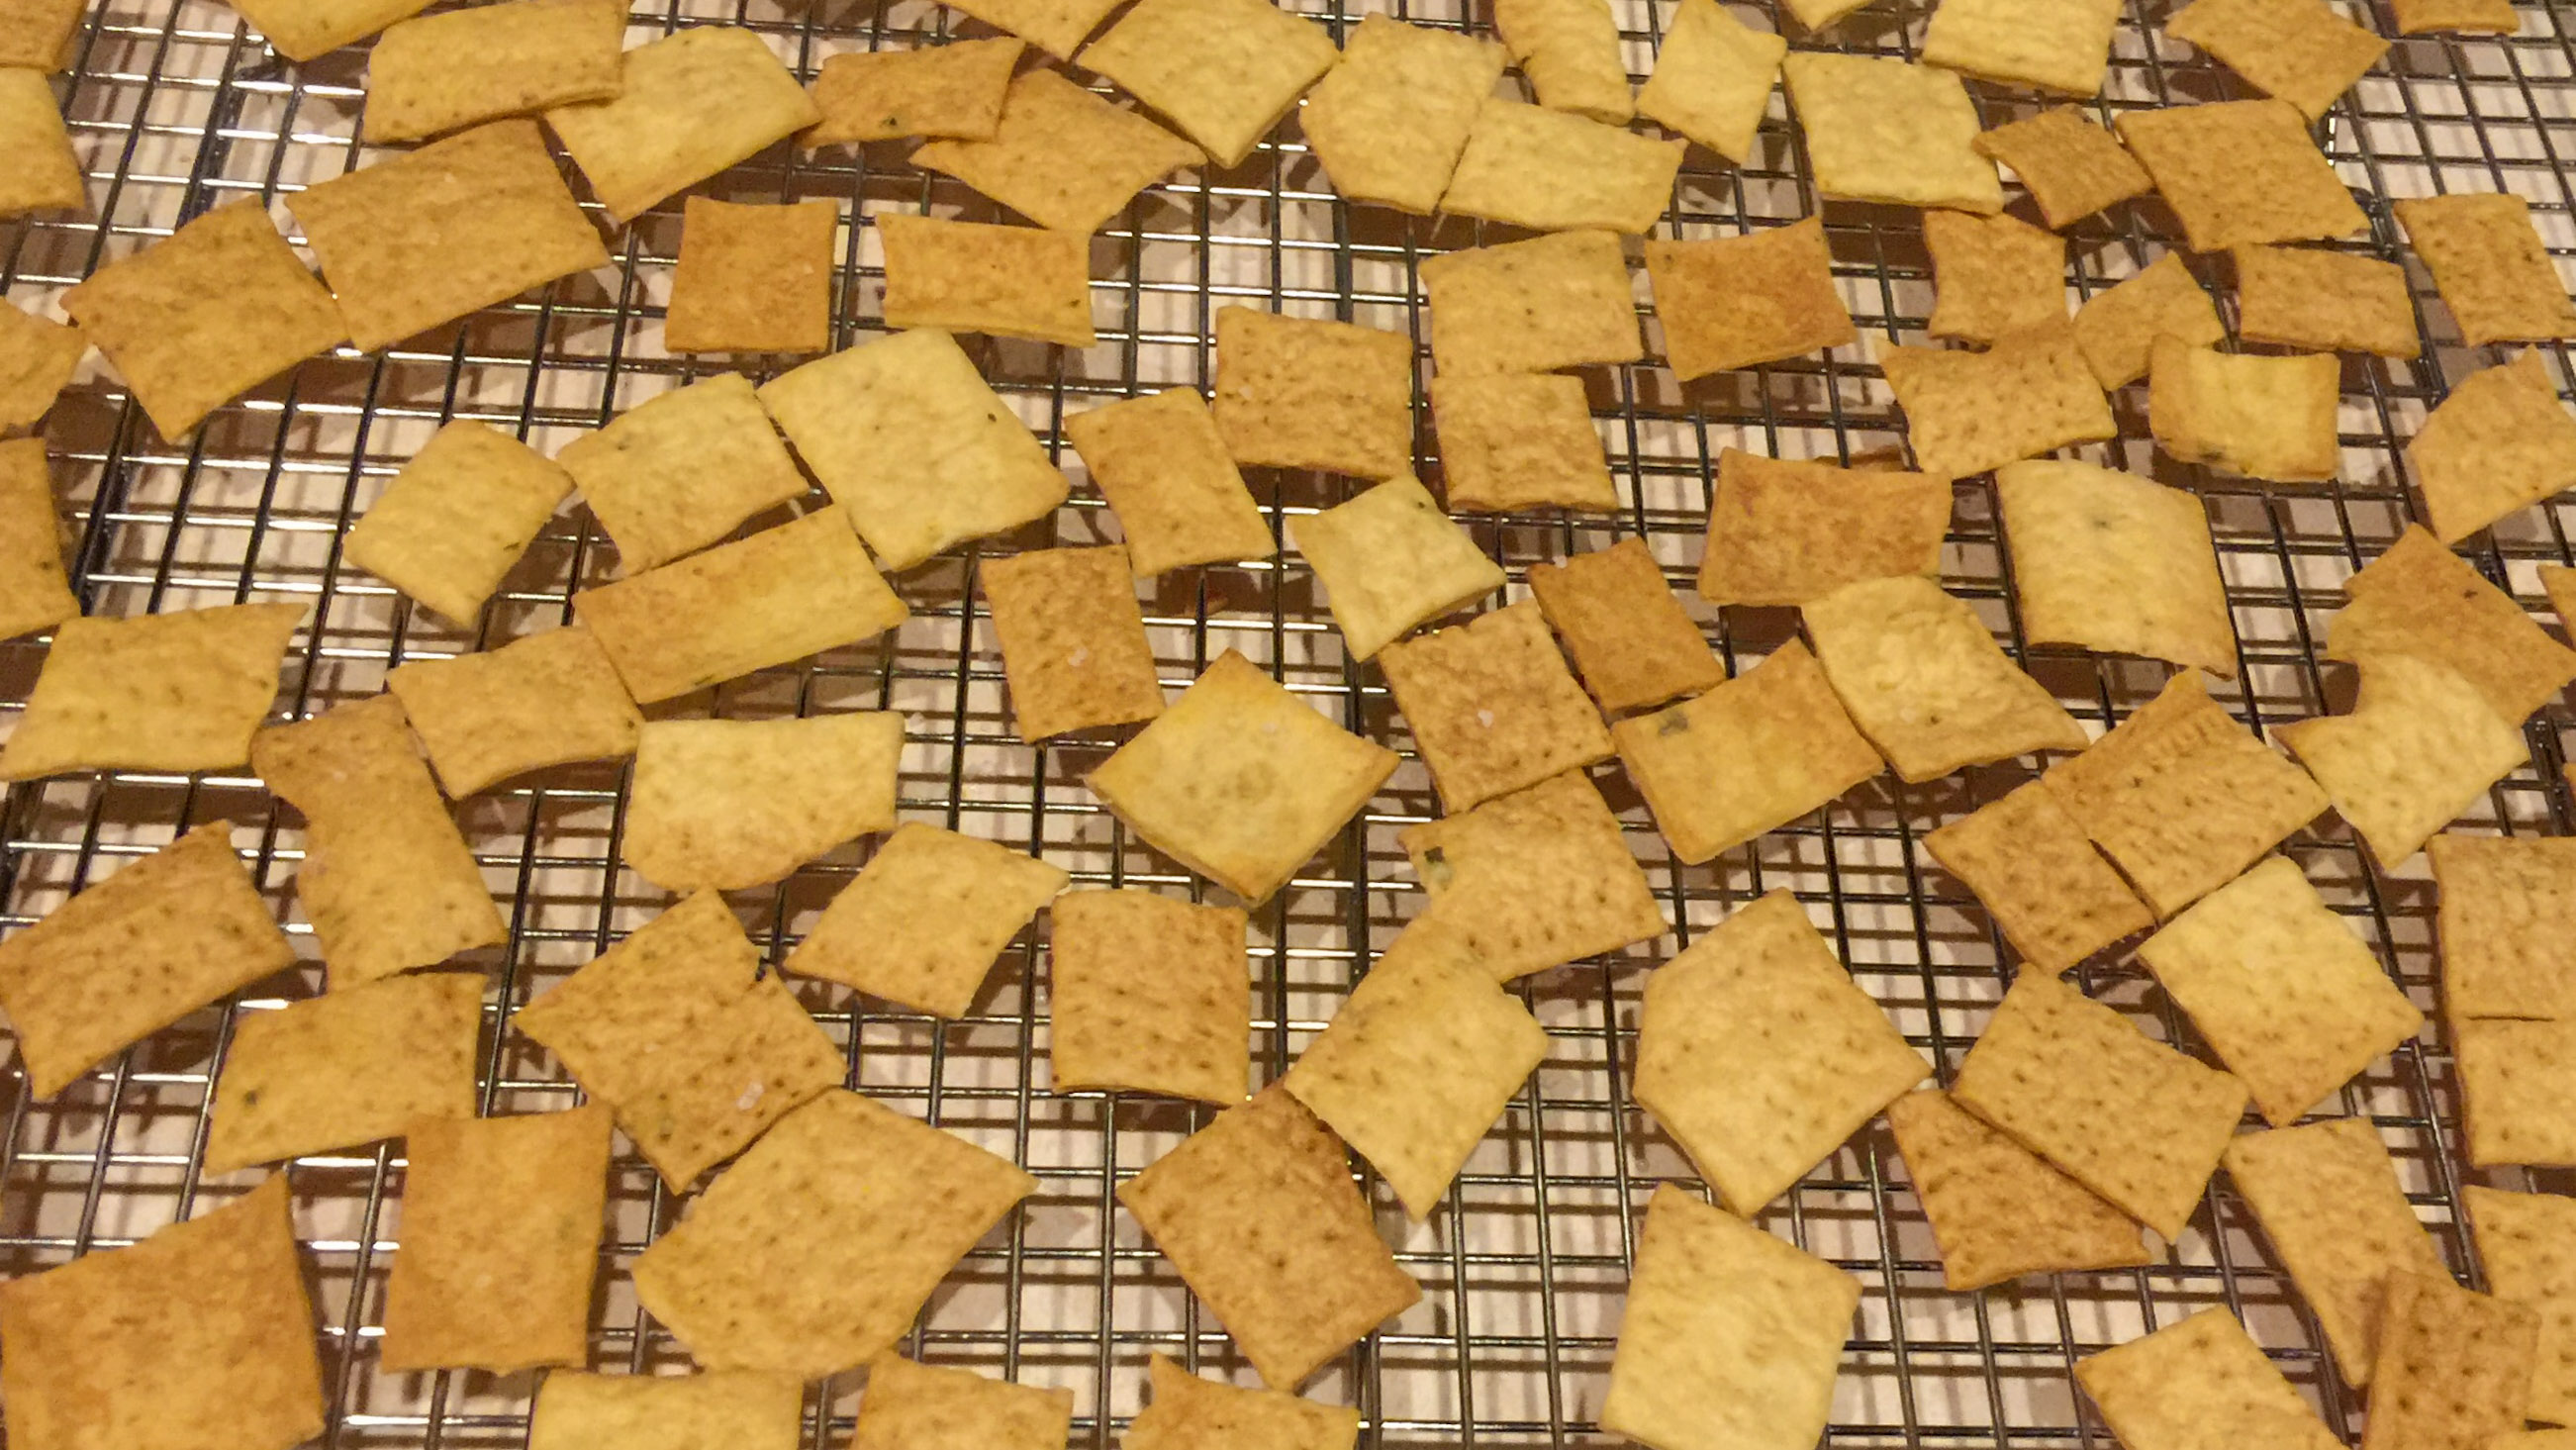
For the bake, you can do both pans at once. 350 F for about 20 minutes. Turn and swap the pans midway through. This is the really tricky part. Depending on how evenly you rolled out the dough, the edges may get to done before the middles. Do lots of testing, often. Under baked, they won’t be satisfyingly crisp. But then they can start to get burnt in an instant. You should probably do the “Great British Baking Show crouch” for the last few minutes.
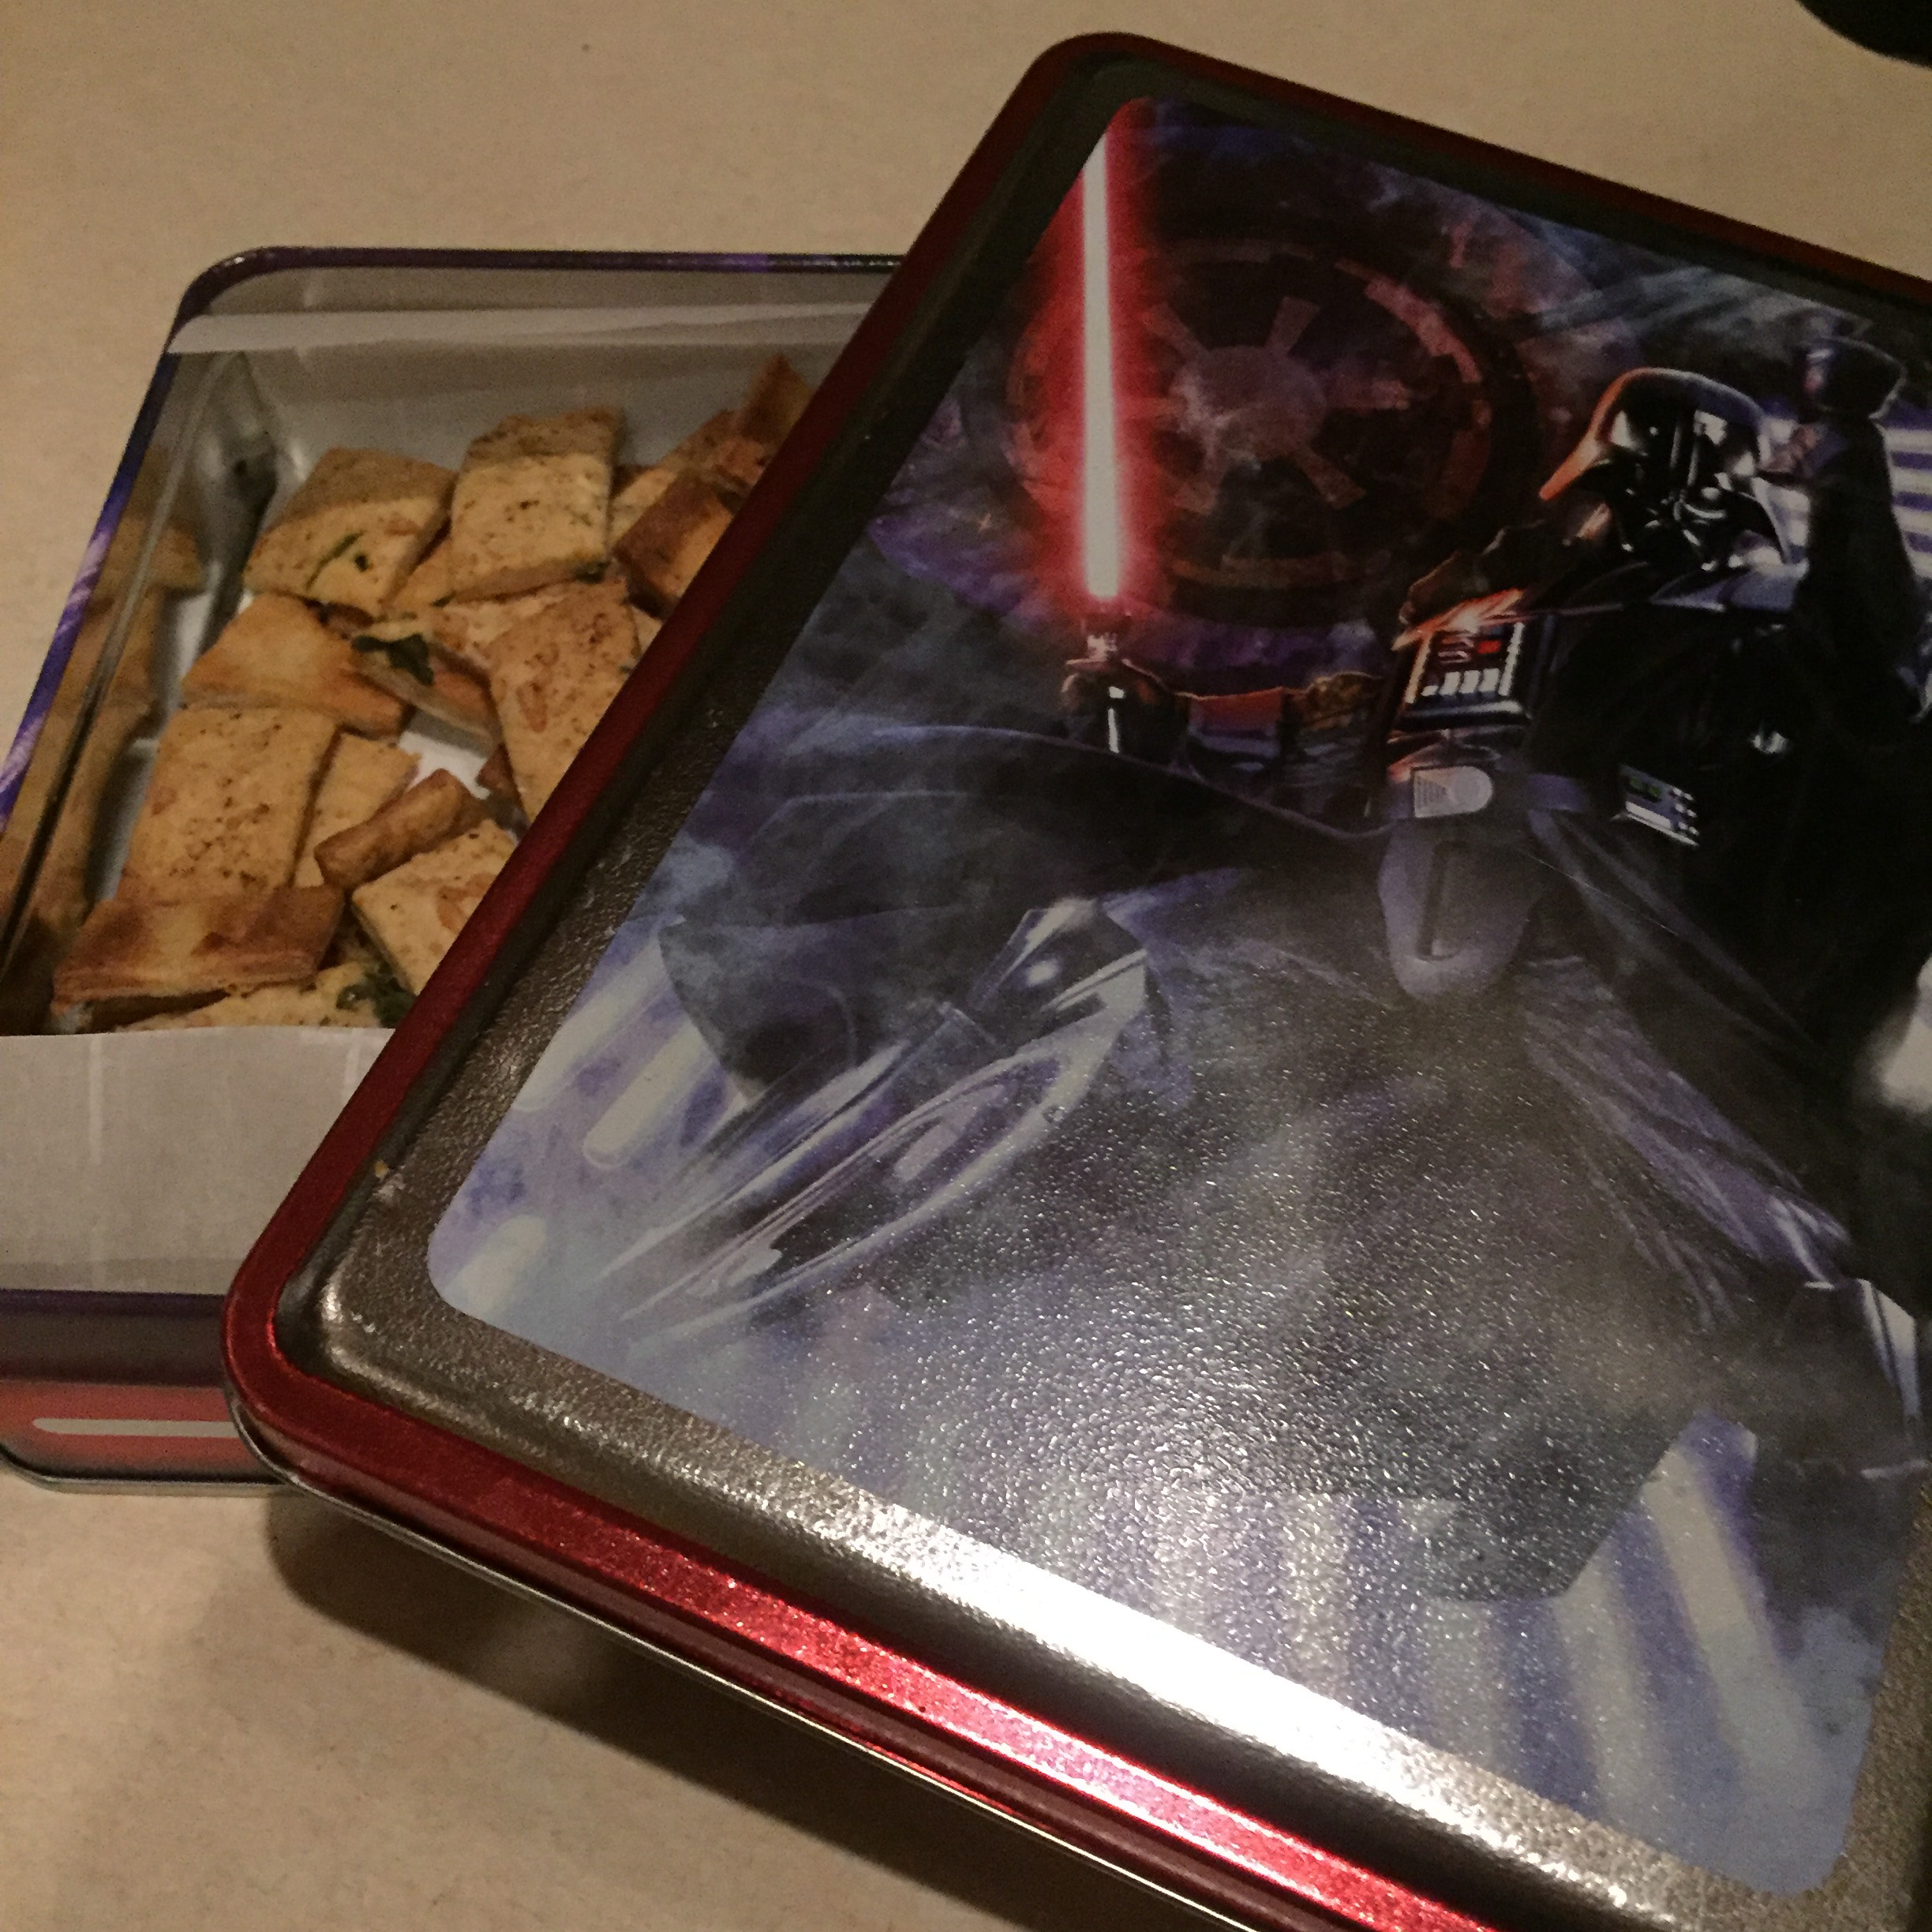
Once they are done, take them out and cool them on a wire rack. You can break apart any crackers that haven’t separated yet. Now you can do some more “quality control,” but remember to leave some for later. They will store in an airtight container for longer than it will take for you to eat them. Our friend Kathy found this Star Wars pencil crayon tin for us at a thrift fair in Queens. That’s where we keep ours!
We absolutely love homemade sourdough bread, and we’ve been making
it for close to four years now. For all that time, we have had two sourdough
starters going. One of our starters is 50/50 whole wheat/white flour, his name
is Charlie Driggs, named for the character played by Jeff Daniels in the 1986
Jonathan Demme film, Something Wild. The other starter is 100% white flour, and
his name is Charlie Watts. Collectively, we call them “The Charlies.”
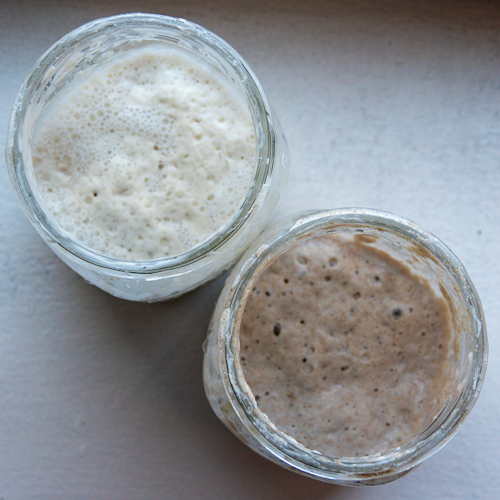
Sourdough starter
To keep the Charlies happy, we need to feed them every day. A
feeding goes like this:
Toss out 80% of the starter, leaving 20% behind
To the remainder, add 100 g of flour
Add 100 g of 87F water
During ordinary maintenance, the Charlies are happy with a
daily feeding. But when I’m getting ready to do a bake, I will do the last
couple of feedings closer together, for example, every 12 or even 8 hours. This
leaves a conundrum, what to do with all the discarded starter? Just tossing it
out seems like a waste.
Well, it turns out that there are a few great things you can
make with the starter that you would otherwise be tossing. We have made
sourdough crackers, which are amazing, and sourdough tortillas. But today, we’re
doing our favorite recipe, which is also the simplest: sourdough kimchi
pancakes.
The beauty of it is that sourdough starter is, on its own,
already pretty close to a perfect pancake batter. I have made all sorts of sourdough
pancakes, both savory and sweet, and found that a minimalist treatment works
just fine. Some olive oil, an egg (or no egg for a vegan version that works out
fine), a pinch of salt (unless adding other savory ingredients, like kimchi), a
pinch of sugar (also optional). I’ve made them with and without baking powder,
and usually leave it out.
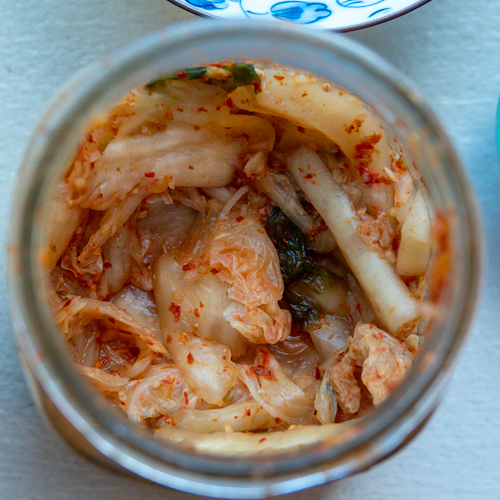
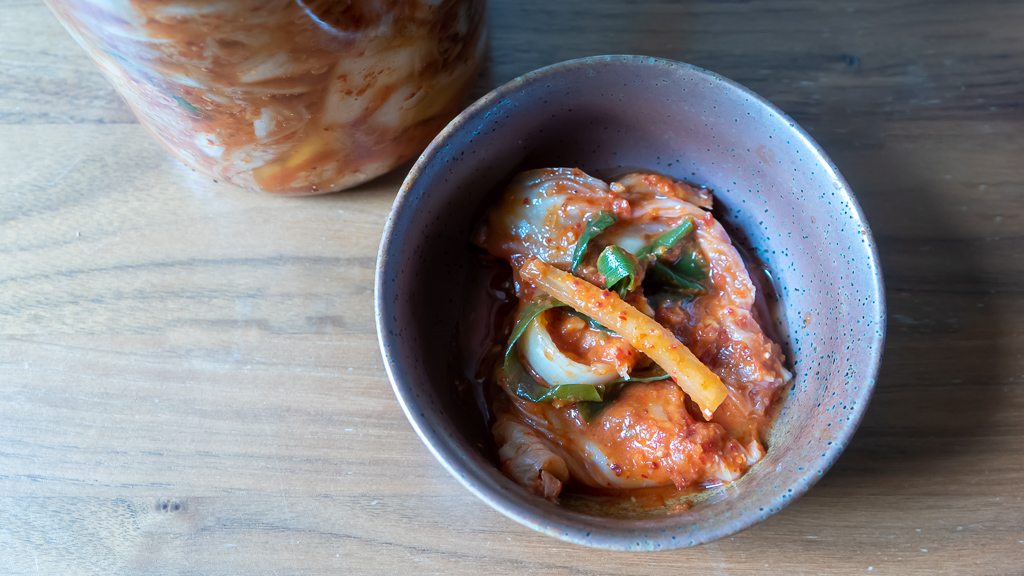
Nora’s vegan kimchi
Since we always have some of Nora’s vegan kimchi on hand, kimchi pancakes are a weekend favorite. I can get these whipped up in under thirty minutes. I usually make the first two for Nora, then two for me, and then Nora is usually kind enough to make the last two while I eat my first two. It’s teamwork! I like mine with a side of homemade fermented hot sauce and some soy sauce. (I’d like to make it clear that these are not going to be an authentic South Korean kimchi pancake. They are delicious, but I doubt they will evoke a taste of home for South Koreans.)
The two Charlies
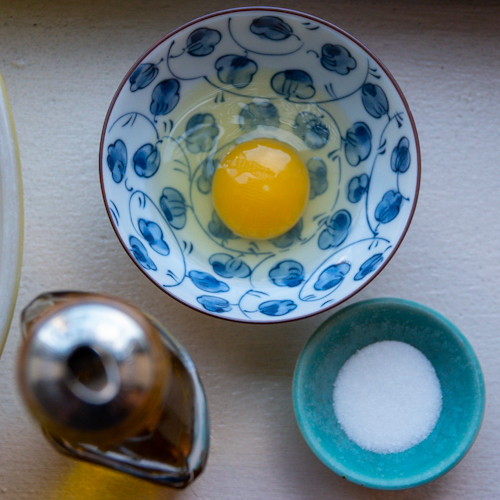
Other ingredients
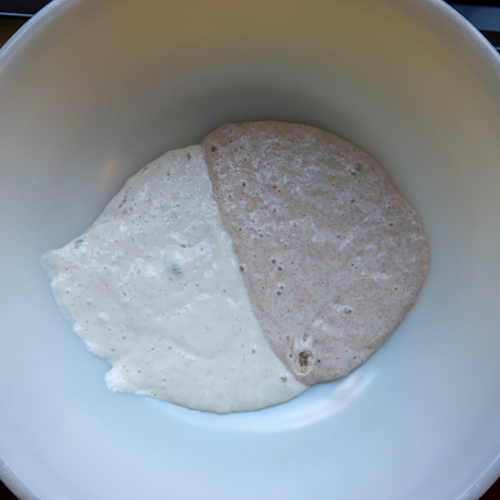
Building the batter
Adding kimchi
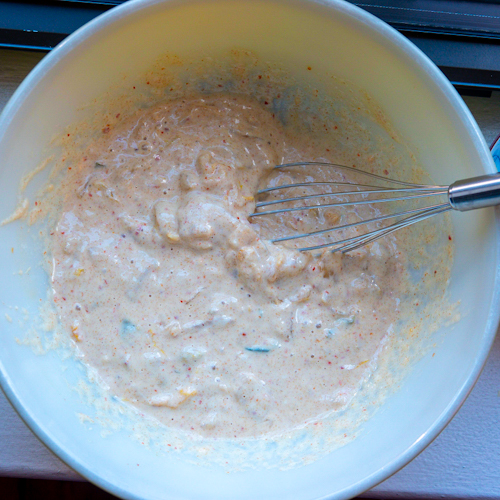
Mixing the batter
Ingredients
190 g white flour sourdough starter
190 g 50/50 whole wheat/white sourdough starter
2 tbsp olive oil
1 egg (optional)
2 tsp sugar (optional)
1 cup kimchi, roughly chopped
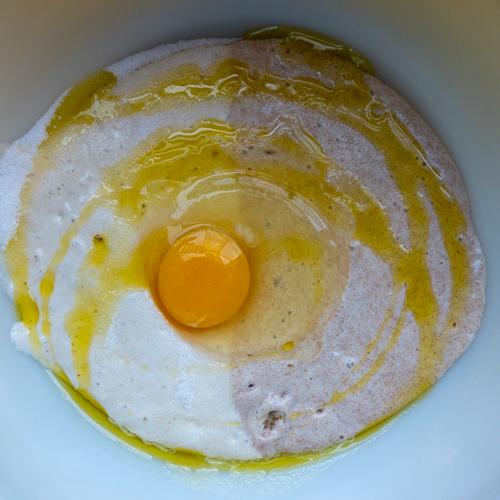
Mix ingredients in your vintage yellow Pyrex bowl. All the usual notes to making pancakes apply: don’t overmix the batter. Make sure your pan is very hot: when water droplets dance across the pan, it’s hot enough. We love our cast iron pan for this. Some olive oil in the pan will make nicely crisp pancakes. Flip when the pancakes are done around the edges, look for the tiny bubbles. This recipe will make six pancakes using 1/3 cup of batter per pancake.
I’m sorry to say the first time I encountered krautfleckerl, I gave it a hard pass.
It was the first night of Chester’s and my first visit to Vienna. We were equal parts excited, tired, and hungry. Our hotel’s concierge recommended a nearby restaurant, but we neglected to tell him that we were looking for vegetarian and pescatarian options. The pickings were slim. The only fully veggie entrée on the menu consisted of pasta sautéed with cabbage and onion. (Yes, that’s our krautfleckerl!) At the time, the dish seemed to me like an afterthought, something a meat-focused chef might toss together from pantry staples to accommodate the rare vegetarian diner who stopped by. I ordered the salmon.
The next day, better rested, we visited the legendary Café Central for lunch. With its vaulted, cathedral ceilings and gleaming glass and gilt cases full of expertly made pastries, it ranked high on our must-see list. The line to get in snaked down the café’s 19th Century stone steps, but we knew it would be worth it.
Finally seated at one of the marble-topped tables, we read through the menu. There it was again: Wiener Krautfleckerl.
The accompanying description wasn’t any more enticing than the one at the last place: “Viennese square noodles with white cabbage and lettuce.” But I realized now this was a classic local dish and decided to give it a try.
It was absolutely delicious.
Homemade pasta squares sautéed in butter with tangy-sweet cabbage. Toasted caraway seeds tossed throughout added additional savory depth. Fresh, simple ingredients, coming together in that perfect way only fresh, simple ingredients can.
I realized too that it was something we could try recreating back at home.
Later, some Googling revealed krautfleckerl was originally a Hungarian dish enthusiastically adopted by Austrian (and German) cooks.
In our home kitchen, Chester added a Polish element by using some of our homemade sauerkraut, in place of fresh chopped cabbage. He said this touch was a nod to a Polish noodle dish, haluski.
The tangy-sour fermented taste balances out nicely with the dash of granulated sugar krautfleckerl recipes traditionally call for. Caramelized onions lend a little sweetness too.
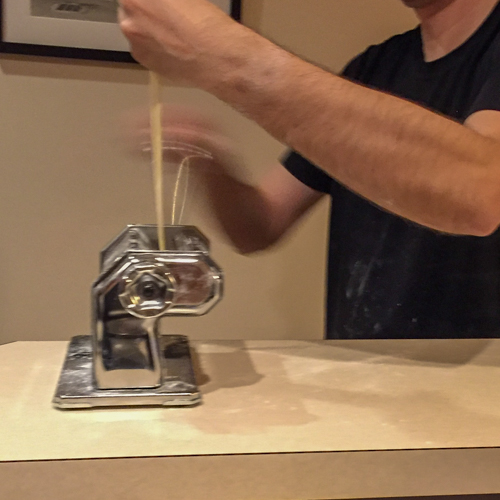
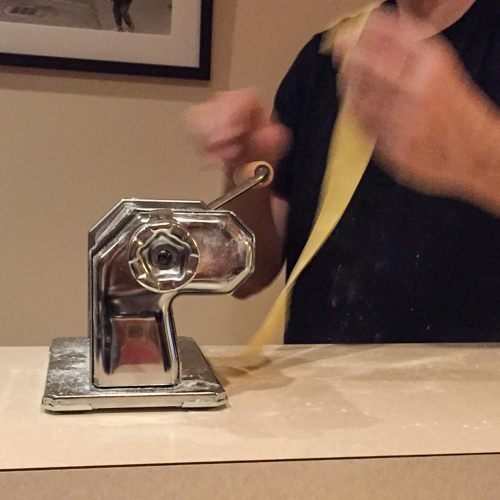
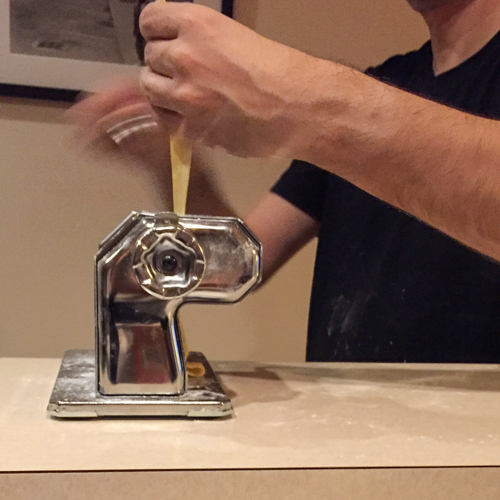
Chester hand rolling the pasta
He made the noodles from scratch using Marcella Hazan’s recipe (2 eggs and 1 cup of flour–that’s all you need for the dough!). He rolled it out in our pasta machine, then cut it into squares.
This was a labor-intensive but delicious weekend version of the recipe. For a quick weeknight dinner, store-bought egg noodles (or really any other wide, flatish pasta like farfalle) would do just fine. Either way, the ingredients are very inexpensive for such a satisfying and luxurious-tasting dish.
Krautfleckerl
(serves 2)
1/2 lb pasta, either fresh or dry (see note above)
Set a pot of water for the pasta on the stove at high heat and bring to a boil. Meanwhile, in a large skillet, melt the butter at medium heat and add the onions. Cook for about 10 minutes, stirring until the onions caramelize (turn brown and translucent). Add the remaining ingredients and continue to cook about 3 minutes until the ingredients are soft and well-combined. Turn off heat and allow to sit.
Meanwhile cook and drain the pasta. Combine in the pan with the cabbage mixture and heat and stir a minute or two, to allow the flavors to combine. Serve immediately. We enjoyed our Krautfleckerl with a great Austrian wine, 2016 Moric Blau Fränkisch.
You might say I caught the fermentation bug from kimchi.
Salty, spicy, sour, with a slightly crunchy edge, this staple of Korean cuisine makes a deliciously addictive addition to everything from fried rice to tacos to sourdough pancakes to grilled cheese sandwiches.
You can buy small jars of artisanal versions for upwards of $10. I’m here to tell you it’s easy–and satisfying–to make at home.
The active prep time is minimal. But with all the resting/fermenting required, it’ll be four days at the very least until you have kimchi that’s ready to eat. The ingredients are: Napa cabbage, daikon (Japanese radish), scallions, ginger, garlic, salt, sugar, plus a Korean a hot red pepper powder called gochugaru (available at specialty stores such as Kalustyan’s here in NYC and also online). Traditional non-vegan recipes include fish sauce and dried shrimp.
Kimchi relies on the same probiotic (human-friendly) bacterium for its fermentation as sauerkraut: lactobacillus acidophilus. The bacteria are naturally present on the cabbage leaves and just need a little encouragement. That encouragement comes in the form of salt and being packed tightly in a container deprived of oxygen. Both of these things kill off the competing (human-unfriendly) bacteria, giving the lactobacillus acidophilus freedom to take over. (If you’re interested in reading more about the subject, I highly recommend books by Sandor “Sandorkraut” Katz.)
I made my very first batch of vegan kimchi three years ago. I’d never tried my hand at making any fermented foods before and, to be honest, felt a little apprehensive about adding dried shrimp to something that was going to be sitting unrefrigerated on my kitchen countertop for over 24 hours. Plus shrimp and the fish sauce were just another two ingredients I’d need to buy. I decided to try a vegan recipe instead, and found a great one from J. Kenji López-Alt at Serious Eats. It’s possible to simply skip the seafood and leave it at that. But he substitutes miso paste to give the finished product extra tasty umami depth.
I’m a much more confident home fermenter now, but am hooked on this vegan version of kimchi (one day I’m going to try the shrimp). I make it regularly, and over the years have adjusted the ingredients and prep method slightly to my preferences. Traditional recipes call for whole Napa cabbage leaves–or, for larger batches, an intact, whole head of it, with the seasonings packed between the leaves (cool video here). But I found tearing the leaves into smaller pieces made them easier to handle every step of the way. They were easier to salt, easier to mix with the chili paste, and easier to pack in–and pull out of–jars.
I also learned the measurements don’t need to be exact. If you only have three scallions on hand instead of six, three scallions will do just fine. Same goes for garlic and ginger–and the hot pepper. You even have some leeway with the amount of salt. As for the countertop fermentation, 24 hours is a basic minimum, but in cooler weather I let it go for about 36. The kimchi will get more and more sour as the process goes on. Once it’s in the fridge, fermentation will continue but at a much slower rate. Feel free to adjust to your own tastes.
2-3 tablespoons non-idodized salt (kosher or sea salt)
6 scallions, trimmed, greens separated from white parts, and cut into 2-3 inch lengths
fist-sized piece of daikon (Japanese radish), peeled and cut into matchsticks approx. 1/4 inch thick
5 cloves garlic, peeled
2-inch knob of fresh ginger, peeled and chopped coarsely
1/2 cup gochugaru (Korean red pepper powder)
2 tbs miso paste (I used low sodium)
1 tbs sugar (I used dark brown but any kind will do)
water
Remove core from bottom part of Napa cabbage. Tear leaves into small pieces and place in a large bowl. Add scallion greens and daikon matchsticks. Add salt a little at a time to bowl, mixing to distribute among the leaves. Cover with a cloth and allow to wilt for 6-12 hours. Stir as needed to redistribute salt. The vegetables should release 1/4-1/2 cup water.
In a food processor, combine scallion whites, garlic, ginger, gochugaru, miso, and sugar. Whir for a few seconds to form a coarse paste.
Combine paste with the cabbage mixture in a bowl. Add 1/4 cup of water and either stir with a spoon or knead with hands until the paste is evenly distributed. Taste for desired saltiness and adjust as necessary. Pack into a large jar, pressing down with the back of a spoon to release any trapped air pockets and allow some liquid to rise to the surface until the vegetables are completely submerged. Tighten lid on jar.
Allow to sit at room temperature 24-36 hours. Open jar after 12 hours or so to release gasses. Place in fridge. Can be consumed in 48 hours and keeps for a month or two. Note: Kimchi will become softer and more sour as time goes on.
I’ve always loved Vincent Price’s ghoulish persona as a horror actor. He combined rarefied charm with an uncanny creepiness. But he was also clearly having fun, and he wanted us all to be in on it.
He brought that same generous sense of fun to his work as a cookbook author. In 1965, he and his British-born, costume designer wife, Mary Price, published the first of what would be several celebrity cookbooks: A Treasury of Great Recipes.
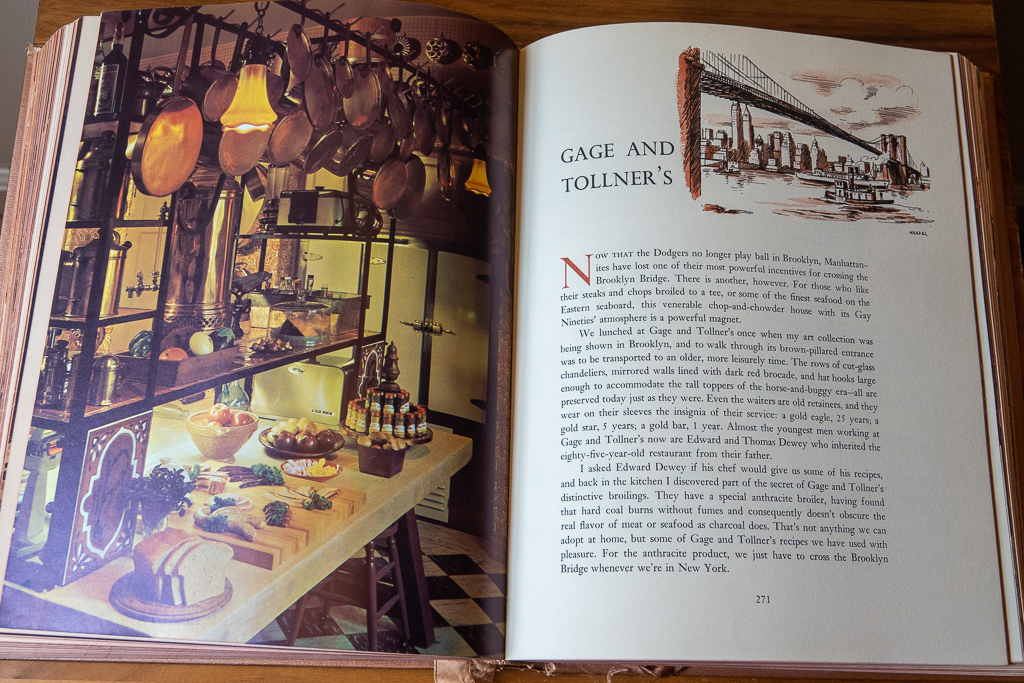
The globe-trotting couple collected house recipes from chefs at their favorite restaurants across Europe, the United States, and Mexico. There are many NYC stalwarts from years gone by (The Four Seasons (RIP), Trader Vic’s (RIP), Sardi’s, Gage and Tollner’s (RIP, but returning soon?)). Everything is adapted for the 1960s American home cook. The ingredients are simple and the recipe headnotes are encouraging (“If you can lay brick you can frost a cake”… ok, maybe not the best example). The Prices vividly describe the history and ambiance of each restaurant in before getting to the recipes. Full menus are reprinted too (can you believe sea bass at The Four Seasons used to cost $4.65?)
The Prices visit Brooklyn’s storied restaurant, Gage and Tollner’s
I snagged a vintage copy online about 10 years ago for around $20–roughly the same as what it listed for back in 1965. It’s a lush volume: gold-embossed, padded cover (think Ottolenghi’s oh-so-huggable Plenty), with two sewn-in satin ribbon bookmarks. Very deluxe.
I was tickled to learn the book was re-issued in 2015 for its 50th anniversary. No more cushy cover, but now with a preface by the late Prices’ daughter, Victoria, plus a foreword by Wolfgang Puck. A well-deserved return from the publishing grave.
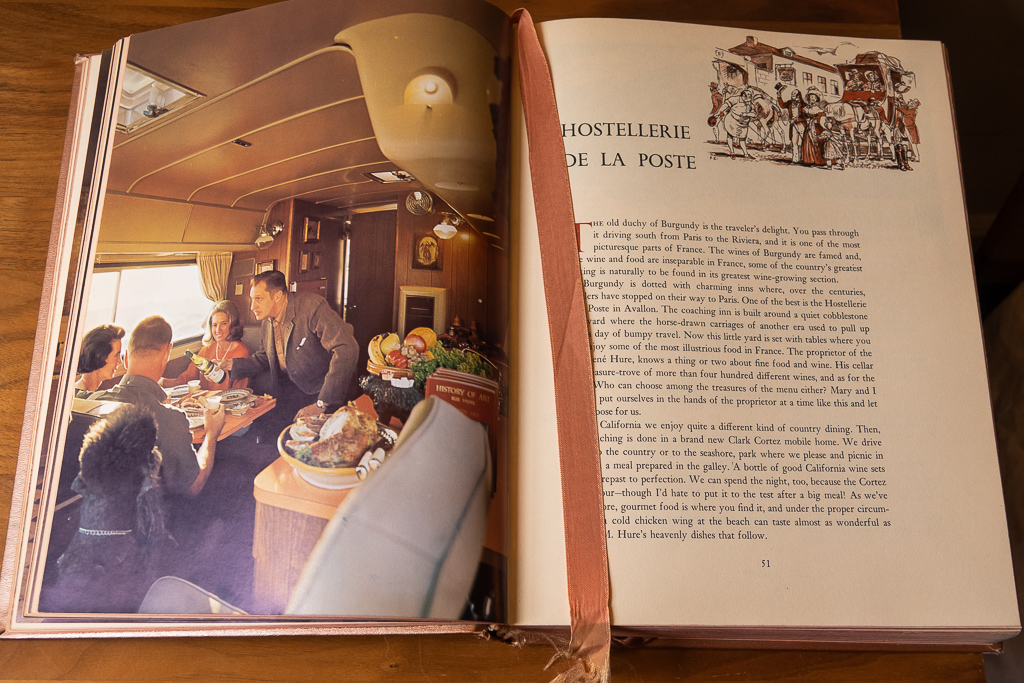
The Prices entertain guests on the go in their elegant mobile home
By the way, are you getting a Halloween pumpkin this year? Chester and I got one, but haven’t carved it yet. Once we do, we’re going to put the seeds to good use. Here’s a recipe for pepitas à la curry that Emilio Gonzalez, then owner of Sobrino de Botín in Madrid, shared with with the Prices during one of their visits. The original specifies commercially hulled pumpkin seeds (aka pepitas), but we’re going to give whole seeds a try.
Pepitas à la Curry (Curried Pumpkin Seeds)
(adapted from A Treasury of Great Recipes by Mary and Vincent Price)
In a saucepan mix the curry powder, 1/4 cup of the warm water, garlic, salt, and lime juice. When smoothly blended, add the remaining water and heat, stirring constantly until liquid simmers.
Add the pumpkin seeds and simmer, but do not boil, for 5 minutes. Drain (you can save the curry mixture to use again for another batch, adding more water when you do).
Spread pumpkin seeds on a cookie sheet. Dot with butter and sprinkle with salt. Toast in a very slow oven until crisp.
Friday was a gorgeous day in New York, perfect for our weekly visit to the Union Square Greenmarket. Who knows how many more days we will have like this? Traditionally, end of harvest is the last chance to ferment, can, and store food for the rough season ahead. Even though we already have plenty on hand, we stopped off at the Oak Grove Plantation stall to get another beautiful batch of chilis for this year’s fermented hot sauce production. We also picked up some green and red cabbage, and bolero carrots for our latest fermentation project, sauerkraut. Sauerkraut is not exactly a staple of ours, but Nora has been making excellent homemade kimchi for a couple of years now, and we thought this would be a good time to branch out.
I grew up in a very Polish household. Every house we lived
in had either a proper root cellar, or various nooks in the basement where my
mother squirreled away mass quantities of canned foods and homemade treasures:
dill pickles, jams, and always a giant vat of sauerkraut. You may think that
the Polish national dish is pierogi or cabbage rolls, but in fact, that honor
goes to bigos. Bigos is a hunter’s stew made sauerkraut, fresh cabbage, and various
meats. Growing up, it was served at pretty much every formal dinner my parents had
with their various friends and relatives. I never really cared for it as a kid,
and haven’t really had the opportunity to try it since becoming a pescatarian over
twenty-five years ago. We will try out some vegetarian bigos recipes in coming
weeks. I am also really dying to try a vegetarian Reuben sandwich recipe.
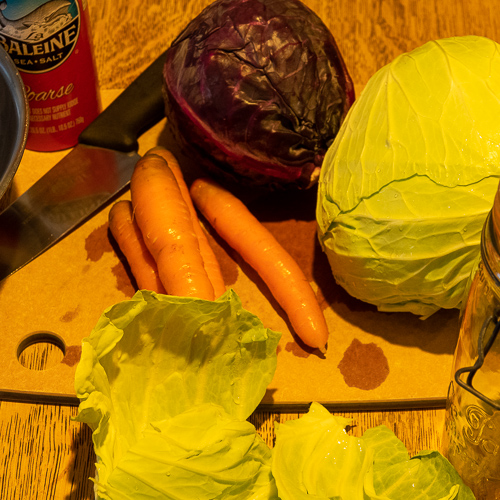
Ingredients
1 head green cabbage
1 head red cabbage
4 carrots
Sea salt
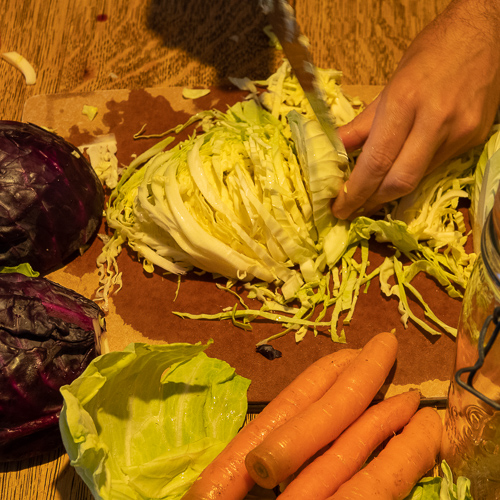
Method
Clean cabbages and retain some of the outer
leaves.
Scrub and trim 4 carrots, do not peel.
Shred each cabbage into a large mixing bowl.
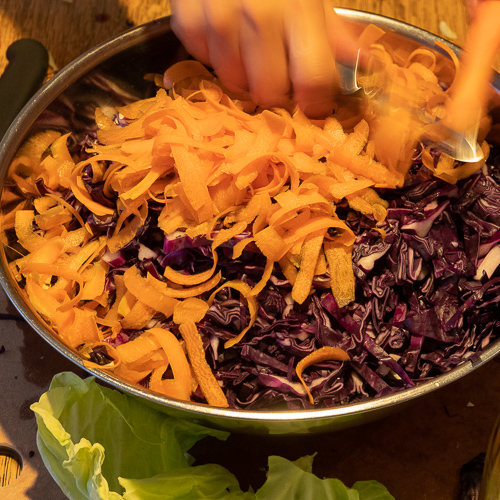
With a peeler, shred the carrots into the mixing
bowl.
Mix to evenly distribute the cabbages and
carrots.
Weigh the shredded cabbage and carrots, add 2% salt
by weight.
Let sit for 5-10 minutes.
With both fists, take handfuls of the mixture
and squeeze, to release the moisture. Keep doing this until water flows from
the cabbage like wringing a wet sponge.
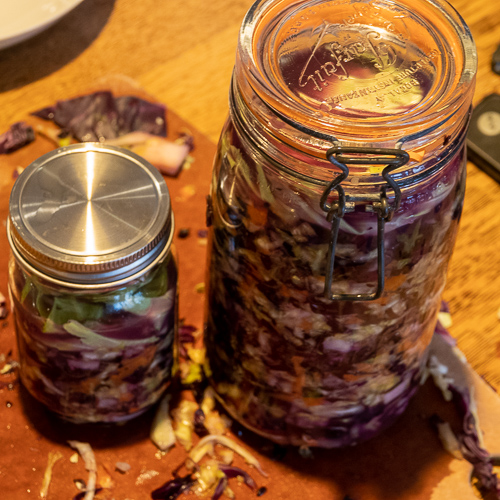
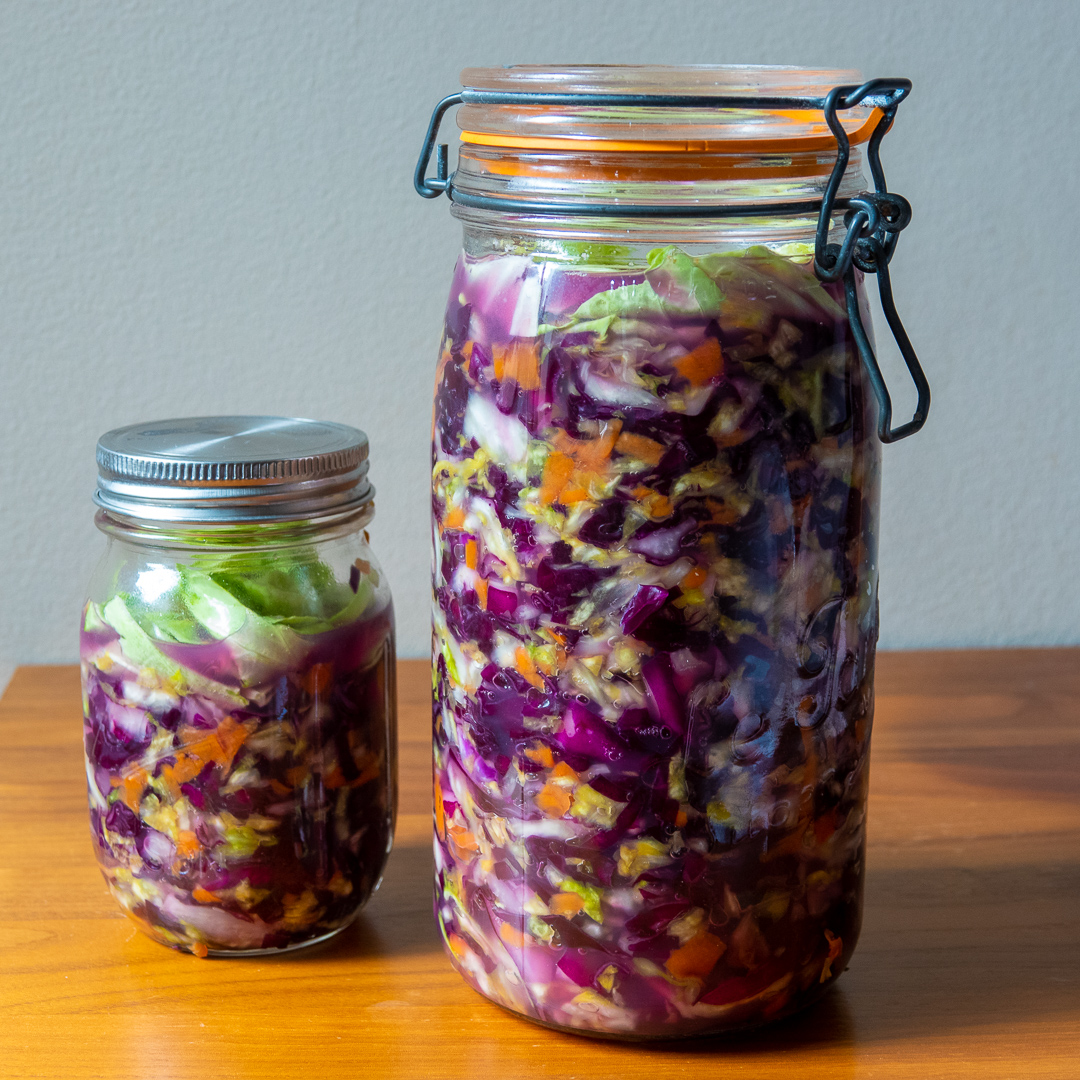
Tightly pack mixture into Mason jars or sauerkraut
crock.
Take some of the outer cabbage leaves and use as
a ‘lid’ inside the jar or crock. Push down to make sure all is submerged by the
brine.
NB: if using a lidded Mason jar, you must periodically
loosen the jar or open the lids to allow gasses to escape. Fermentation will be
at its most vigorous for the first few days.
Periodically taste. After a few days, it will be
crispy and fresh tasting, for weeks and months after that, it will develop
sourness and deeper flavors. Eat it when you like it!
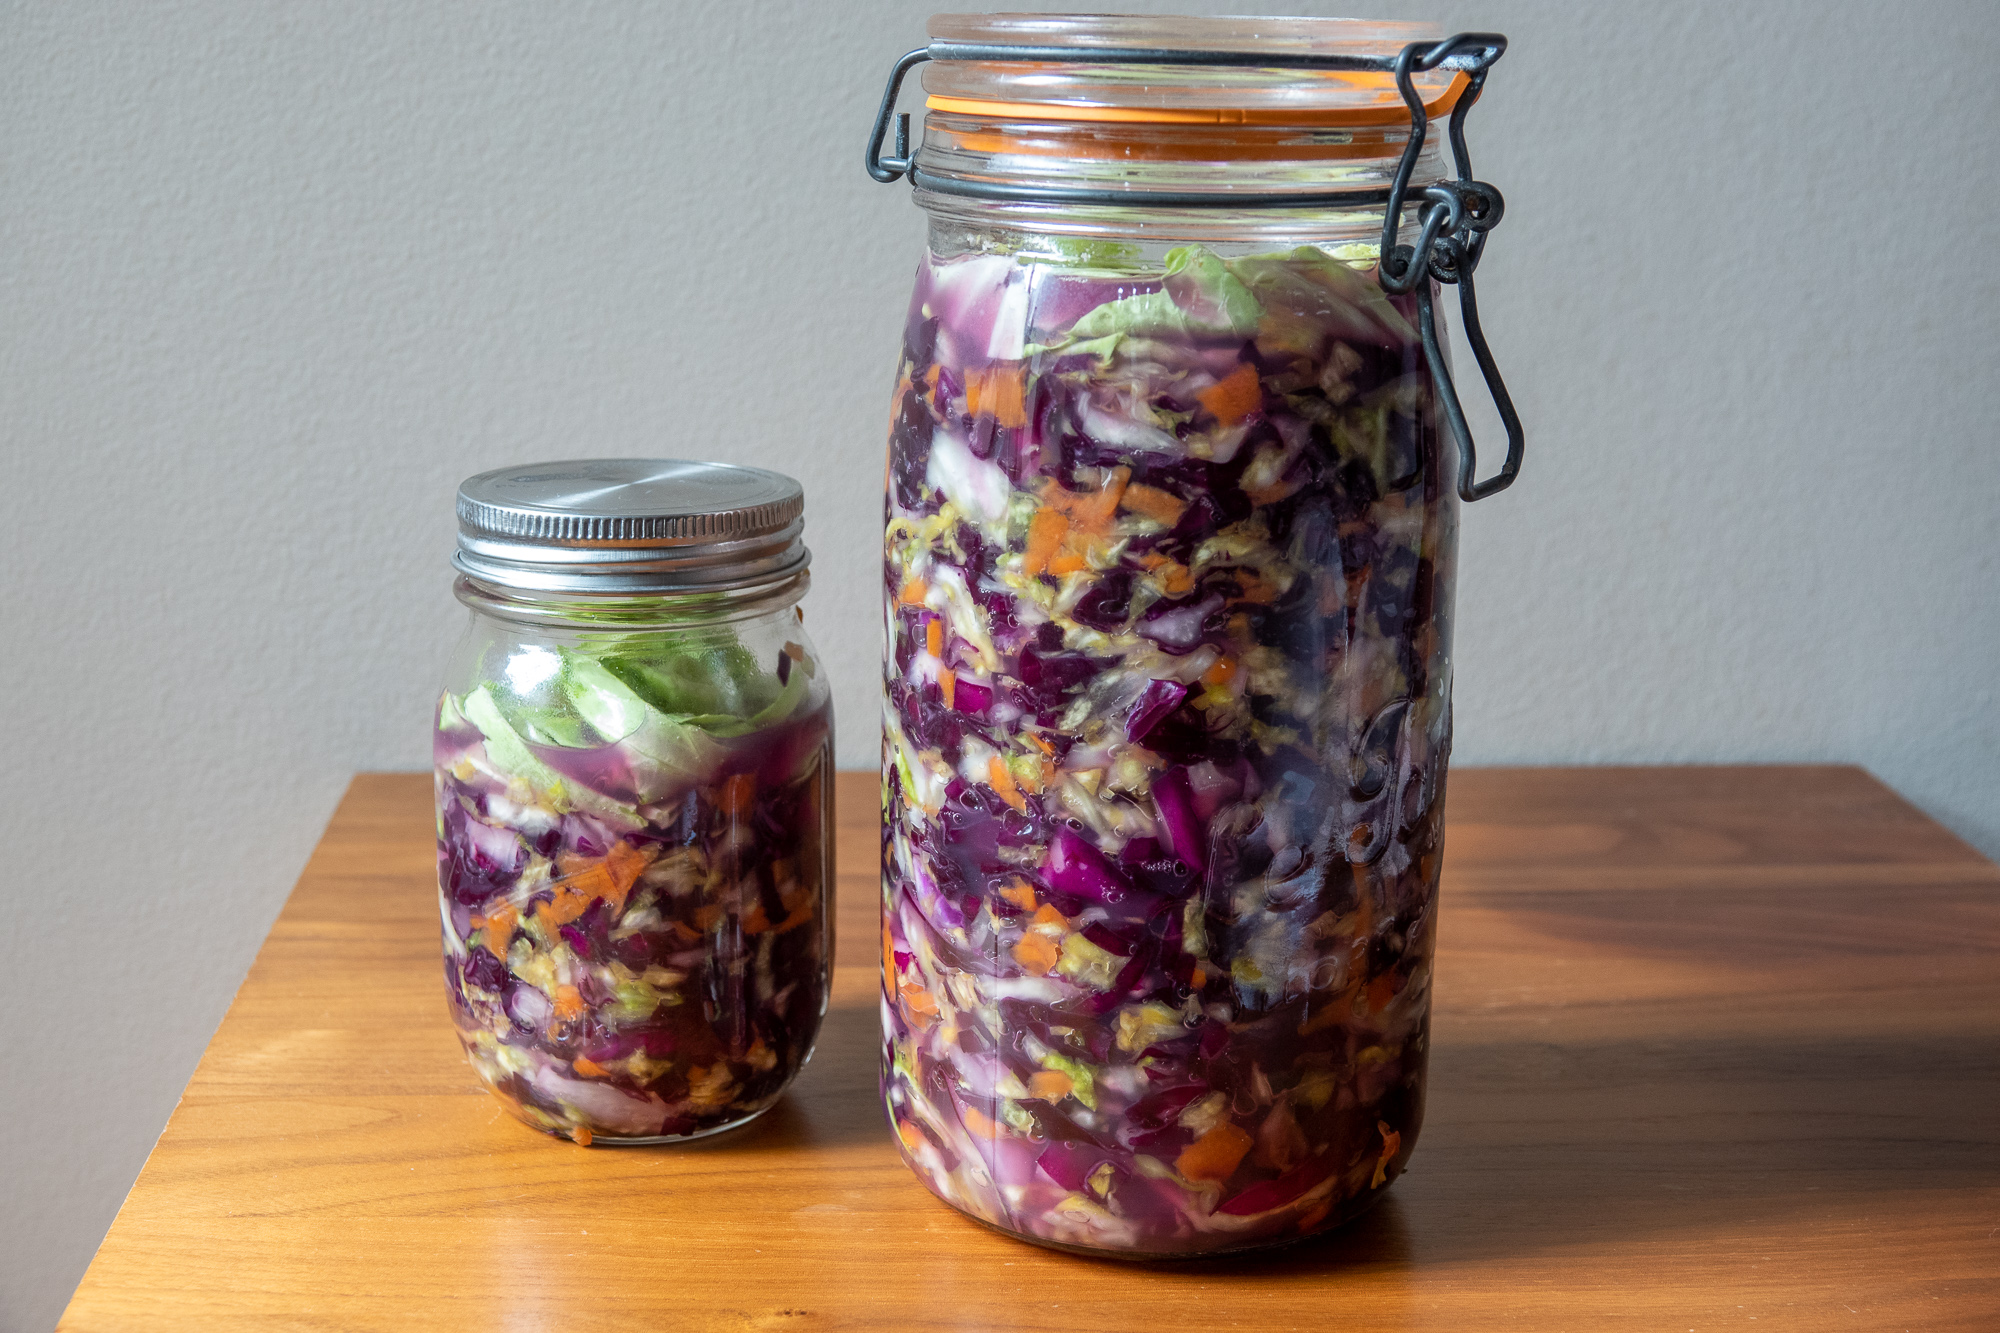
Notes
The main vessel we are using to ferment this is a 1.5L vintage Le Parfait Super Jar that Nora found at the Housing Works Thrift Shop. We closed the lid when we packed it, and by Saturday evening, the gas buildup was substantial, opening the lid released a violent spritz of purply brine. After that, we have mostly been keeping the lid loose. When first shredding all the cabbage, it seemed like it would be an enormous volume, but that went down after the squeezing step, and went down further after packing into the jar.
Looking at recipes, a 2% salt by weight appears to be a common target. For folks like us, who are watching our sodium intake, that may be a bit too much. Sandor Katz recommends salting to taste.